


![]()
Cloud itself is a big domain with various services running simultaneously. It will require a lot of effort for a person/organization to manage the cloud without automation. Thus, cloud automation is on its pace and various tools are proposed for faster and efficient development. One such automation tool is Terraform.
This blog covers a brief introduction to Terraform and how you can use it to provision AWS Infrastructure with the following topics.
- What is Terraform?
- Prepare Your System
- Download, Install and Start Terraform
- Generate AWS IAM Access Key
- Create EC2 Instance with Terraform
- Conclusion
What is Terraform?

Terraform is an open-source IaaS (Infrastructure as a Code) tool by Hashicorp. It is used to build, provision and modify architecture using declarative commands. Terraform is effective, fast, and secure for provisioning architecture. It supports almost all cloud vendors like Amazon Web Service, Microsoft Azure, Google Cloud Platform, Oracle Cloud and more.
Read More: Terraform
Prepare Your System
In this tutorial, we will use the Amazon EC2 instance with the Ubuntu system to run Terraform. But, it’s your choice to run Terraform on any cloud platform or machine. For a better understanding, I will recommend you to follow the steps with us.
Step 1) Open up your AWS console or directly visit ‘console.aws.amazon.com‘. If you don’t have access to AWS, create one free tier account.
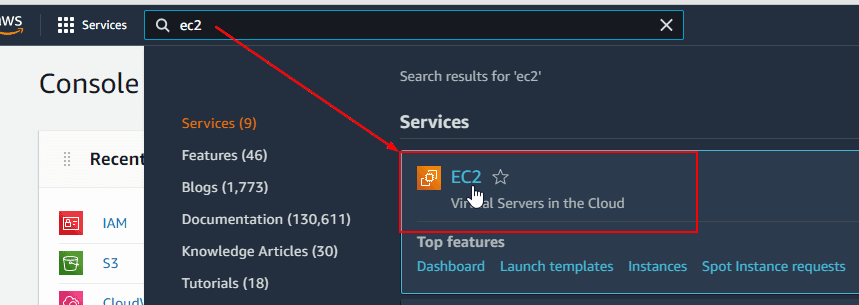
Step 2) Search for EC2 in your AWS console and open it.
Step 3) Click on Launch Instances to create a new EC2 instance.

Step 4) Select an AMI (Amazon Machine Image). In our case, we will use Ubuntu.

Step 5) You can fill up all the details for your instance. To quickly create an EC2 instance, leave the settings to default, launch your instance and save your new RSA key pair safe.

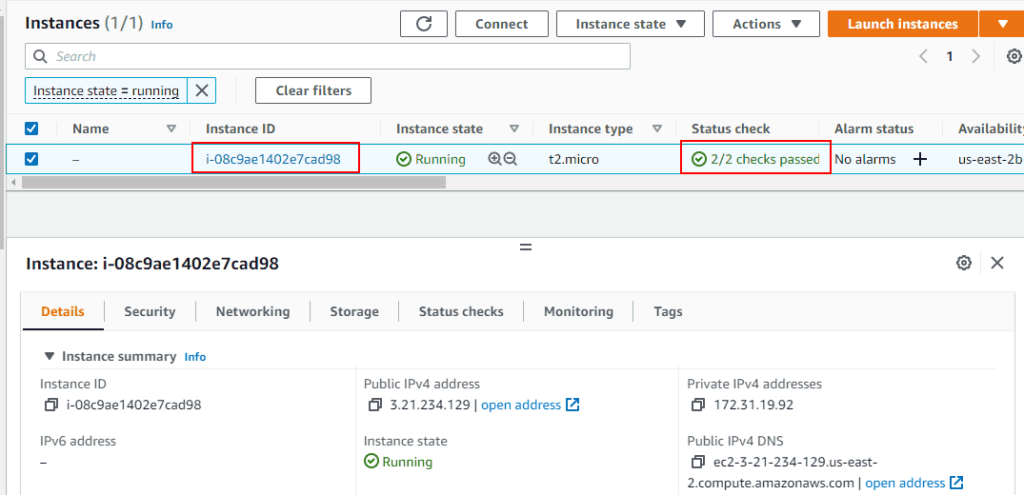
Step 6) After a few minutes, your instance will be live and running, as shown in the image above. Select it and click on Connect to launch your EC2 instance.
Download, Install, and Start Terraform
Based on your system requirements, you can download and install Terraform from the official download page.
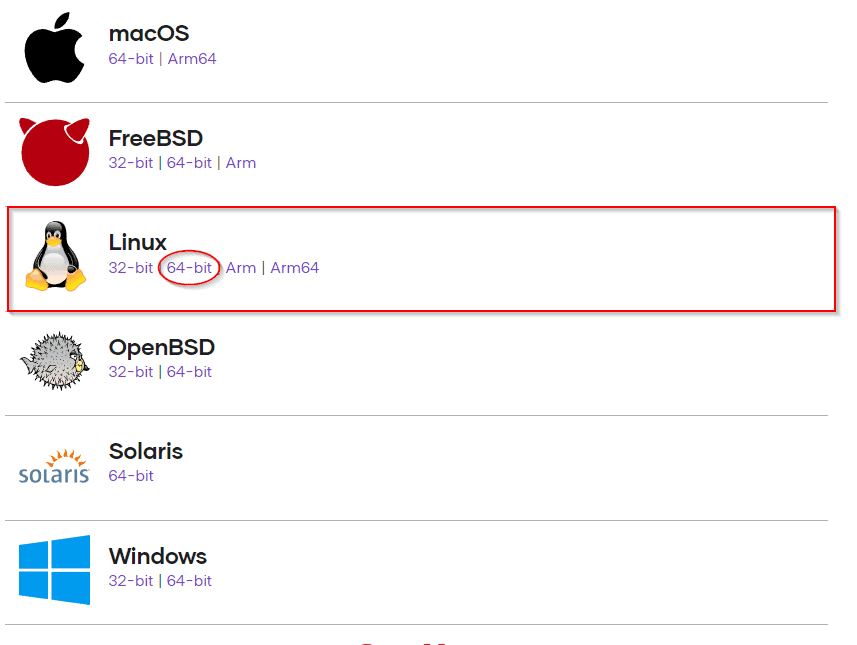
Step 1) From the official Terraform download page, copy the link to the Linux file as shown in the image below.
Step 2) To download Terraform to your AWS instance, use ‘wget’ command followed by the copied download URL as shown in the image below.
wget https://releases.hashicorp.com/terraform/1.0.9/terraform_1.0.9_linux_amd64.zip

Step 3) To unzip the downloaded package, you need to install the unzip tool in your system. Use the below command to download the tool.
sudo apt-get install unzip
Step 4) Check the downloaded package name using the ‘ls‘ command. Copy the package name and use the unzip command with the package name, as shown below.
ls
unzip terraform_1.0.9_linux_amd64.zip

Step 5) Now, the Terraform is extracted successfully. Run the below commands one by one to run the terraform commands hassle-free by ignoring the directories. Finally, use the command ‘terraform‘ to activate terraform, as shown in the image below.
echo $"export PATH=\$PATH:$(pwd)" >> ~/.bash_profile
source ~/.bash_profile

terraform

Generate AWS IAM Access Key
We installed Terraform in our system, but now the question arises: How Terraform will provision anything without AWS permission? For this, we create an access key that will be used for resource provisioning by Terraform.
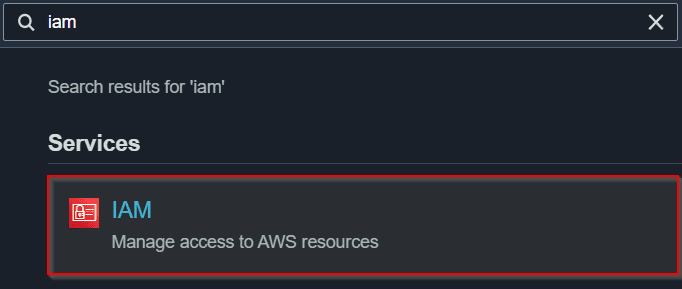
Step 1) Search and visit IAM in your AWS console.
Step 2) Select Users and Add Users here if you don’t have one, as shown in the image below.

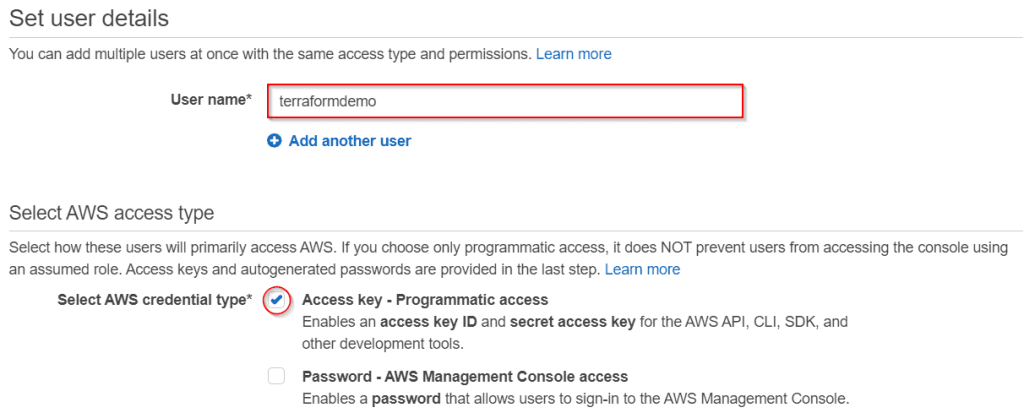
Step 3) Name the user and select Access Key in the checkbox below. Now go to the Next window which is permission settings.
Step 4) Here, create one new user group.
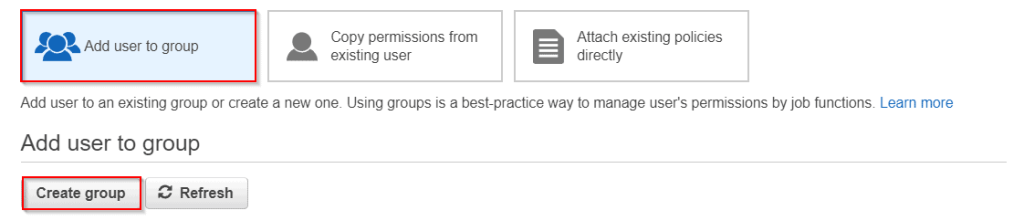
Step 5) Name the group and search for the required permission for allowing Terraform to perform its task. In our case, we will be creating one EC2 instance, so we selected AmazonEC2FullAccess permission, as shown in the image below. Now to generate this user group, click on the button Create.

Step 6) Select the created group for the IAM user and proceed with the final steps to make the new user active.

Step 7) After creating the user, you will see the keys on your screen or visit the user to find them. Copy your Access Key ID and Secret Access Key as they will be used while provisioning AWS resources using Terraform.

Create EC2 Instance with Terraform
For easy understanding, we will create one EC2 instance using the terraform file with all the instructions to create the EC2 instance.
Step 1) Create a new directory using the ‘mkdir’ command and name it whatever you want. Then, visit the directory using the below commands.
mkdir terraform-lab

cd terraform-lab/
Step 2) Create a new file here that will have the instructions to provision the AWS resource. Use the below commands to create the file.
vim ec2.tf
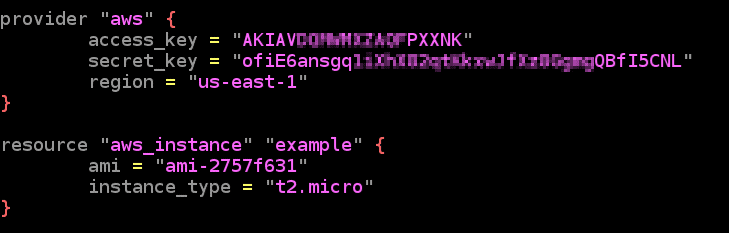
Step 3) After running the above command, the file is created but to enable the edit mode, you need to press the INSERT or any other button on your keyboard. Copy the below code, replace it with your IAM keys and paste it on your file. Also, don’t forget to maintain proper spacing and lines in your code, as shown in the image below.
The provider section in code uses the credentials but if you have an AWS CLI setup you may not require this. The resource section in code will create the resource aws-instance with the name example with mentioned AMI (Amazon Machine Image).
provider "aws" {
  access_key = "ACCESS_KEY_HERE"
  secret_key = "SECRET_KEY_HERE"
  region     = "us-east-1"
}

resource "aws_instance" "example" {
  ami           = "ami-2757f631"
  instance_type = "t2.micro"
}
Step 4) For saving the above file in the Ubuntu system, press the ‘Esc‘ button on your keyboard, type ‘:wq’ and press ‘Enter‘.
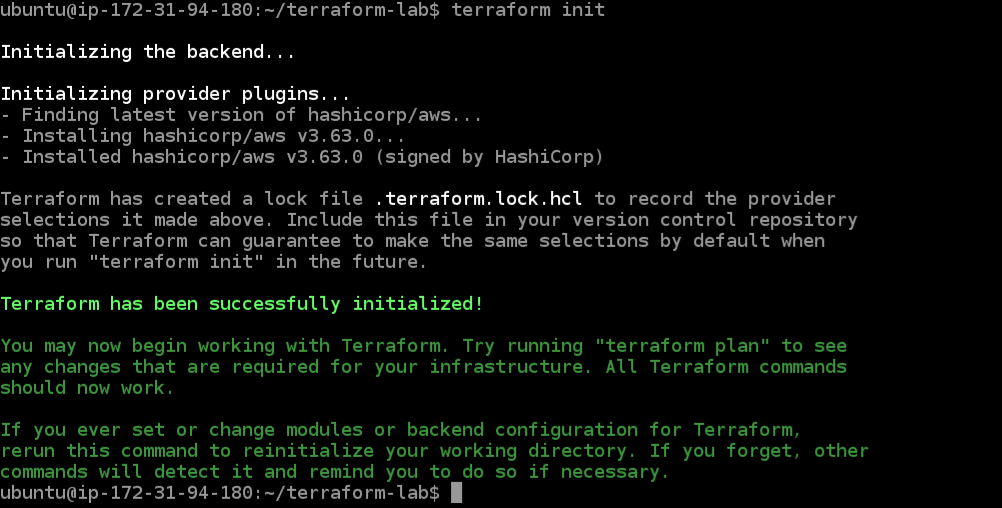
Step 5) Now everything is ready, use the below command to initialize terraform to compile the file. You will receive an error here if there is any syntax error in the file.
terraform init
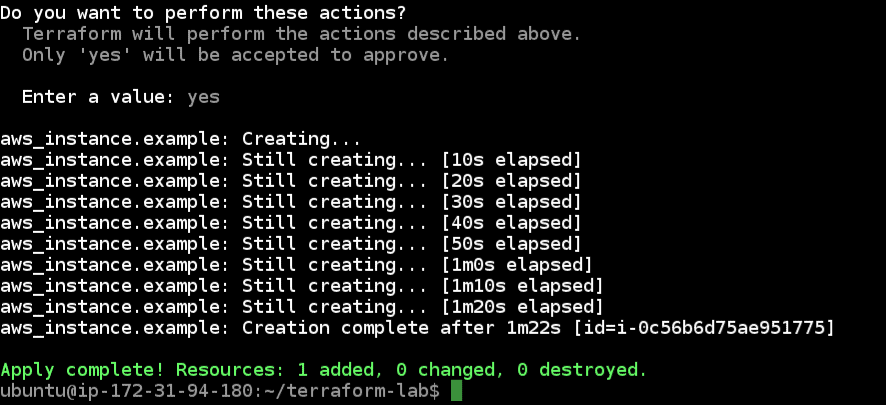
Step 6) Finally, proceed with resource provisioning with the below command. You will receive an error here if the access keys are wrong, AMI (Amazon Machine Image) is wrong, or permission to provision EC2 Instance is not provided in the IAM (Identity Access Management).
If everything goes well, you will see a confirmation on your screen to provision. Type yes to proceed, and your resource will be live in a few minutes.
terraform apply
Step 7) You can check your new AWS EC2 instance created in your AWS console.
To delete all the resources created by Terraform, use the below command to clear all the things.
terraform destroy
Conclusion
Terraform is one of the most used Infrastructures as a Code tool by IT companies. In this blog, we created an AWS EC2 instance with Terraform using declarative syntax on our system. Using similar steps, we can create, manage and destroy any resource in AWS Infrastructure with the help of Terraform.
Related/References
- Terraform Installation Overview
- Variables in Terraform
- Terraform Providers Overview
- Everything you need to know about Terraform Certification
Join FREE Class
🚀 Master Terraform & DevOps to get High-Paying Jobs! 🔥 Join our EXCLUSIVE Free class! 🚀
Get your hands dirty with lots of projects and labs based on Terraform and DevOps in our Program.Click on the below image to Register for Our FREE Class Now!

![Microsoft Agentic AI Business Solutions Architect [AB-100] | K21 Academy](https://test.k21academy.com/wp-content/uploads/2025/11/Microsoft-Agentic-AI-Business-Solutions-Architect-AB-100-Exam-Overview1.png)


