


![]()
Azure Kubernetes Service (AKS) provides a managed Kubernetes service that simplifies the deployment, management, and scaling of containerized applications using Kubernetes on Microsoft Azure. Terraform, on the other hand, is an open-source infrastructure as a code software tool that provides a consistent workflow to manage various cloud services.
In this blog, we will cover the following topics:
- Understanding Terraform
- Benefits of using Terraform with AKS
- Prerequisites for creating and managing AKS cluster with Terraform
- Installing Azure CLI and Configuring it
- Creating Terraform Code for Launching AKS Cluster
- Running Terraform Configuration Files
- Installing KUBECTL to Connect with the Cluster
- Destroying the Infrastructure
- Conclusion
- FAQs

Understanding Terraform
Terraform enables infrastructure to be described as code using a high-level configuration language known as HashiCorp Configuration Language (HCL). This allows for the creation, modification, and versioning of infrastructure in a predictable and repeatable manner.
Benefits of using Terraform with AKS
Integrating Terraform with AKS offers several advantages:
- Infrastructure as Code: Define AKS cluster configuration in code, enabling version control and reproducibility.
- Automated Provisioning: Automate the creation and management of AKS clusters, reducing manual effort and potential errors.
- Consistent Environment: Ensure consistent deployment environments across development, testing, and production stages.
- Scalability: Easily scale AKS clusters up or down to meet changing workload demands.
Prerequisites for creating and managing AKS cluster with Terraform
Before getting started, ensure you have:
- Azure Account: Sign up for an Azure account if you don’t have one already.
- Terraform and Azure CLI: Install Terraform and Azure CLI on your local machine.
Installing Azure CLI and Configuring it
1. To install Azure CLI refer to the link below and download according to your operating system.
https://docs.microsoft.com/en-us/cli/azure/install-azure-cli
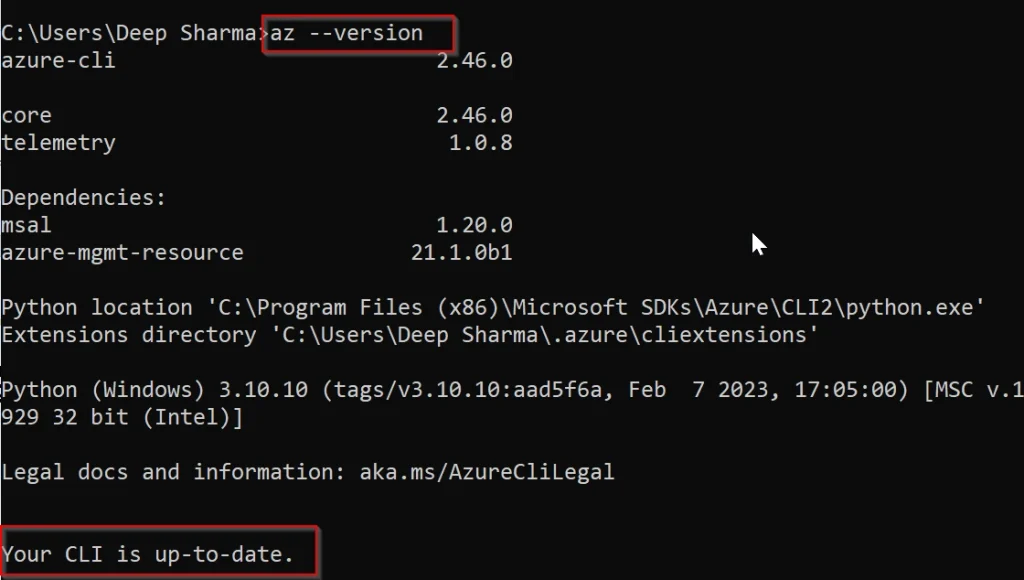
2. After the successful installation of Azure CLI open the command prompt in your Windows or terminal in macOS or Linux and run the following command to ensure that it has been installed successfully.
$ az --version
3. Now you have to set your Azure profile for that run $ az login
4. Select your account and you will be logged in.

5. Probably, you can have more than one subscription! However, you can specify the subscription to use via the following command: (Id = Subscription_Id).
$ az account set --subscription="SUBSCRIPTION_ID"
6. We can now create the Service Principalwhich will have permission to manage resources in the specified subscription using the following command:
$ az ad sp create-for-rbac --role="Contributor" --scopes="/subscriptions/SUBSCRIPTION_ID"

These values map to the Terraform variables like so:
• appId is the CLIENT_ID defined above.
• password is the CLIENT_SECRET defined above.
• tenant is the TENANT_ID defined above.
7. Now run the following command to log in to the service principal.
az login --service-principal -u CLIENT_ID -p CLIENT_SECRET --tenant TENANT_ID
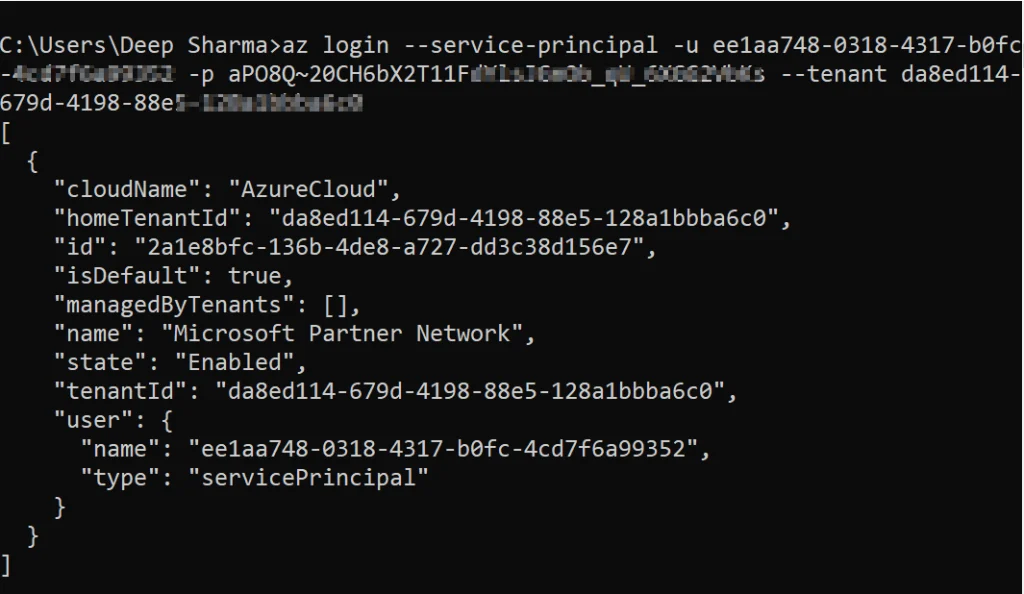
Once logged in as the service principal type changed to servicePrincipal. So, we should be able to list the VM sizes by specifying an Azure region, for example, here we use the East US region:
$ az vm list-sizes --location eastus

Creating Terraform Code for Launching AKS Cluster
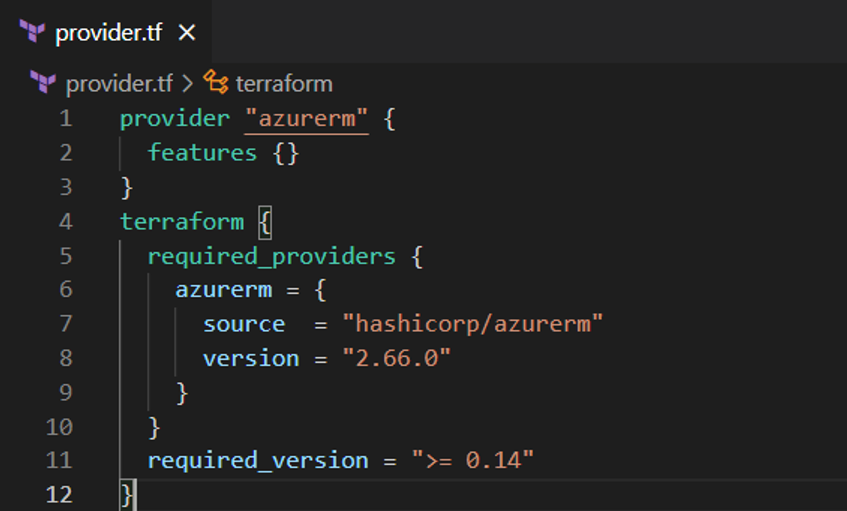
1. Create provider.tf file to specify Azure terraform provider.
Terraform provider: Terraform configurations must declare which providers they require so that Terraform can install and use them. Each provider adds a set of resource types and/or data sources that Terraform can manage. Every resource type is implemented by a provider; without providers, Terraform can’t manage any kind of infrastructure.
Copy-paste the provider file form below the GitHub Link
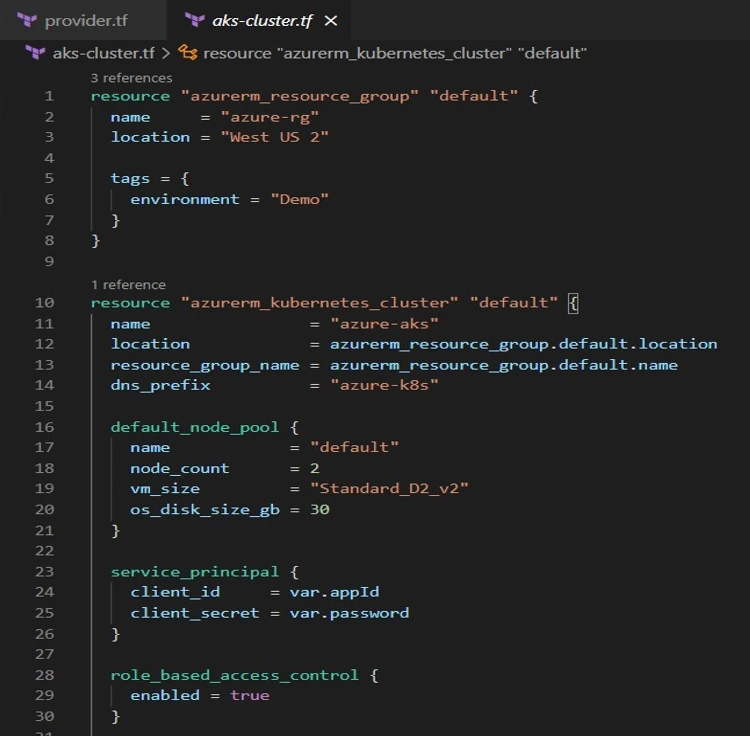
2. Create a new file named aks-cluster.tf. In this file, we will add the code to create both the Resource group and Kubernetes Cluster.
Copy-paste the cluster creation file from the below GitHub Link
Note: Please ensure your current region and VM size as it has not worked in different regions.
The following arguments we are using:
- name – The name of the Managed Kubernetes Cluster to create. Changing this forces a new resource to be
- location – The location where the Managed Kubernetes Cluster should be created. Changing this forces a new resource to be
- resource_group_name – Specifies the Resource Group where the Managed Kubernetes Cluster should exist.
- dns_prefix – DNS prefix specified when creating the managed
- tags – A mapping of tags to assign to the
- service_principal – A service_principal block as documented below. One of either identity or service_principal must be specified.
3. Now, Create variables.tf file to store variables.
Copy-paste the variable creation file from the GitHub Link
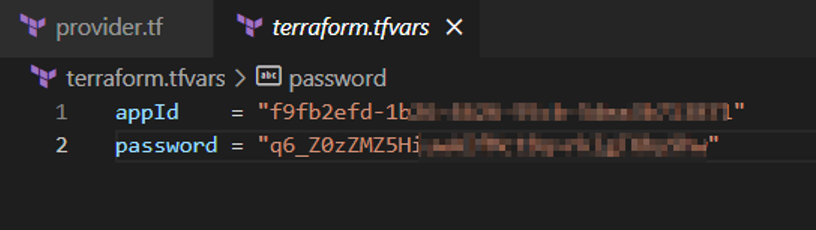
4. To store the values of our variables, create terraform.tfvars file and provide the values.
Note: We got the appID and password in the previous when we created the service principle.
Do not copy-paste the command from here use your appID and password.
appId	= "f9fb2efd-1b26-4626-95cb-5******"
password = "q6_Z0zZMZ5HiuwAIfMctB*******"
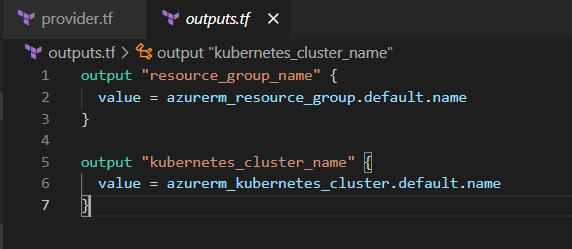
5. At last, we will create an output.tf file to show us the required output after the cluster is created.
Note: After creating the AKS cluster this will give you the cluster name and resource group name which we will be using in next section.
Copy-paste the output creation file form below the GitHub Link
Note: When Creating the AKS Cluster, Please Ensure that you are using an Azure Paid account because the VMs that we are using in this Guide are not available in the Free trail Account.
And if you want to go with a Free Trail account, you have to change VMs accordingly.
Running Terraform Configuration Files
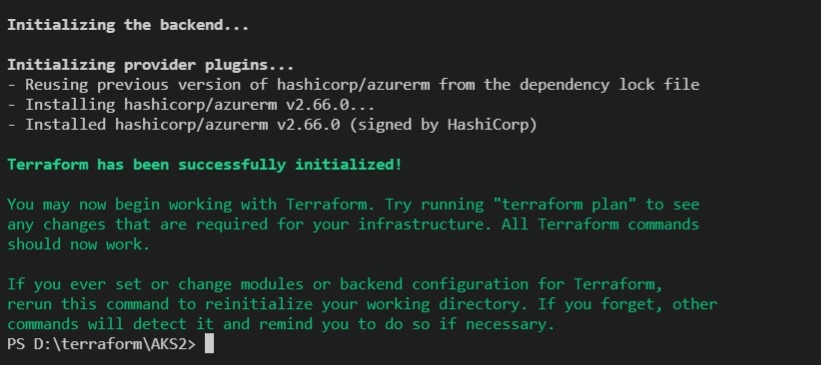
1. For that open the command prompt go to the folder in which you have the above code file and run the below command. It will install all the required plugins needed.
$ terraform init
2. To check whether your code is valid or not run the following command. It will validate your code and if there are some errors in it, it will notify you.
$ terraform validate

3. Run the following command. This will do the dry run and tell what all resources it will build, without actually building them.
$ terraform plan -out=tfplan
 4. At last run the below command it will build all the infrastructure required.
$ terraform apply tfplan
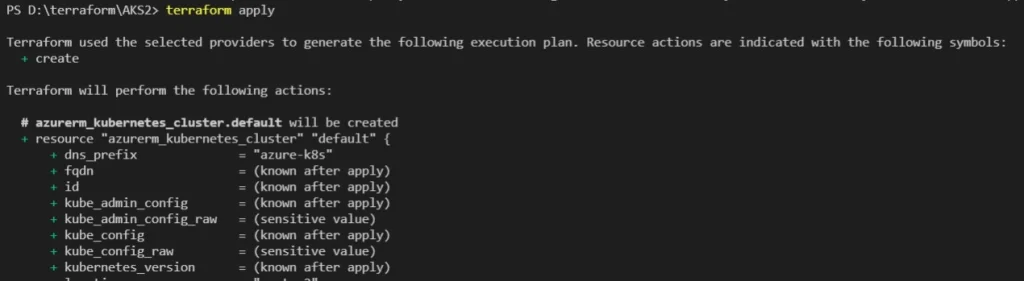
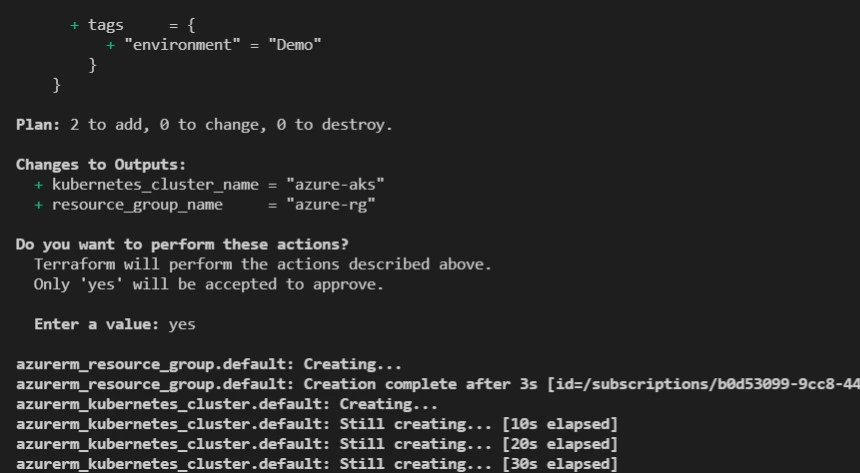
Note: It can take 10-15 minutes to create the cluster.
5. Now, we can check the AKS cluster has been To check follow the below steps:
-
- Login to azure
- Search for Kubernetes services from the search bar
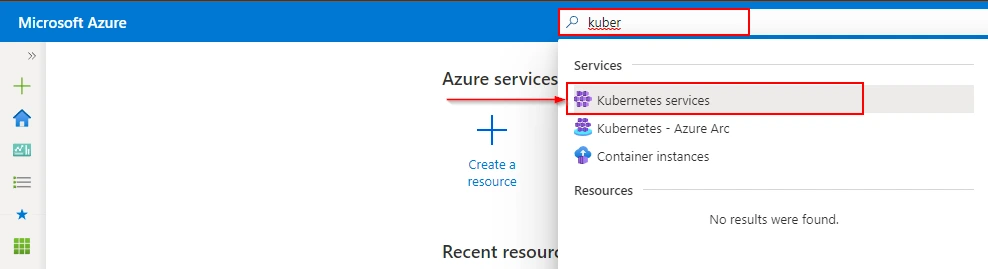
- Look for the azure-aks cluster that we created

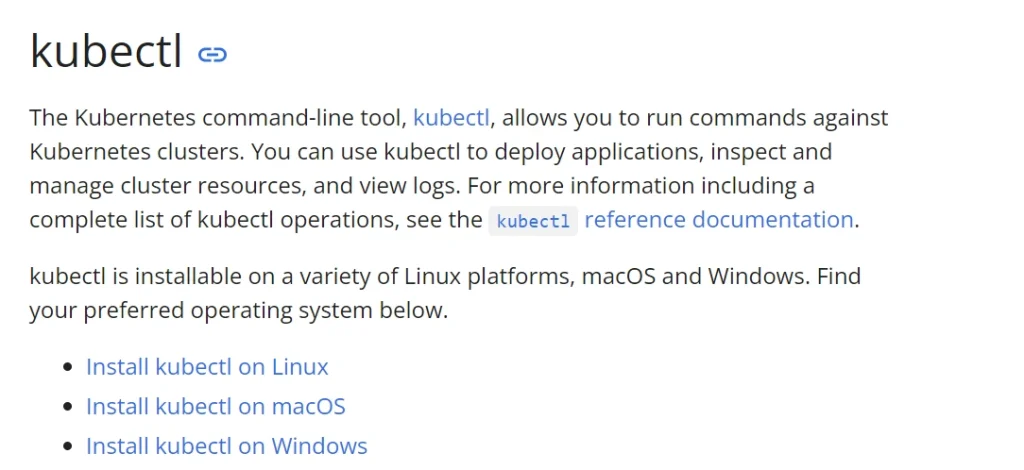
Installing KUBECTL to Connect with the Cluster
1. To install refer the below link and download according to your Operating System:
https://kubernetes.io/docs/tasks/tools/install-kubectl/
2. Install the AKS command line tool on the machine this is used to configure the aks cluster on you
For Windows:
- Type the following command in the command prompt:
az aks install-cli
3. After the successful installation of kubectl, now to connect to the Azure AKS cluster use the following command. This command will download the credentials and update the kubeconfig file.
$ az aks get-credentials --name <AKS_cluster_name> --resource-group <resource_group_name>
Note: Replace the values marked in yellow with AKS cluster name and Resource group name
4. To verify the connection to your cluster, use kubectl get command to return a list of the cluster nodes.
$ kubectl get nodes

Note: Here the nodes are the VMs running in your Azure cluster and you can schedule containers on these nodes these nodes are managed by the master node which is managed by Azure.
Destroying the Infrastructure
To destroy the whole infrastructure created use the below command. It will destroy all the above-created infrastructure.
$ terraform destroy
Conclusion
Managing AKS clusters with Terraform offers a powerful combination of flexibility, scalability, and automation for Kubernetes-based applications on Azure. By leveraging Terraform’s declarative approach to infrastructure management, teams can streamline the provisioning, configuration, and maintenance of AKS clusters while adhering to best practices and ensuring consistency across environments.
FAQs
Can I use Terraform to manage existing AKS clusters?
Yes, Terraform supports managing existing AKS clusters by importing them into Terraform state and applying changes as needed.
Is it possible to rollback changes applied to AKS clusters with Terraform?
Terraform provides the capability to rollback changes by reverting to a previous state using version control or Terraform state management features.
How does Terraform handle updates to AKS node pools?
Terraform manages updates to AKS node pools by provisioning new nodes with the updated configuration and gracefully draining and replacing existing nodes.
Can I automate AKS cluster backups with Terraform?
While Terraform itself does not provide backup functionality, you can integrate it with Azure services like Azure Backup to automate AKS cluster backups.
Related/References
- Terraform Installation Overview
- HashiCorp Infrastructure Automation Certification: Terraform Associate
- Resource Manager In Oracle Cloud Infrastructure
- HashiCorp Certified Terraform Associate
- How to Provision AWS Infrastructure with Terraform?
- Terraform Cheat Sheet
- Why Choose Terraform Over Chef, Ansible, Puppet or CloudFormation?
Join FREE Class
🚀 Master Terraform & DevOps to get High-Paying Jobs! 🔥 Join our EXCLUSIVE Free class! 🚀
Get your hands dirty with lots of projects and labs based on Terraform and DevOps in our Program. Click on the below image to Register for Our FREE Class Now!

![Microsoft Agentic AI Business Solutions Architect [AB-100] | K21 Academy](https://test.k21academy.com/wp-content/uploads/2025/11/Microsoft-Agentic-AI-Business-Solutions-Architect-AB-100-Exam-Overview1.png)