

![]()
We have been getting lots of queries from our trainees on how to use Notification Activity in OIC.
In this blog, we are going to show you how to use Notification Activity in the Oracle Integration Cloud. It particularly useful when you want to be notified when an error has occurred in integration.
If you are new to Oracle Integration Cloud (OIC), then check out our blogs for Beginners overview of Oracle Integration Cloud (OIC).
What Is Notification Activity
The Notification Activity is used to send an E-Mail notification to any number of recipients. You have the ability to select the From address and to create a custom email body and have the field that you need in the notification.
OIC gives the flexibility to choose the sender for these notifications. This can be achieved by adding a list of email addresses that can later be approved to qualify as an Approved Sender in OIC.
You also have an option to select attachment with the notification E-Mail, this is useful as it saves time as you no longer have to create a Microsoft Email adapter to handle attachment.
Also check our previous blog on Oracle Integration Cloud New Homepage to get familiar with the new OIC homepage.
How To Use Notification Activity
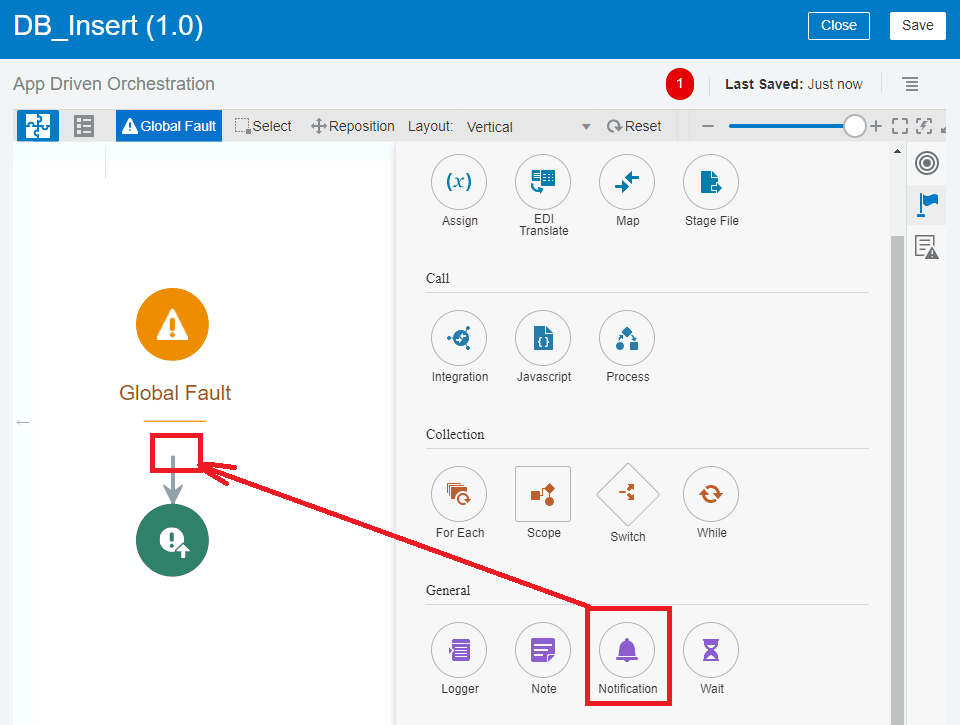
Notification Activity can be used directly in the Integration also if you want to be notified when a fault occurs you can add notification activity in the global fault handler.
Inside the Global Faults, you have the ability to send notifications when a fault/error has occurred in an integration. In the notification activity, you can choose to send error code, cause of the error, and more.
Step By Step Guide To Send Error Notification
For the purpose of this blog, we are using an already created integration to insert data into DB.
1. Click on Global Fault. You can apply any business rule, invoke external service, send an email notification, etc.
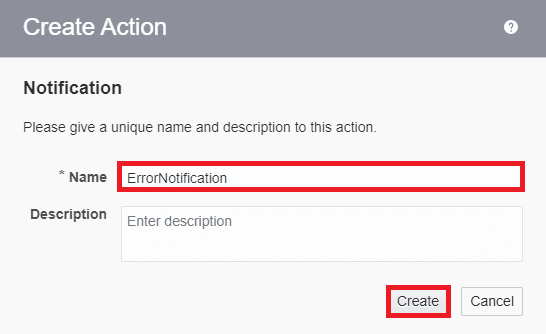
2.Enter Name and optionally Description for the notification.
Also Read : Why Use B2B in OIC
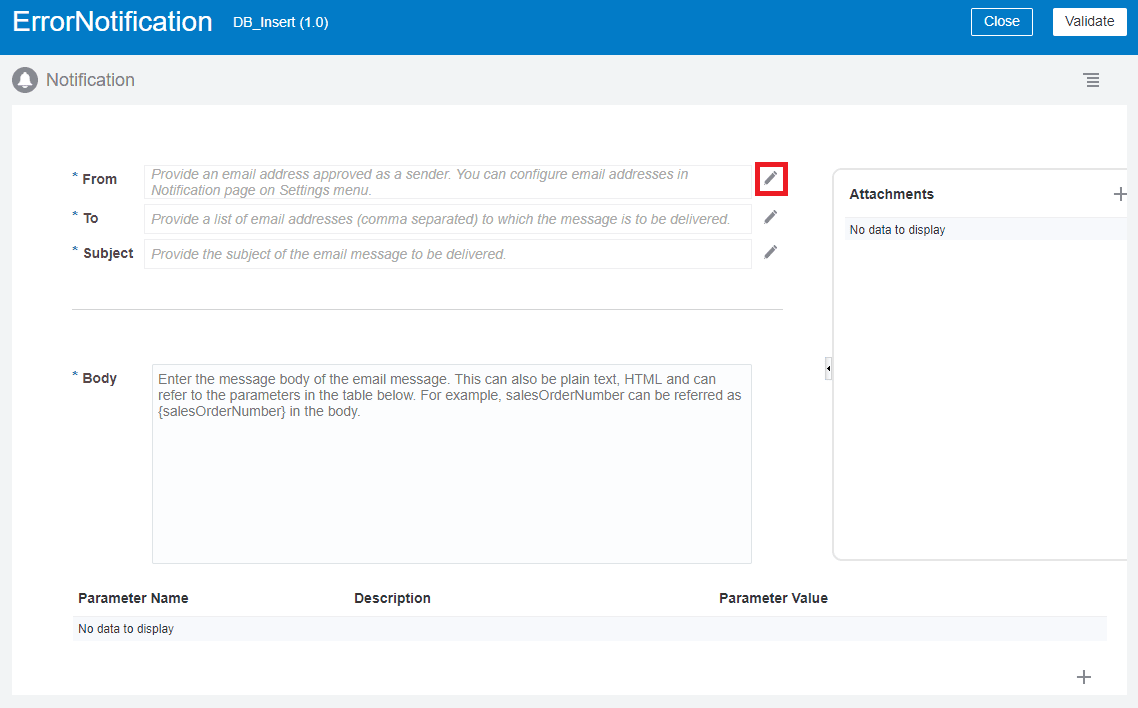
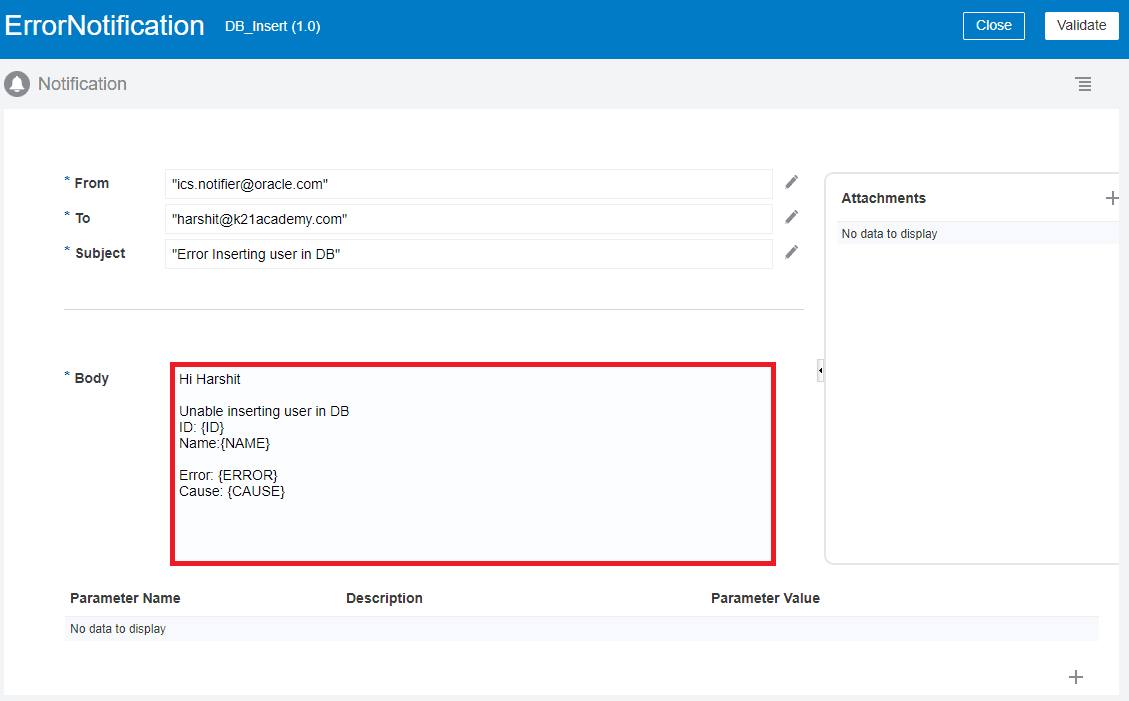
3. The notification configuration window will get open as shown in the below screenshot.
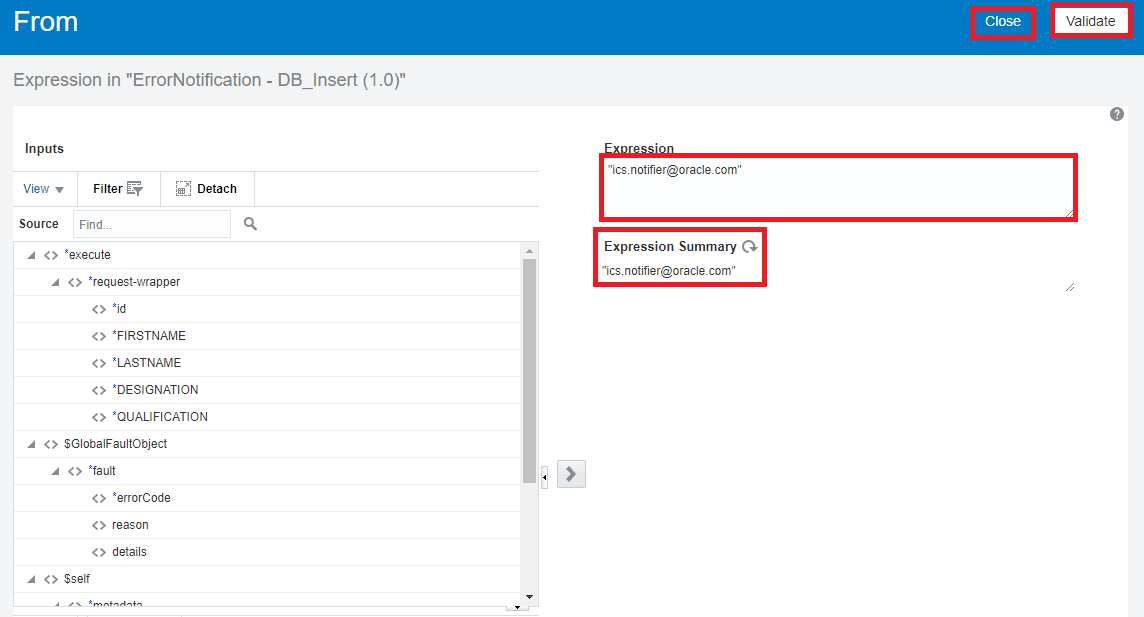
4. Click the edit icon in front of From option. This allows you to enter from the address.
Check Out: SOAP vs Rest API, know their major differences!
5. Enter From address “ics.notifier@oracle.com” or “no-reply@oracle.com” in the expression input box. Click Validate then Close button from the right upper corner.
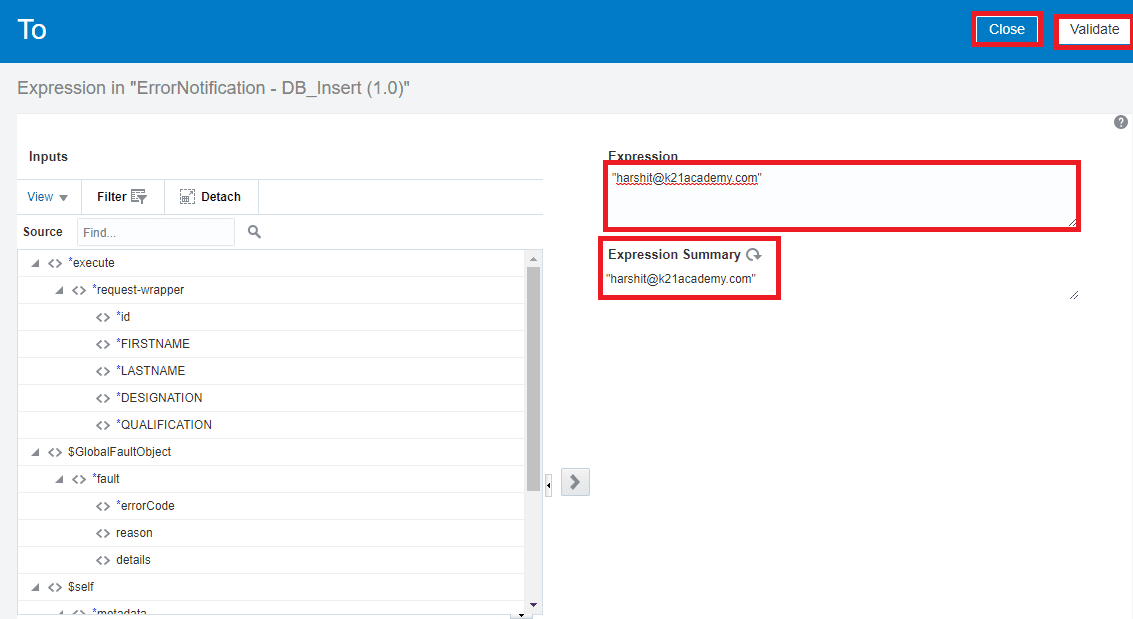
6. Similarly, we can configure To address. Enter To addresses in the case to send the notification to one or multiple recipients.
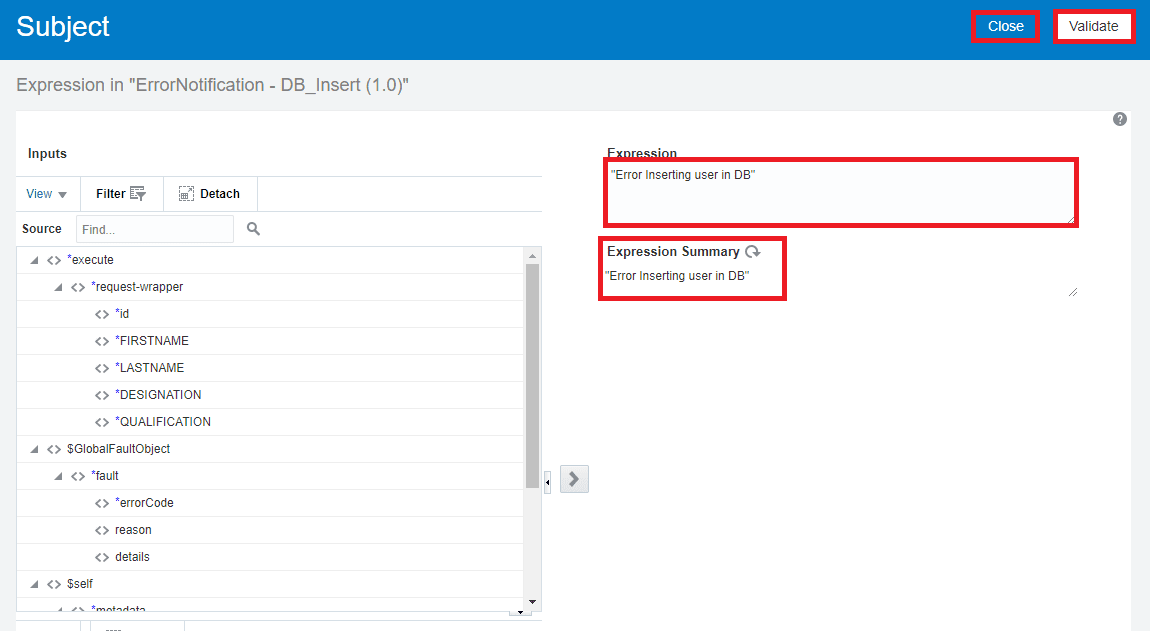
7. Similarly, we can configure the Subject. Enter a comma-separated subject in the case to send the notification to multiple recipients.
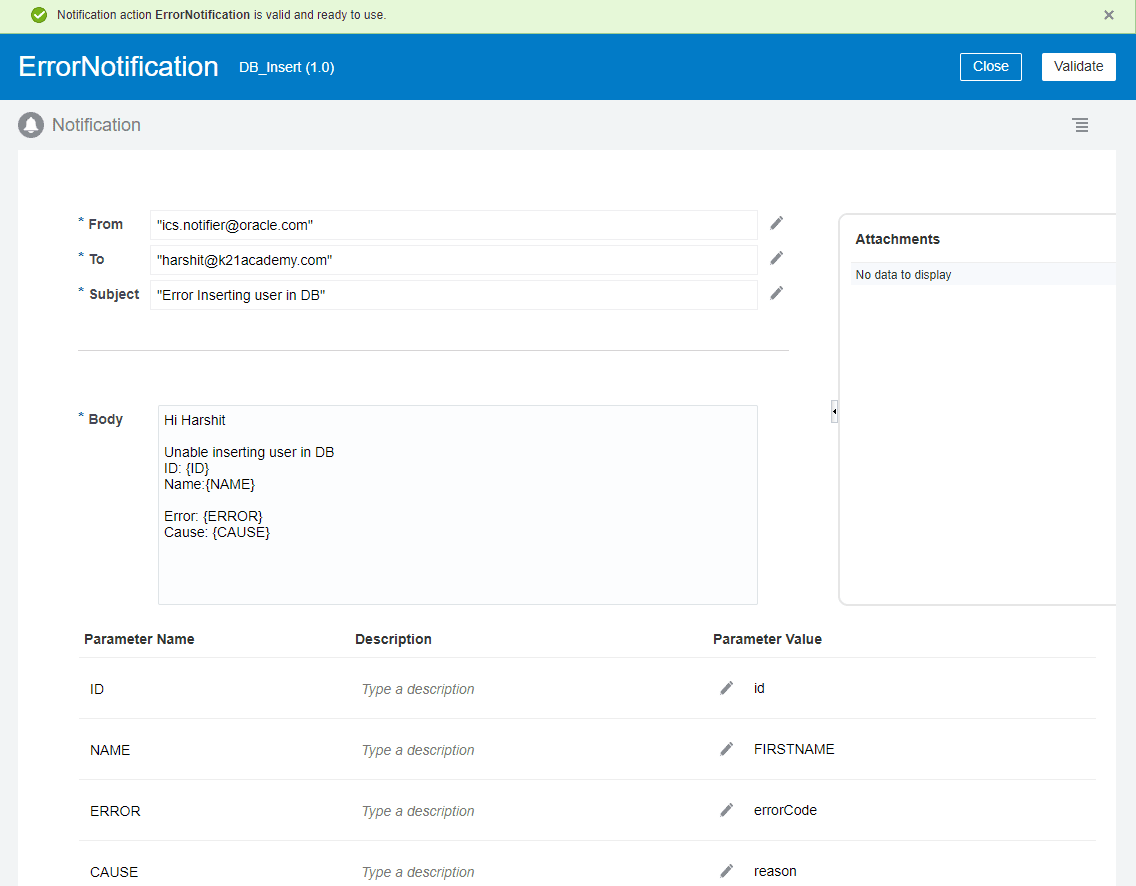
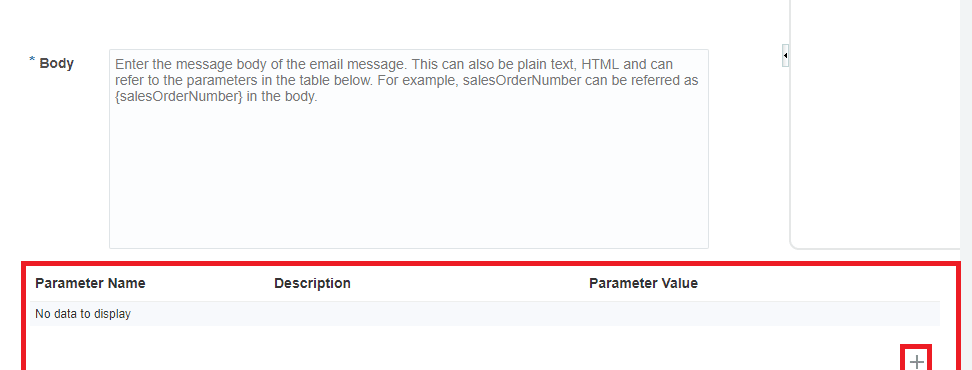
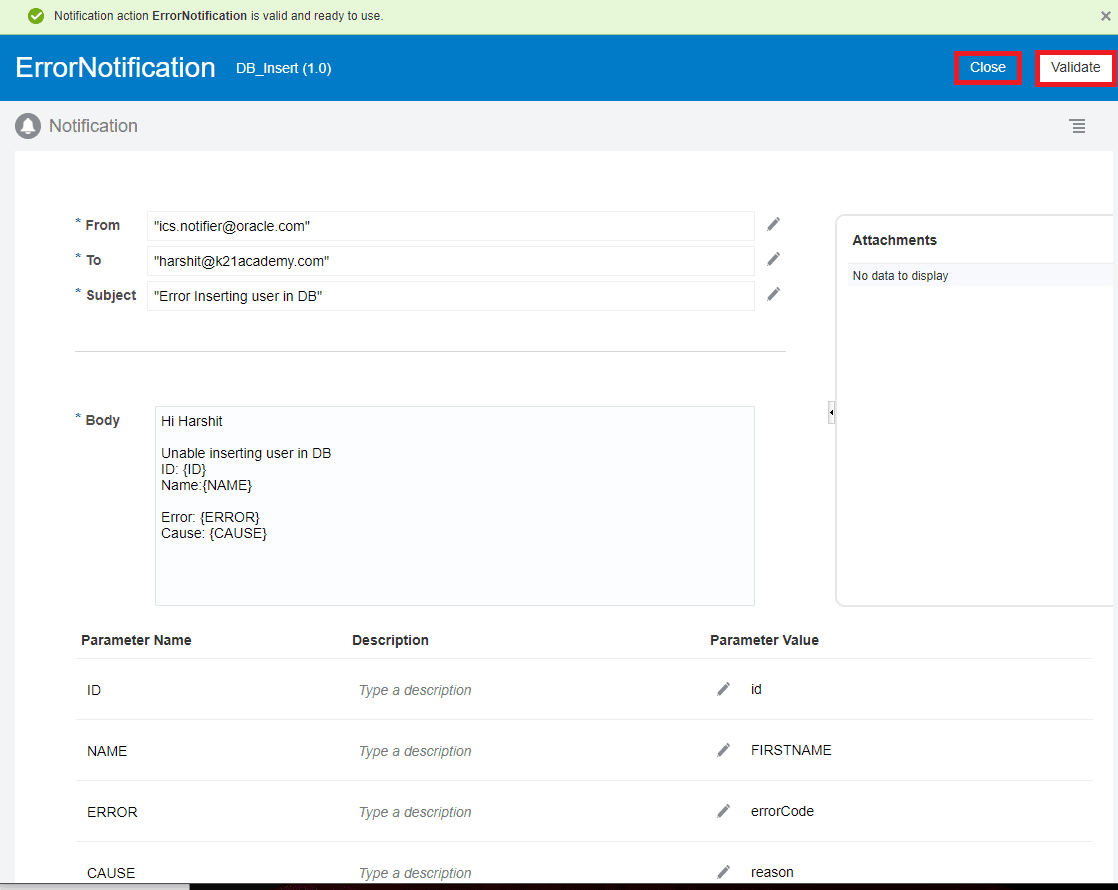
8. The body can be plain text and HTML. Curly braces are used to {} send any parameter value with the body.
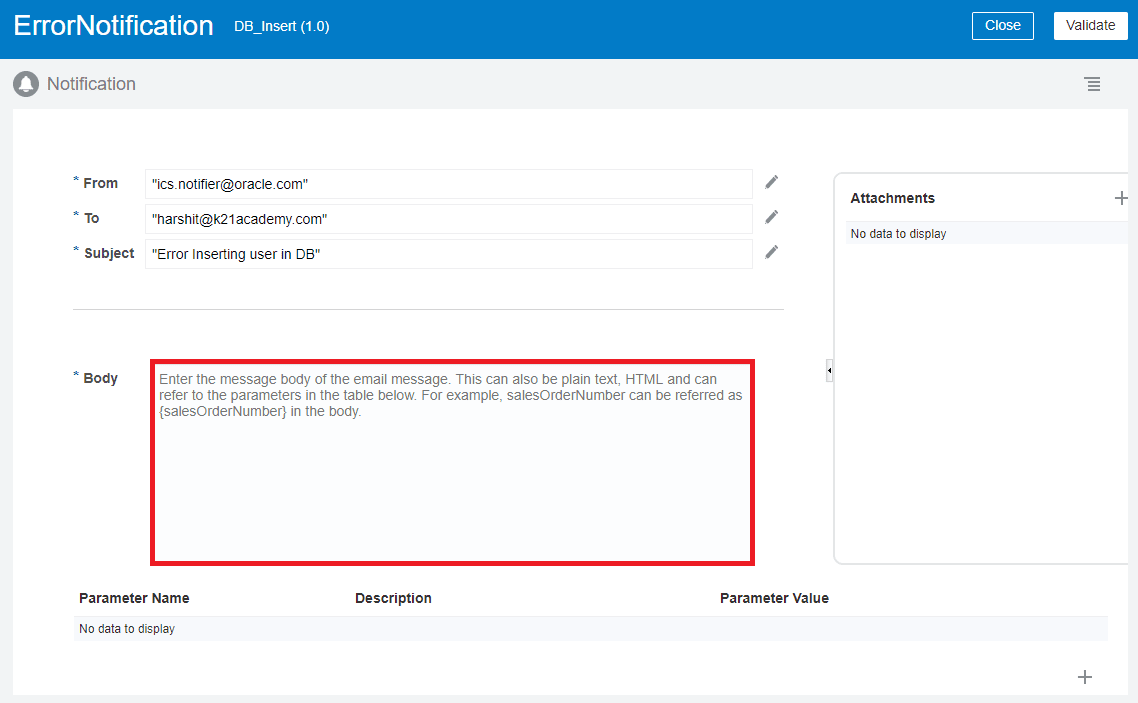
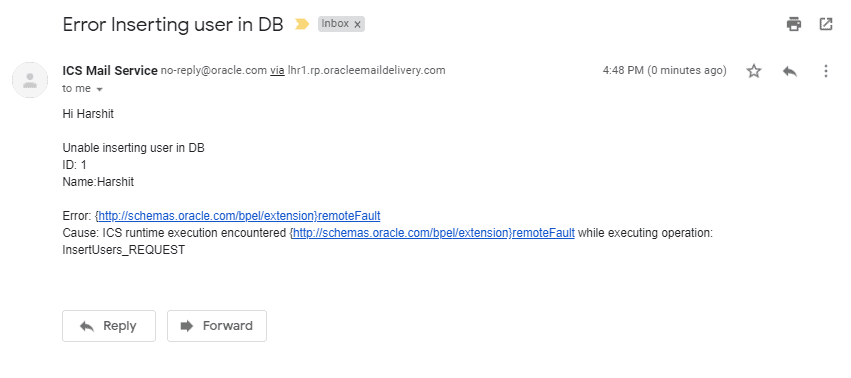
9. In the body enter a below Message or create your own that you would like to be notified with.
Hi Harshit
Unable to inserting user in DB
ID: {ID}
Name:{NAME}
Error: {ERROR}
Cause: {CAUSE}
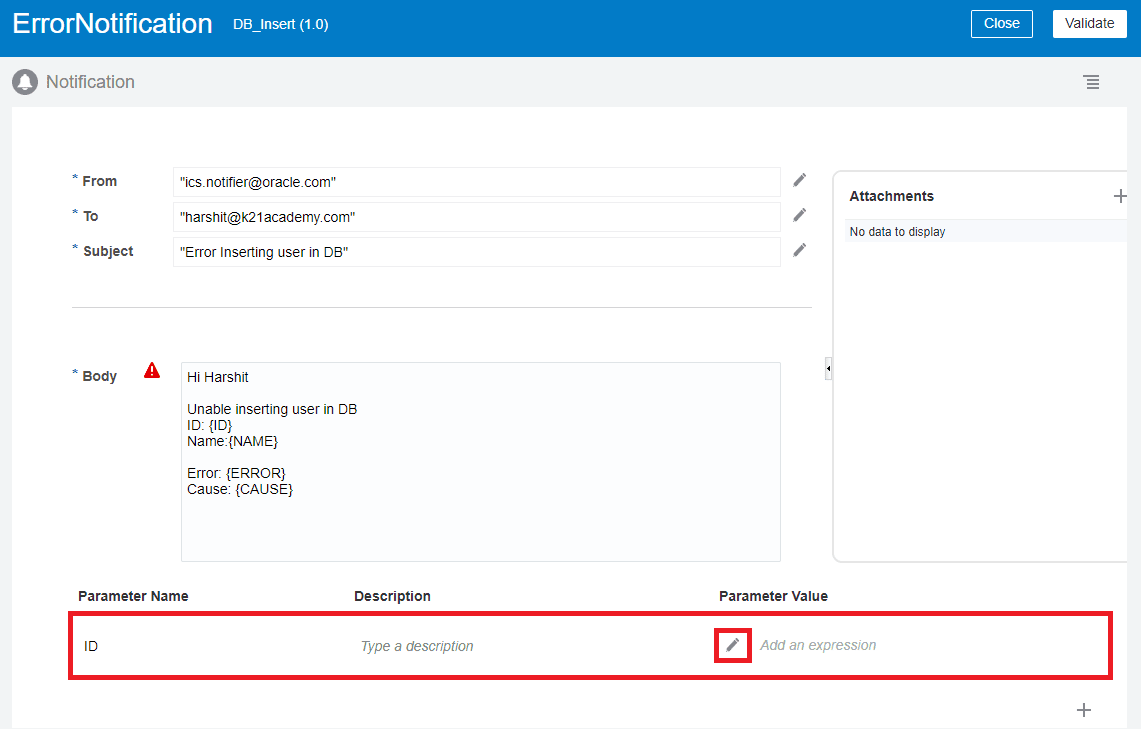
10. Parameters can be created with the table given under the Body input text. Click + sign to create any variable.
11. Enter Parameter name as ID and click the edit icon to assign any value to it.
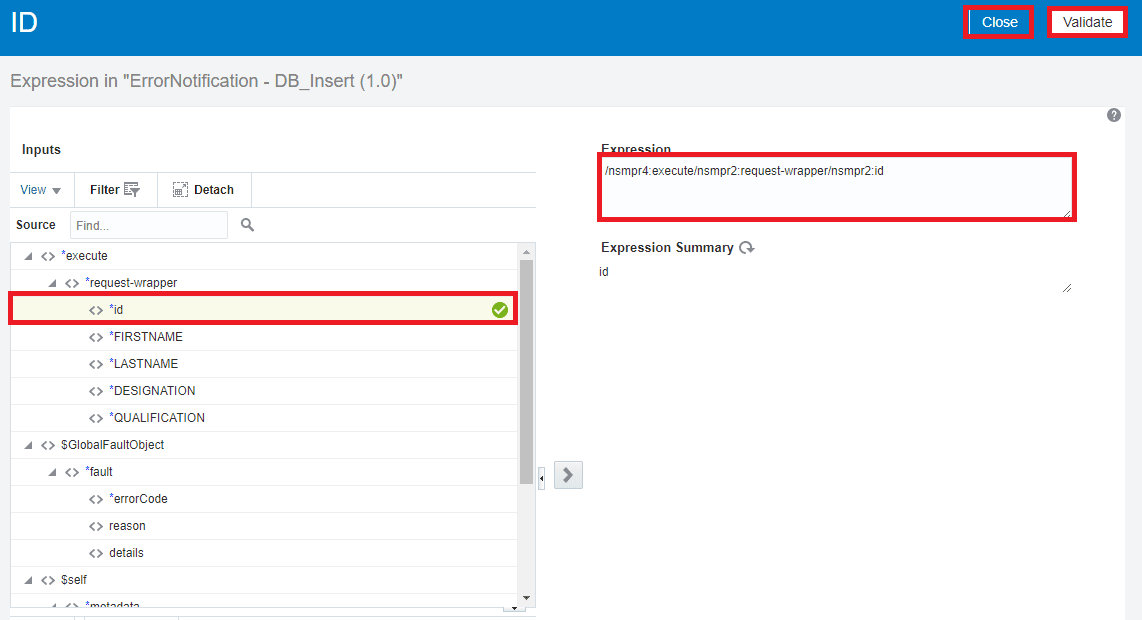
12. Drag and drop id from source to expression box then click on validate then close.
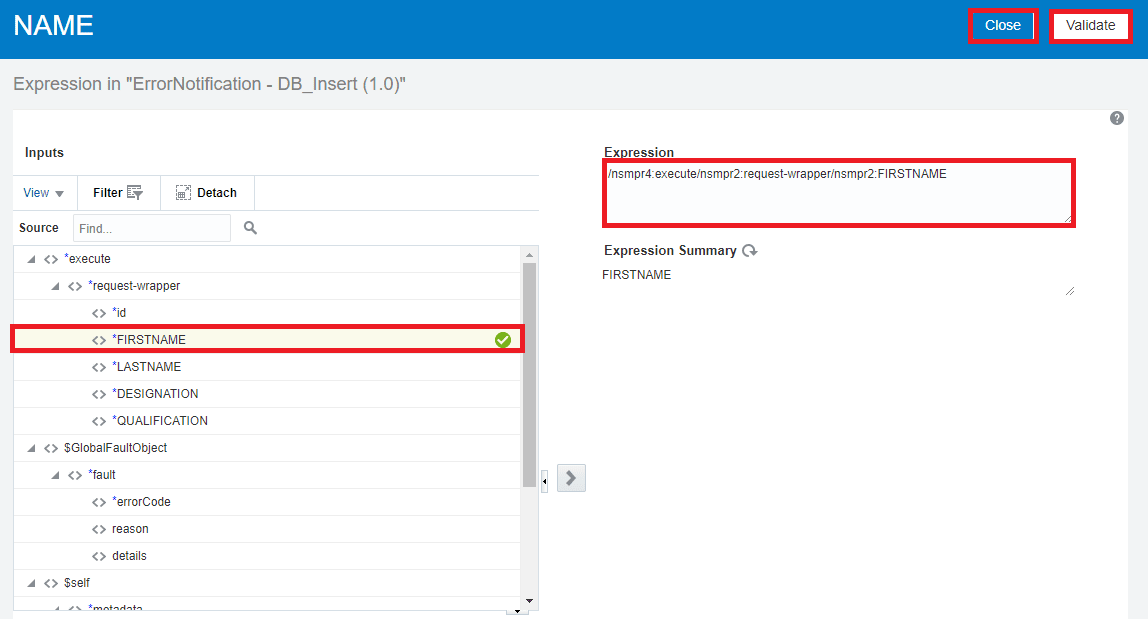
13. Click + sign to create another variable. Change Parameter name to NAME and click on edit in the parameter value.
14. Drag and drop FIRSTNAME from source to expression box then click on validate then close.
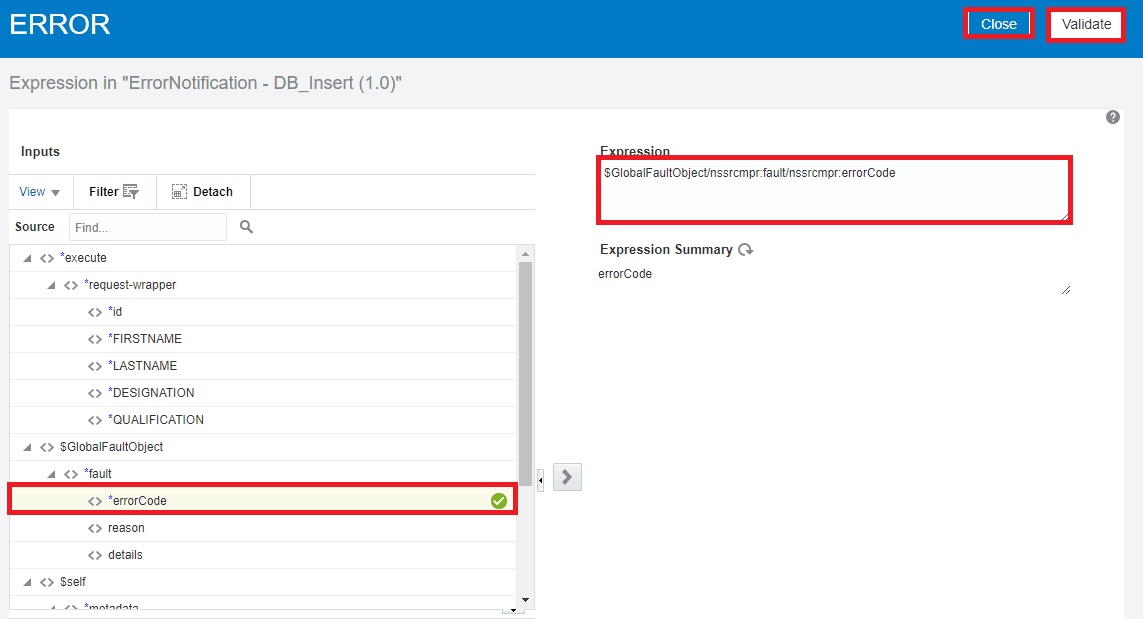
15. Click + sign to create another variable. Change Parameter name to ERROR and click on edit in the parameter value.
16. Drag and drop error code from source to expression box then click on validate then close.
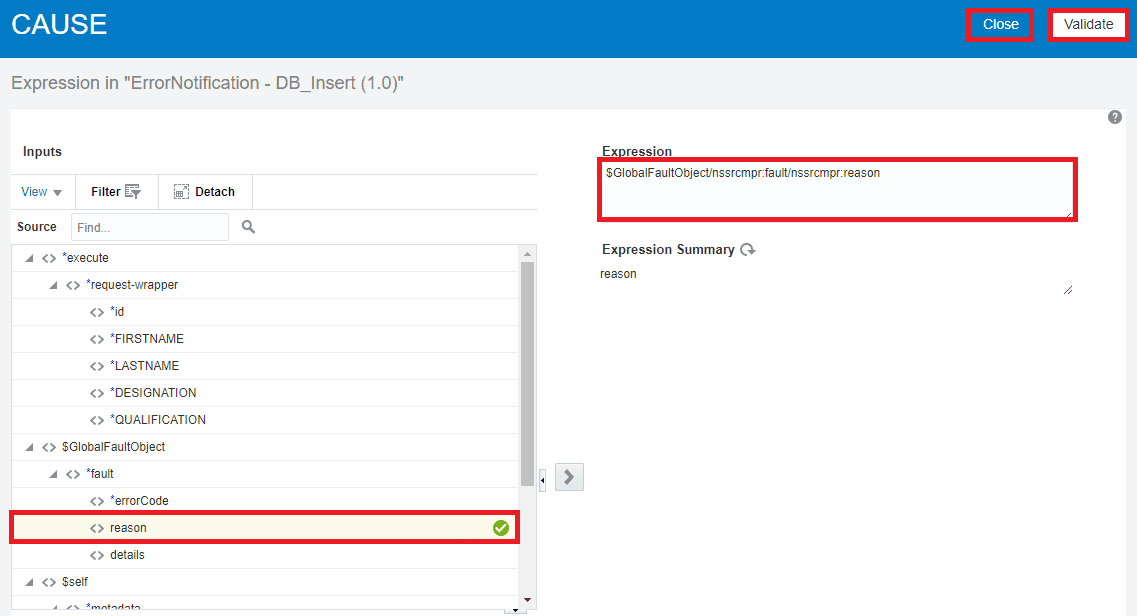
17. Click + sign to create another variable. Change Parameter name to CAUSE and click on edit in parameter value.
18. Drag and drop reason from source to expression box then click on validate then close.
19. Click on Validate and then click on save.
20. This is how you configure Notification Activity to shoot when an error has occurred.
21. If an error is encountered you will get a mail with all the parameter values defined earlier.
I hope this blog was able to guide you on how to use notification activity to inform when an error has occurred.
Note: If you want to enhance your knowledge and become a certified Oracle Cloud Platform Application Integration 2021 Associate then check on the blog on the certification exam [1Z0-1042].
Related/References
- Oracle Integration Cloud (OIC) For Beginners Overview
- 6 Docs Every Oracle Cloud Integrator Must Read
- Oracle Cloud Documentation Links: OIC | SOA-CS | OCI
- For Oracle Documentation: Clone an Integration, click here.
Next Task For You
Do you want to learn more about Oracle and confuse where to start or which certification is right for you? Then, click on the register now button below to register for a Free Masterclass on Oracle [1Z0-1042] Certified Cloud Integration Expert, which will help you better understand and choose the right path and clear the certification exam.

![Microsoft Agentic AI Business Solutions Architect [AB-100] | K21 Academy](https://test.k21academy.com/wp-content/uploads/2025/11/Microsoft-Agentic-AI-Business-Solutions-Architect-AB-100-Exam-Overview1.png)


