


![]()
This post covers Download & Installation of Oracle GoldenGate 12c (12.2.0.1.1) (software for real-time data integration and replication in heterogeneous IT Systems).
In the previous post, we covered Oracle GoldenGate 12c Overview & Components
GoldenGate 12c installation can be GUI or CLI (including Silent Mode) and needs to be run after unzipping the software.
Download Software: First download the software from OTN and then follow below steps:
Assumption:
- ORACLE_HOME= /u01/app/oracle/product/12.1.0.2/db_1
- We will install the Oracle GoldenGate software for the replication source in the directory /u01/app/oracle/product/ogg_src, which you must create.
- The steps are mentioned for Installation of Oracle GoldenGate in one instance. Same steps need to be followed for other installations of Oracle GoldenGate 12c.
- We are configuring GoldenGate for Oracle Database 12c (other databases supported for GoldenGate replication are DB2, MySQL, Informix, SQL Server, Sybase, Teradata)
Oracle GoldenGate 12c Installation:
1. Use the terminal window connected as oracle and create the /u01/app/oracle/product/ogg_src directory.

2. Run the Oracle GoldenGate 12.2.0 installer as the oracle user. The installer is located in the /stage/oracle/GG_12c/fbo_ggs_Linux_x64_shiphome/Disk1 directory.

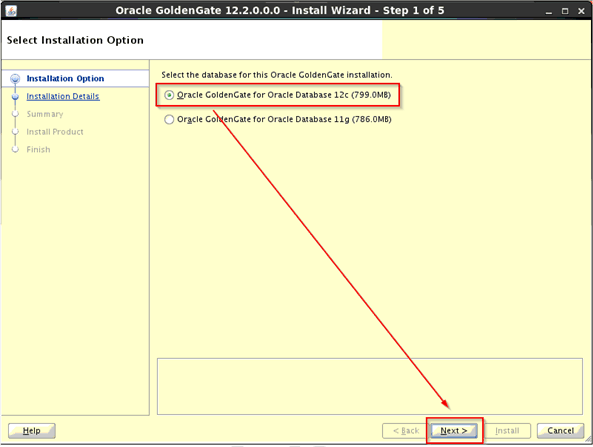
The installer starts, and after a few second the “Install Wizard – Step 1 of 5” window appears on screen:
3. On Installation Option screen, select “Oracle GoldenGate for Oracle Database 12c (799.0MB)” and click
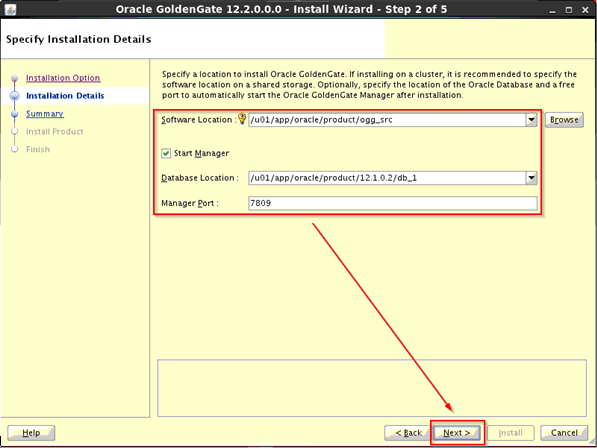
4. On Installation Details screen, in the “Software Location” field enter the directory you created to host the Oracle GoldenGate software for the replication source, /u01/app/oracle/product/ogg_src. Leave the “Start Manager” checkbox selected, and accept the default values for the Database Location (/u01/app/oracle/product/12.1.0.2/db_1) and Manager Port (7809)
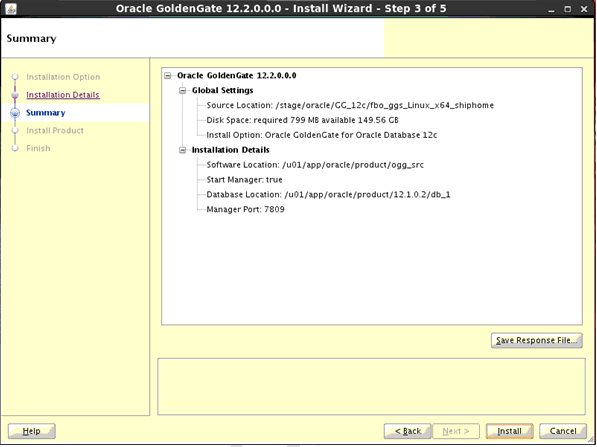
5. On Summary screen, verify the fields you entered in the previous screens and click Install to start the installation.
6. The window displays the progress bar and keeps you informed about the installation process.
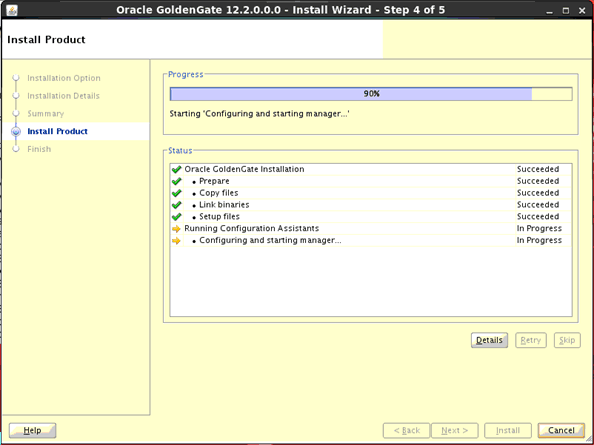
7. After a while, the installation process ends and the last window of the wizard appears, informing you that the installation was successful:

Reference:
This post is from our Oracle GoldenGate 12c Administration Training, in which we cover Architecture, Installation, Configuring & Preparing the Environment, DML Replication – Online Change Synchronization, Initial Load, Zero Downtime Migration & Upgrading using GoldenGate, Oracle GoldenGate Security, Performance of Oracle GoldenGate and Troubleshooting and much more.
Next Task For You
Want to move ahead in your career and want to get a higher Earning Job?
Get 7+ Courses for DBAs & Apps DBA in a bundle program and learn from the Industry’s best Experts.

![Microsoft Agentic AI Business Solutions Architect [AB-100] | K21 Academy](https://test.k21academy.com/wp-content/uploads/2025/11/Microsoft-Agentic-AI-Business-Solutions-Architect-AB-100-Exam-Overview1.png)