


![]()
This post is the part 2 of step by step installation of Oracle Access Manager (OAM) which covers creating a domain for Oracle Access Manager 12.2.1.3.0.
For Part I, Download Software and create Schema click here
RCU – Repository Creation Utility is a java based tool (available only for Windows and Linux) to create a schema in Database. For basics on RCU (Repository Creation Utility) click here
- You use sys account or any user with sysdba privileges to database
- RCU version is minimum 12.2.1.3.0
Run the Repository Creation Utility
Note: Make sure that your Listener is up and Running and CDB (Container Database) and PDB (Pluggable Database) database is up and running if not start the database by following the steps:
Start Database
1. Login as user oracle, when prompted enter the password as Welcome1
2. Set Environment variable for database (we have used Given Directories in our environment )
export ORACLE_HOME=/u01/app/oracle/product/12.1.0/dbhome_1
export ORACLE_SID=iam
export PATH=$ORACLE_HOME/bin:$PATH
3. Start Database Listener
lsnrctl start
4. Start Database
sqlplus “/as sysdba”
SQL> startup
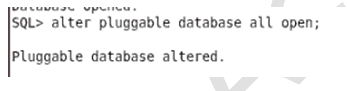
5. Now, to open the PDB database use the below command
SQL> alter pluggable database all open;
Create OAM Schema Using RCU
Note: In OAM 12c there is no need to download the software for RCU Separately. The .rcu File will create where we have our Oracle_Home.
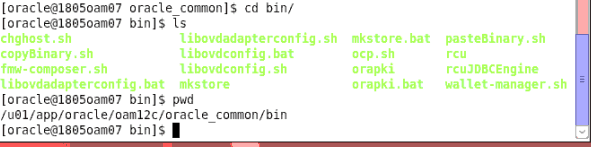
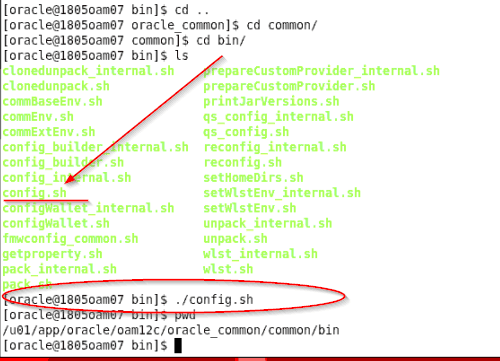
1. Launch a terminal window as Oracle User and run the .rcu to create the schema for OAM. In my case, .rcu is located in the /u01/app/oracle/oam12c/oracle_common/bin directory.
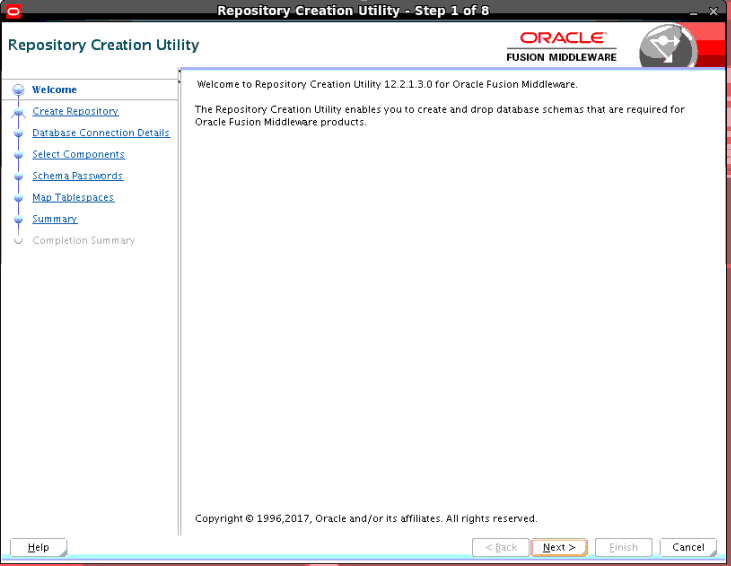
2. On Welcome page click Next
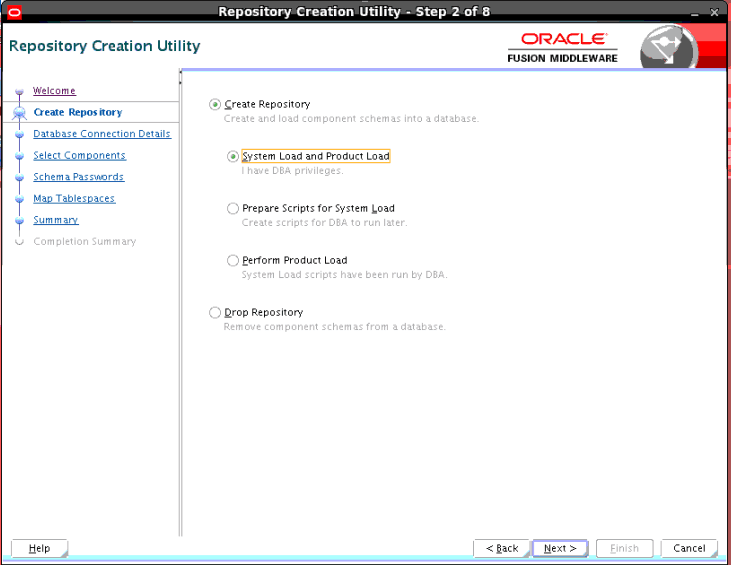
3. On Create Repository screen select Create Repository and click Next
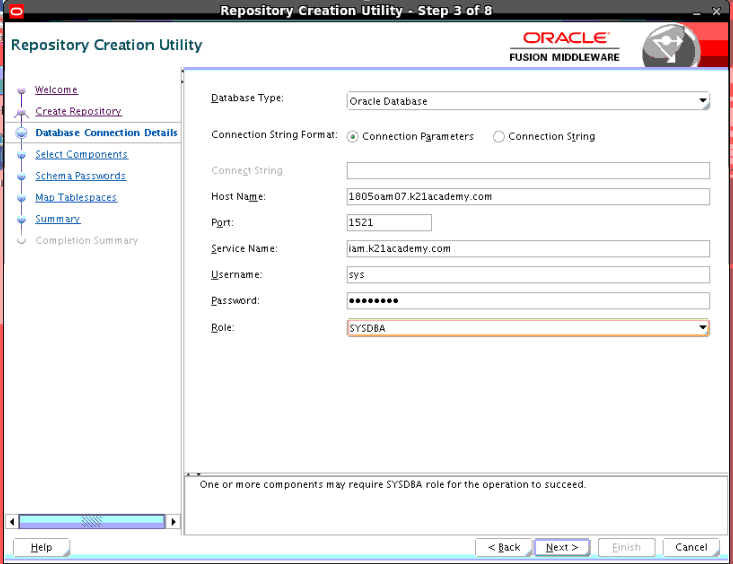
4. On Database Connection Details screen enter the following and click Next
- Database Type: Oracle Database
- Host Name: 1805oam07.k21academy.com
Note: Here change the hostname of your VM that you get by typing hostname
- Port: 1521
- Service Name: pdbiam.k21academy.com (If you want to check your service name, check the listener start with command lsnrctl status)
- Username: sys
- Password: Welcome1
- Role: SYSDBA
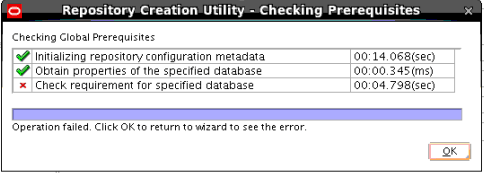
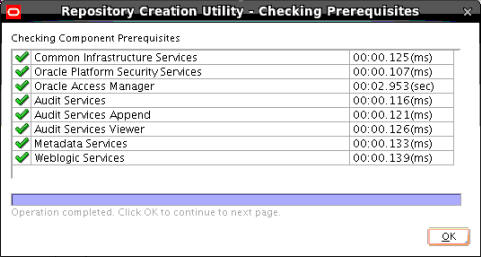
5. On Repository Creation Utility – Checking Prerequisites screen click Ok
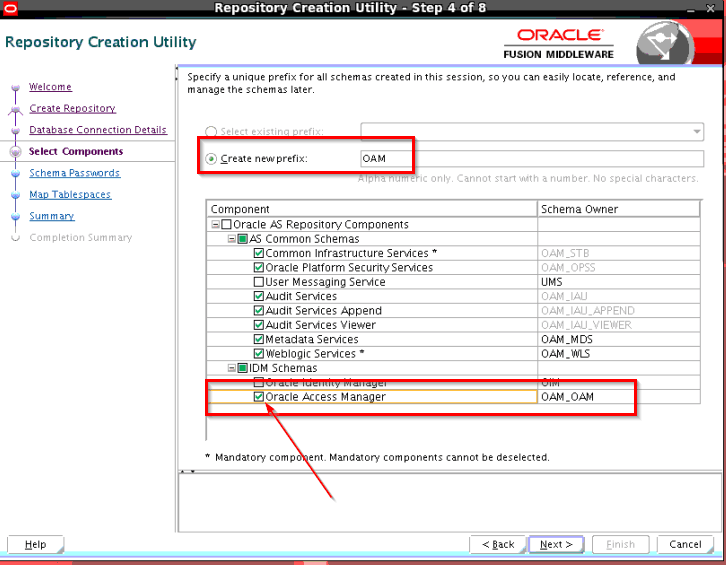
 6. On Select Components screen select the following and click Next
Create a new Prefix: OAM
Component: Oracle Acess Manager
Note: Once you select Oracle Access Manager As a Repository Component then all dependent components will be automatically selected
 7. On Repository Creation Utility – Checking Prerequisites click Ok
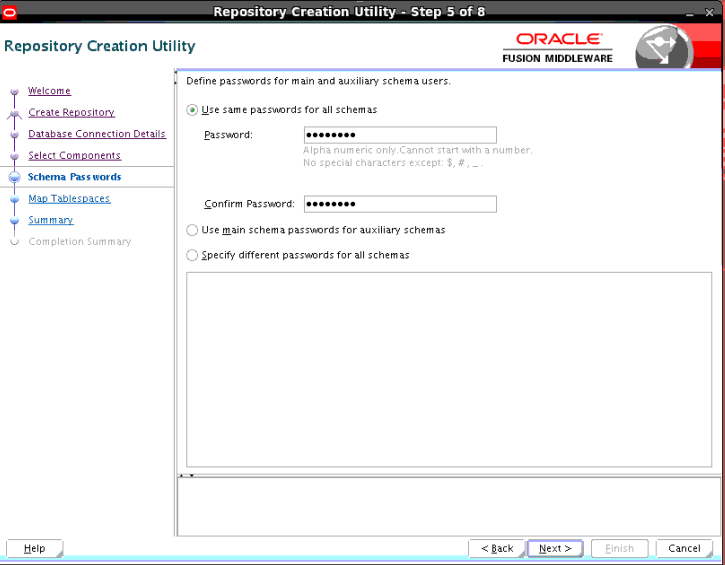
8. On Schema Password screen select Use the same password for all schemas and click Next
- Password: Welcome1
- Confirm Password: Welcome1
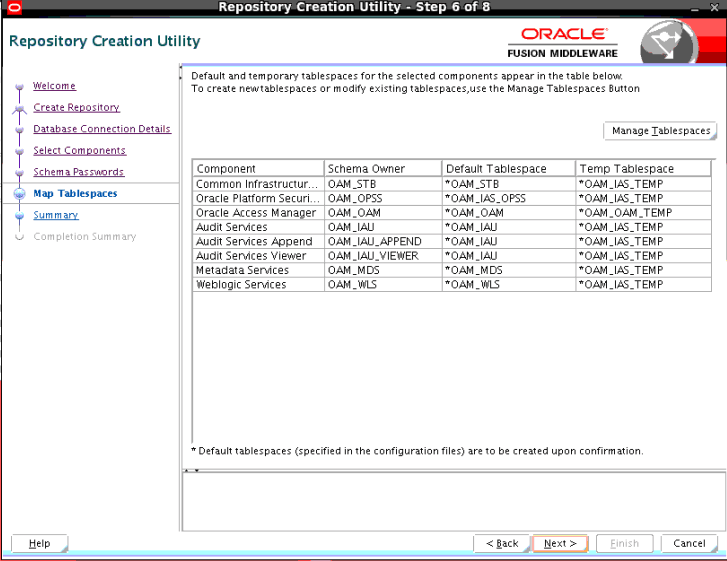
9. On Map Tablespaces screen use default and click Next
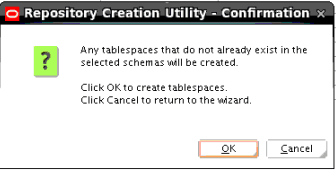
10. On Repository Creation Utility – Creating Tablespaces screen click Ok
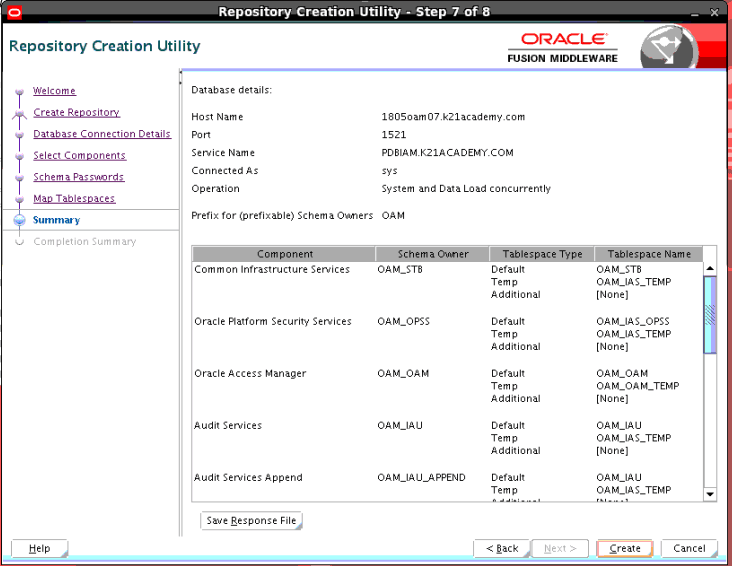
 11. On Summary screen click create
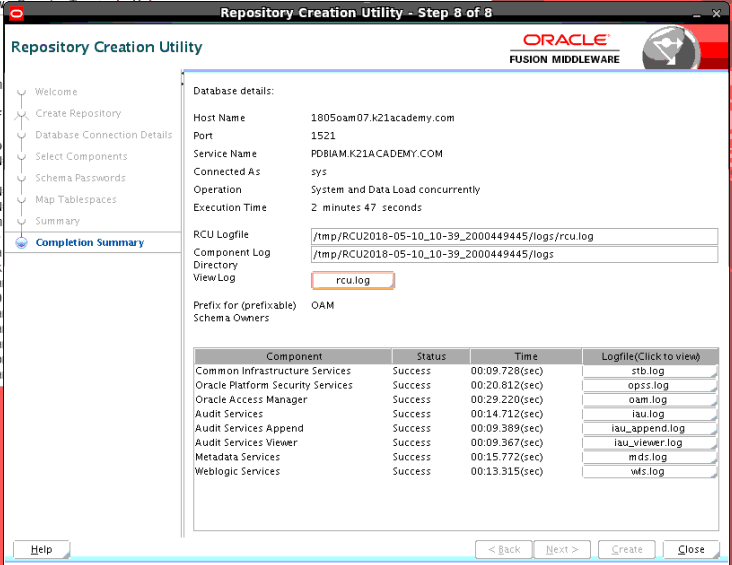
12. On Complete Summary screen, Click Close.
Oracle Access Management 12c: Domain Configuration
Launch a terminal window as Oracle and enter the following command:
Start configuring domain by running config.sh under $ORACLE_HOME/common/bin (where ORACLE_HOME is for OAM in Part I of this Series) :
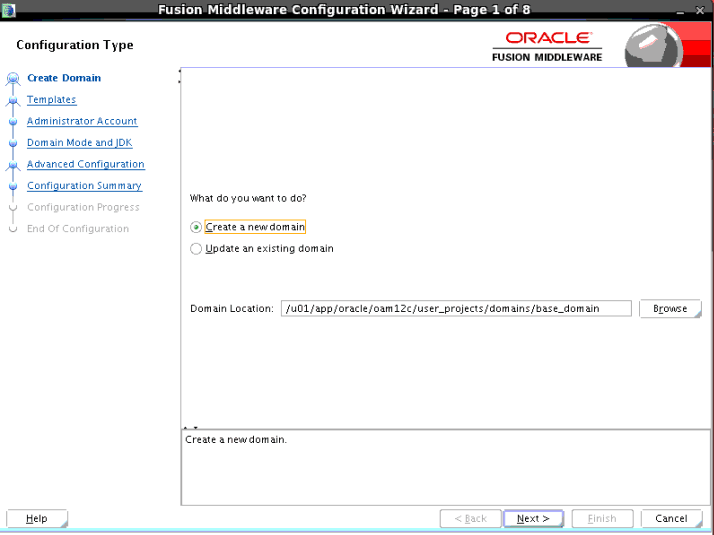
1. On Configuration Type, screen select Create a new domain and click Next
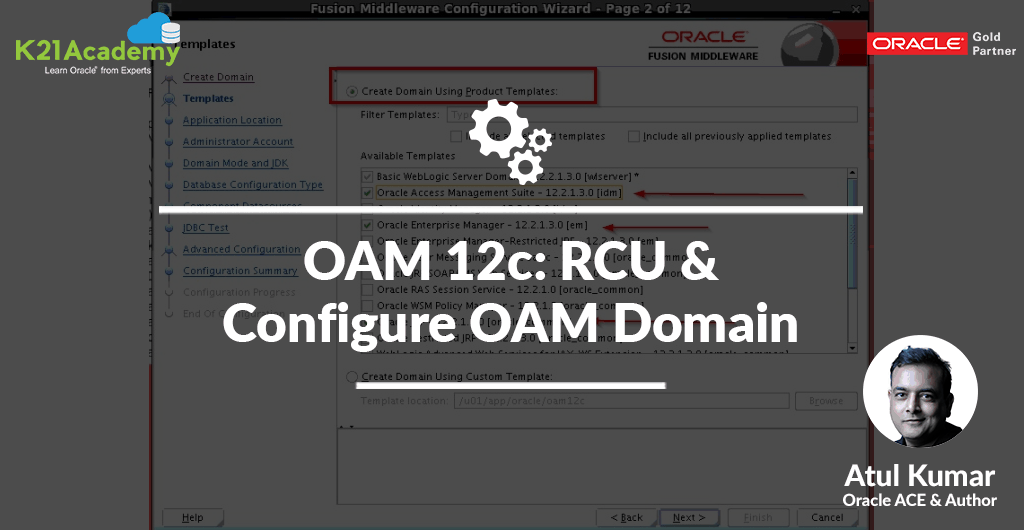
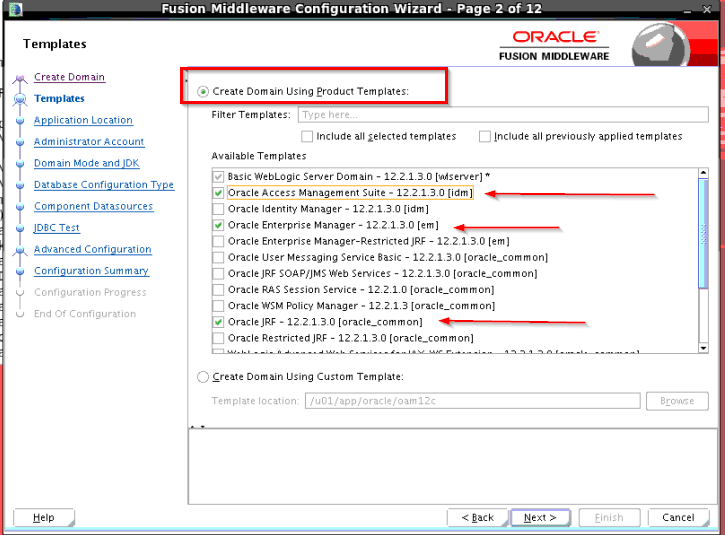
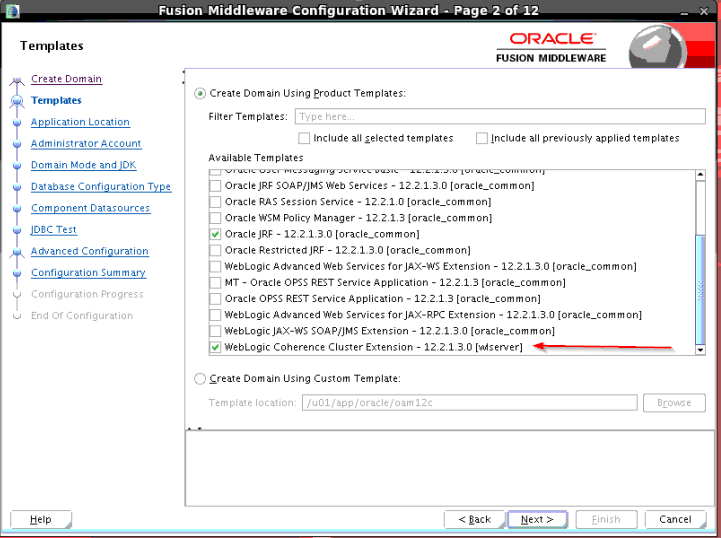
2. On Templates screen, select Create Domain Using Product Templates
- Select the following templates:
- Oracle Access Management Suite – 12.2.1.3.0[idm]
Note: Once you select idm As a template then all dependent components will be automatically selected
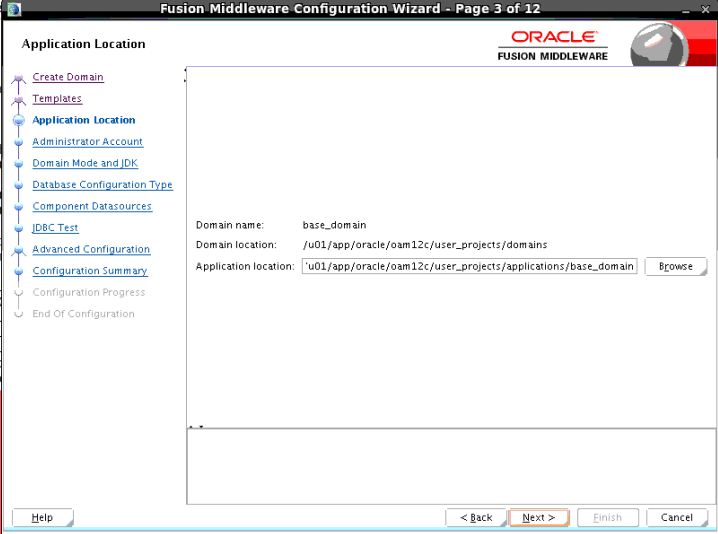
3. On Application Location screen, Click Next.
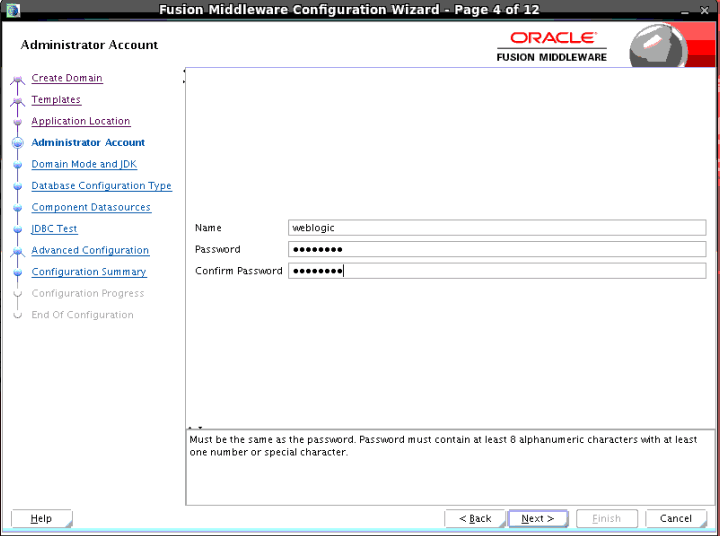
4. On Administrator Account enter the following
- Password: Welcome1
- Confirm Password: Welcome1
Click Next
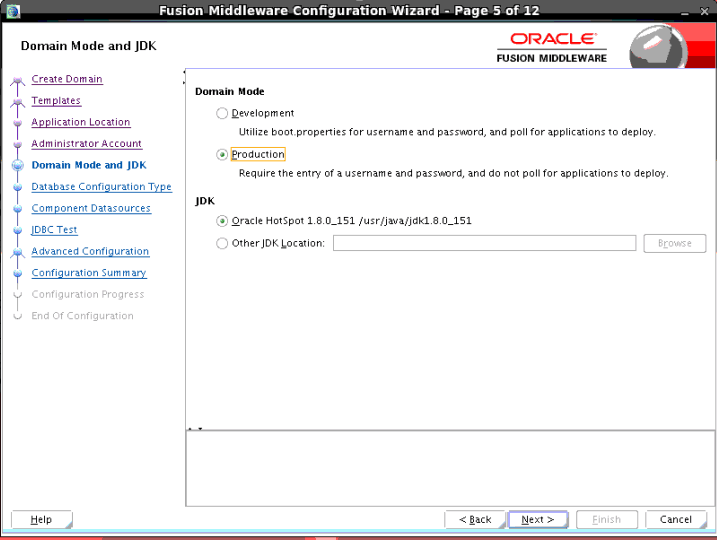
5. On Domain Mode select Production and Under JDK select Oracle Hotspot 1.8.0_151 /usr/java/jdk1.8.0_151 and click Next
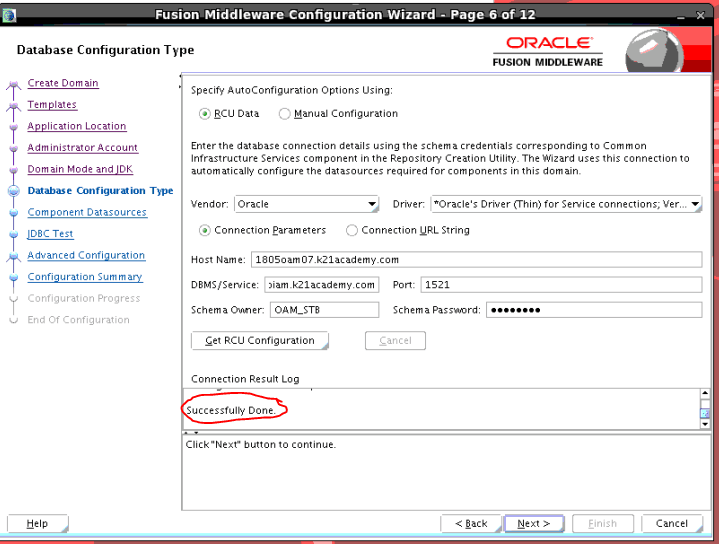
6. On Database Configuration Type screen select RCU Data and enter the following
- Hostname: 1805oam07.k21academy.com (Make sure you put your hostname)
- DBMS/Services: pdbiam.k21academy.com (check your service name with listener status)
- Port: 1521
- Schema Owner: OAM_STB
- Schema Password: Welcome1
Now, click on Get RCU Configuration, once it’s done successfully then click Next
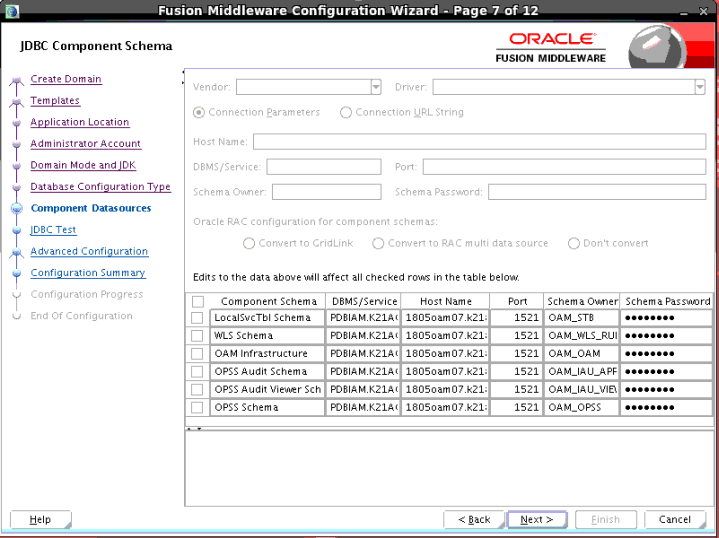
7. On Component Datasources screen leave default and click Next
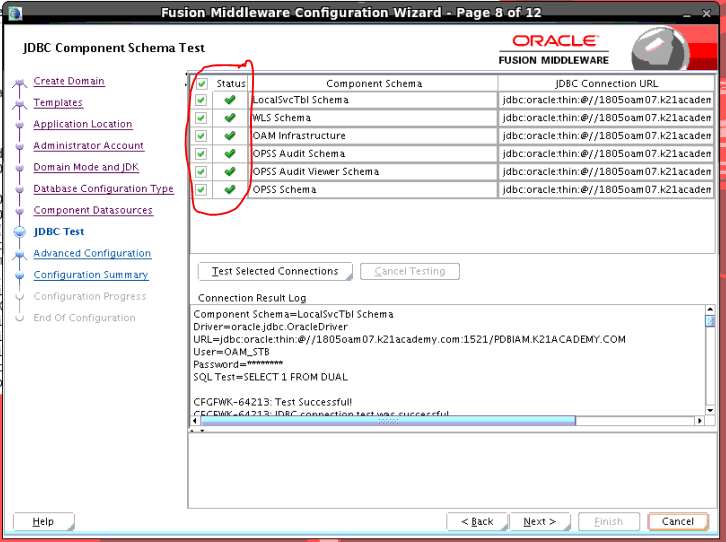
8. On JDBC Test screen, Once the test connections were successfully done then click Next
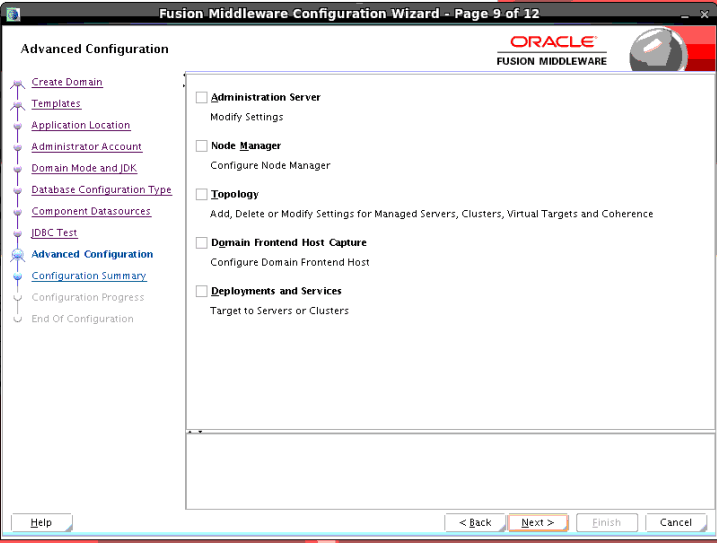
9. On Advanced Configuration screen leave default and click Next
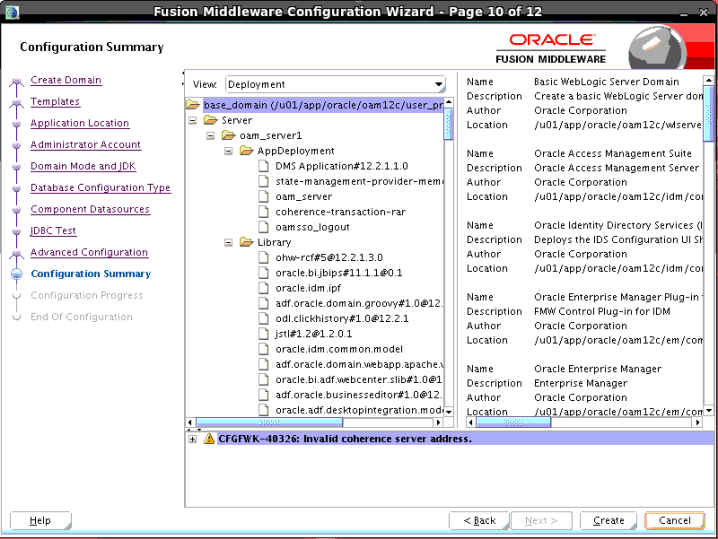
10. On Configuration Summary screen click Create
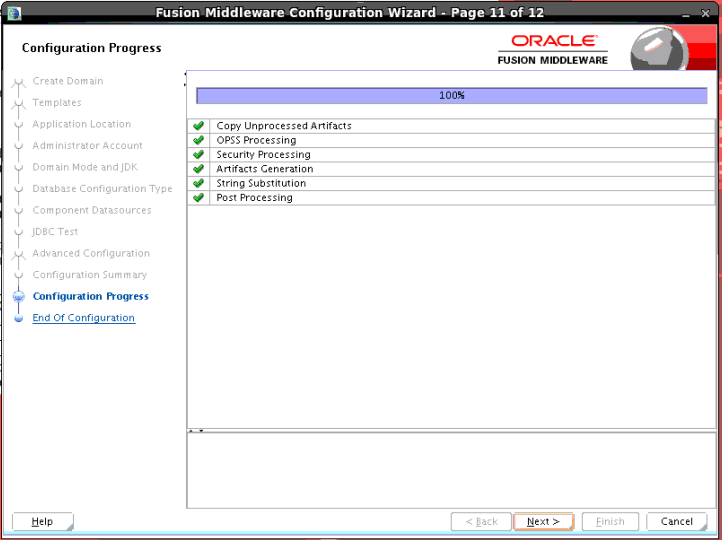
11. Once it’s done Successfully then click Next
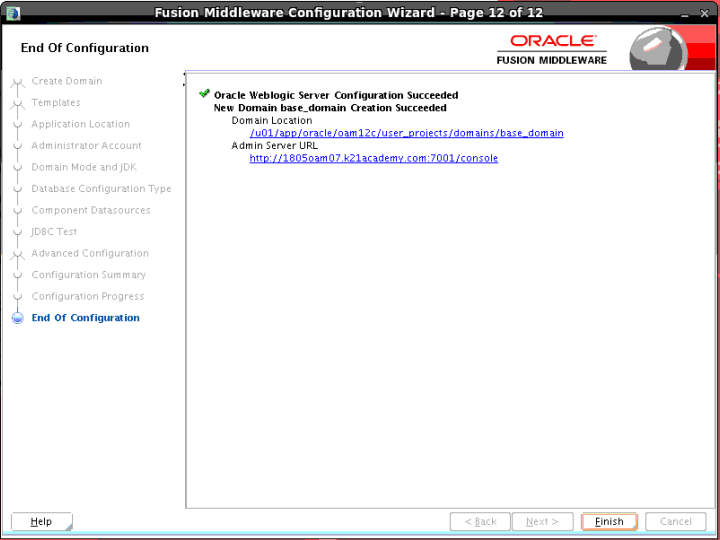
12. On End of Configuration screen click Finish
Note: Make a note of those Domain Location and Admin Server URL
OAM Start & Stop Server (Admin and Managed)
- Next is to start & Stop OAM Admin server & Managed server
Related Posts
- Overview of Oracle Identity & Access Management Products (OAM, OIM, OID, OUD, OES, OIF….) Click Here
- Documentation & Download of Oracle IDM 12cPS3 here
- Download IDM Software and create Schema click here
- Console in OAM: OAM Console, WebLogic & EM
- OID Consoles Overview: ODSM, Weblogic & EM
- Paid Program for IDM (OAM/OID): Architecture, Install, Configure, Integrate, HA, DR, Troubleshooting etc
- Step by Step Activity Guide You Must Perform to become Expert in IDM
Next Task For You
If you are looking for commonly asked interview questions for Oracle Access Manager then just click here and get that in your inbox.
If you like this and would like to learn Oracle Identity & Access Management then get a FREE Mini-Course on IDM/OAM/OID by just one click here.

![Microsoft Agentic AI Business Solutions Architect [AB-100] | K21 Academy](https://test.k21academy.com/wp-content/uploads/2025/11/Microsoft-Agentic-AI-Business-Solutions-Architect-AB-100-Exam-Overview1.png)