


![]()
When you are designing an infrastructure the first thing you need is an architecture diagram. There are various tools that can be used to build an Oracle OCI Architecture diagram like Visual Paradigm, Draw.io graphics, Cacoo template, OKIT, and many more. These tools are really helpful in understanding and preparing an OCI infrastructure diagram. These diagrams are a great way to represent the overall design, deployment, and topology and provide a bird’s eye view on the architecture.
From all the tools mentioned above, OKIT might be the best as it was released recently and offers much more than the other tools. In this blog, we will be discussing:
- Overview of OKIT
- Interface of OKIT
- Steps to Install OKIT
- Accessing OKIT from your browser
- Creating a Custom Template
Overview Of OCI OKIT
OCI Designer ToolKIT (OKIT) is an Open-Source browser-based Design tool for OCI which provides a very fast designing of a complete OCI based Infrastructure. It is a Drag and Drop application through which admins can prepare an OCI based Infrastructure and can also export it in Ansible / Terraform scripts.
It is a graphical environment through which you can create and visualize OCI environments by using your web browser. The interface is extremely simple and easy to use which makes it fast to deploy and use. It allows designers or architects to visualize and create an infrastructure and then let them export in different formats such as:
- SVG
- png
- jpeg
This toolkit can further be used to add key property information to the build infrastructure which can further be exported to different frameworks like:
- Ansible
- Terraform
- OCI Resource Manager
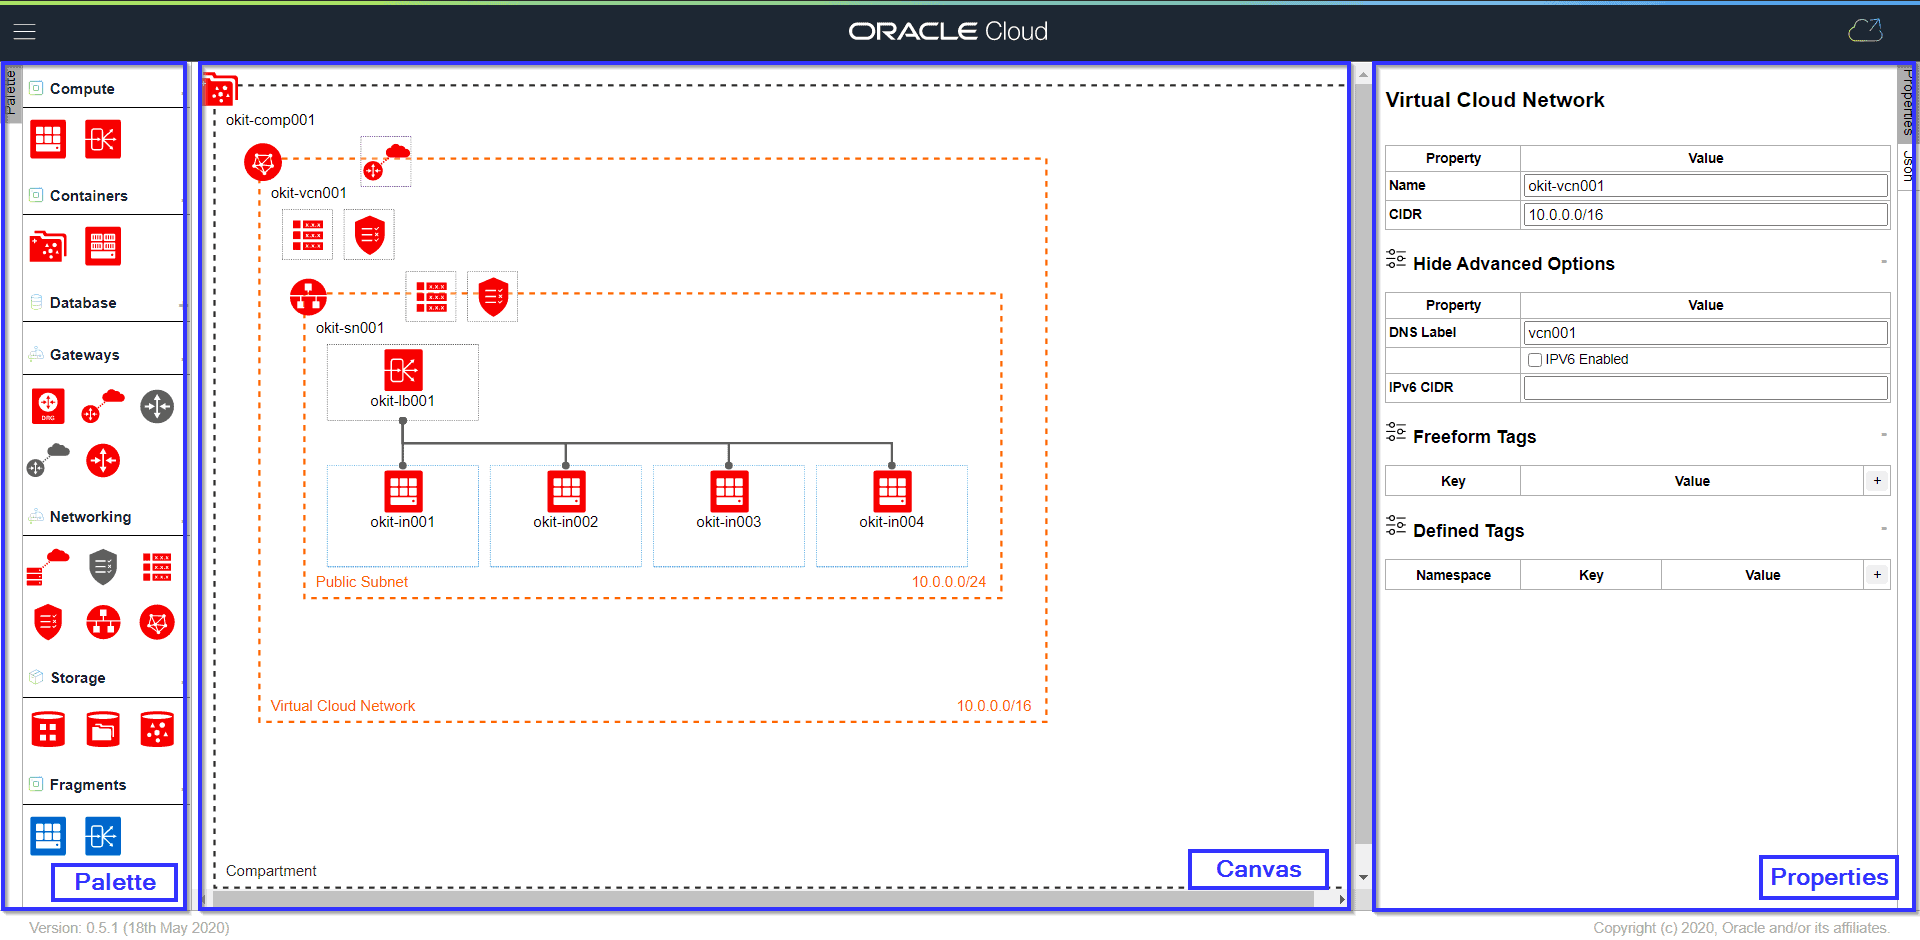
Interface Of OKIT
The OCI Designer ToolKIT provides a simple and minimalistic interface which can be divided into three parts.
Also Check: Our blog post on Oracle Cloud Infrastructure Tagging. Click here
Palette
It is present on the left side of the screen on which you have access to different OCI artefacts. These icons can be dragged and dropped into Canvas to build an infrastructure.
Canvas
Present on the center of the screen where the infrastructure diagram is built. Initially, it will only have a compartment and you will have to drag and drop artefacts from the palette.
Properties
On the right side of the screen, we have Properties slide-out panel through which you can edit the properties if the selected artefacts which will then be implemented when we export them for different frameworks.
Also read: Everything you need to know about OCI IAM
Steps To Install OKIT
Step 1: Connect to your instance(on which you want to install OKIT) using PuTTY.

Step 2: Install Git using the below commands:
$ sudo yum install -y git

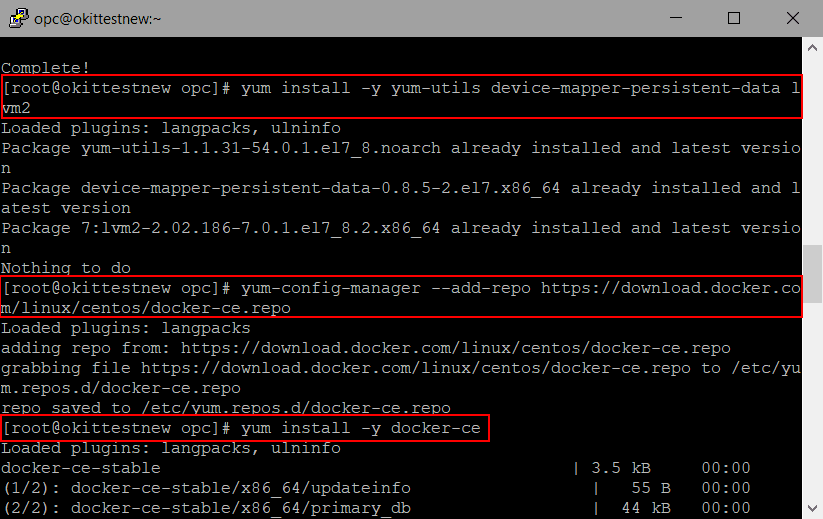
Step 3: Install Docker using the below commands:
$ sudo yum install -y yum-utils device-mapper-persistent-data lvm2
$ sudo yum-config-manager --add-repo https://download.docker.com/linux/centos/docker-ce.repo
$ sudo yum install -y docker-ce
$ sudo systemctl start docker
Also Check: Oracle Virtual Networking
Step 4: Install CLI using the below command:
$ bash -c "$(curl -L https://raw.githubusercontent.com/oracle/oci-cli/master/scripts/install/install.sh)"

When prompted for Install directory and every other resource path, Press Enter (choose the default).
When prompted for ‘Y/N’ for $Path, Enter Y, when prompted for a path for RC file Press Enter (choose the default).
Once it is installed, check the OCI CLI Version by typing:
$ oci -v

Step 5: Now we need to configure OCI to create OCI config file. Use the below command
$ oci setup config
When prompted for directory press ENTER (choose Default) then paste the OCID of the user, tenancy and then write the region.
Press Y and then Enter when asked for new API Signing Key. Leave directory, name, and passphrase empty.
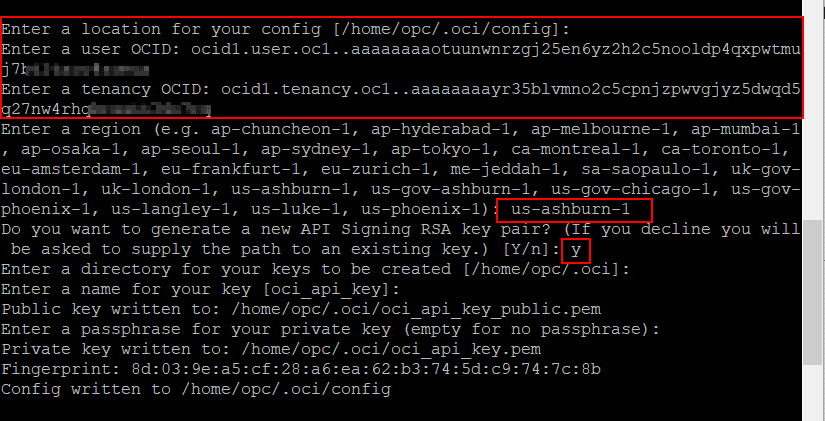
This will configure the OCI config file.
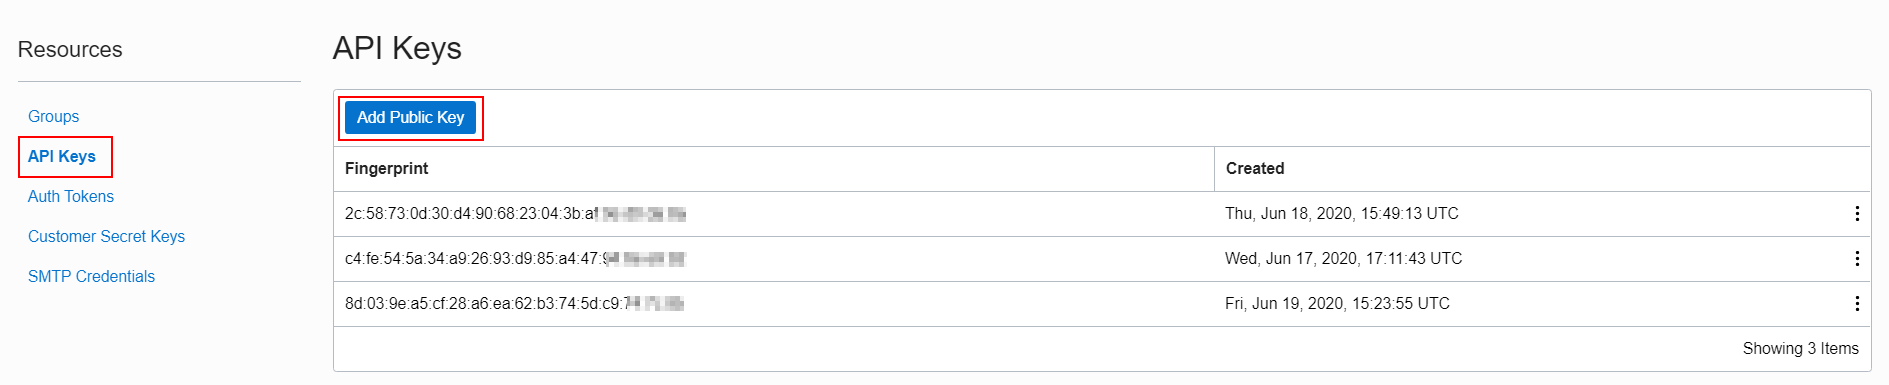
Now add the newly created public key into API keys present under your User.
Read More:Oracle Cloud Storage Gateway
Step 6: Clone OCI Designer toolkit form Git using the below command:
$ git clone -b v0.5.1 --depth 1 https://github.com/oracle/oci-designer-toolkit.git
Once it has been cloned, change directory to oci-designer-toolkit and build the Docker image using these commands:
$ cd oci-designer-toolkit
$ sudo docker build --tag okit --file ./containers/docker/Dockerfile --force-rm ./containers/docker/

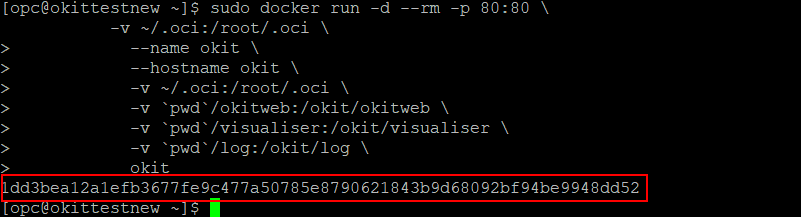
$ sudo docker run -d --rm -p 80:80 \
           --name okit \
           --hostname okit \
           -v ~/.oci:/root/.oci \
           -v `pwd`/okitweb:/okit/okitweb \
           -v `pwd`/visualiser:/okit/visualiser \
           -v `pwd`/log:/okit/log \
           okit
Accessing OKIT From Your Browser
Once you have configured OKIT on your instance you just need to check if your Security List allows it to connect to it.
So, go into you OCI account and Security List of your Public Subnet and add an Ingress Rule as shown below:
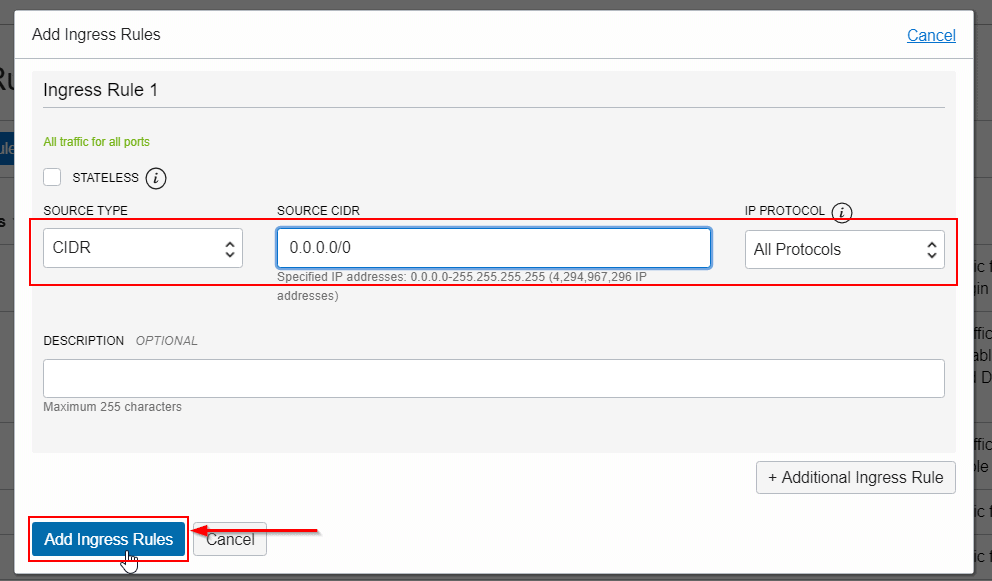
Once you have added this Rule, you can now access it from your Local machine’s Browser from the below URL:
http://<Instance’s Public IP>/okit/designer
Also Check: Oracle OCI CLI. Click here
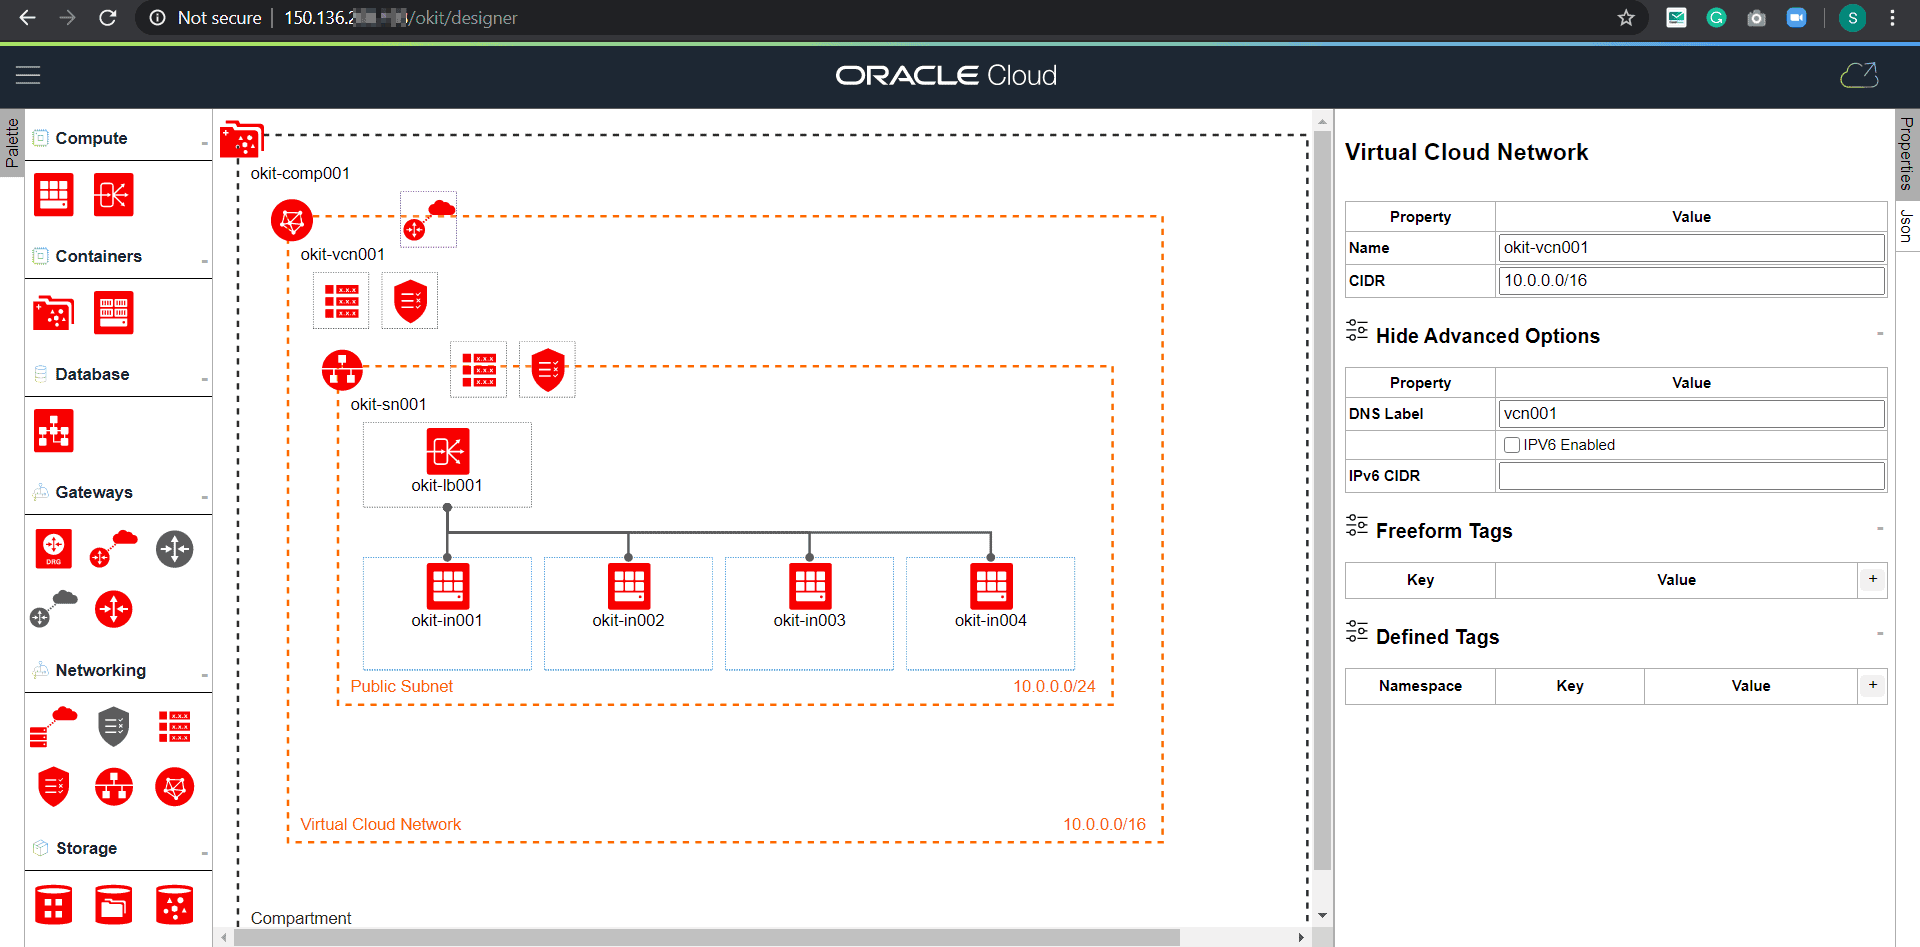
Creating A Custom Template
OKIT lets you build and save a custom template. Creating a template is very easy and fast using this toolkit. Let’s take an example of a Load Balancer front-ending a pair of instances.
Select “New” from the menu and use the Drag & Drop features of OKIT to create the following architecture.
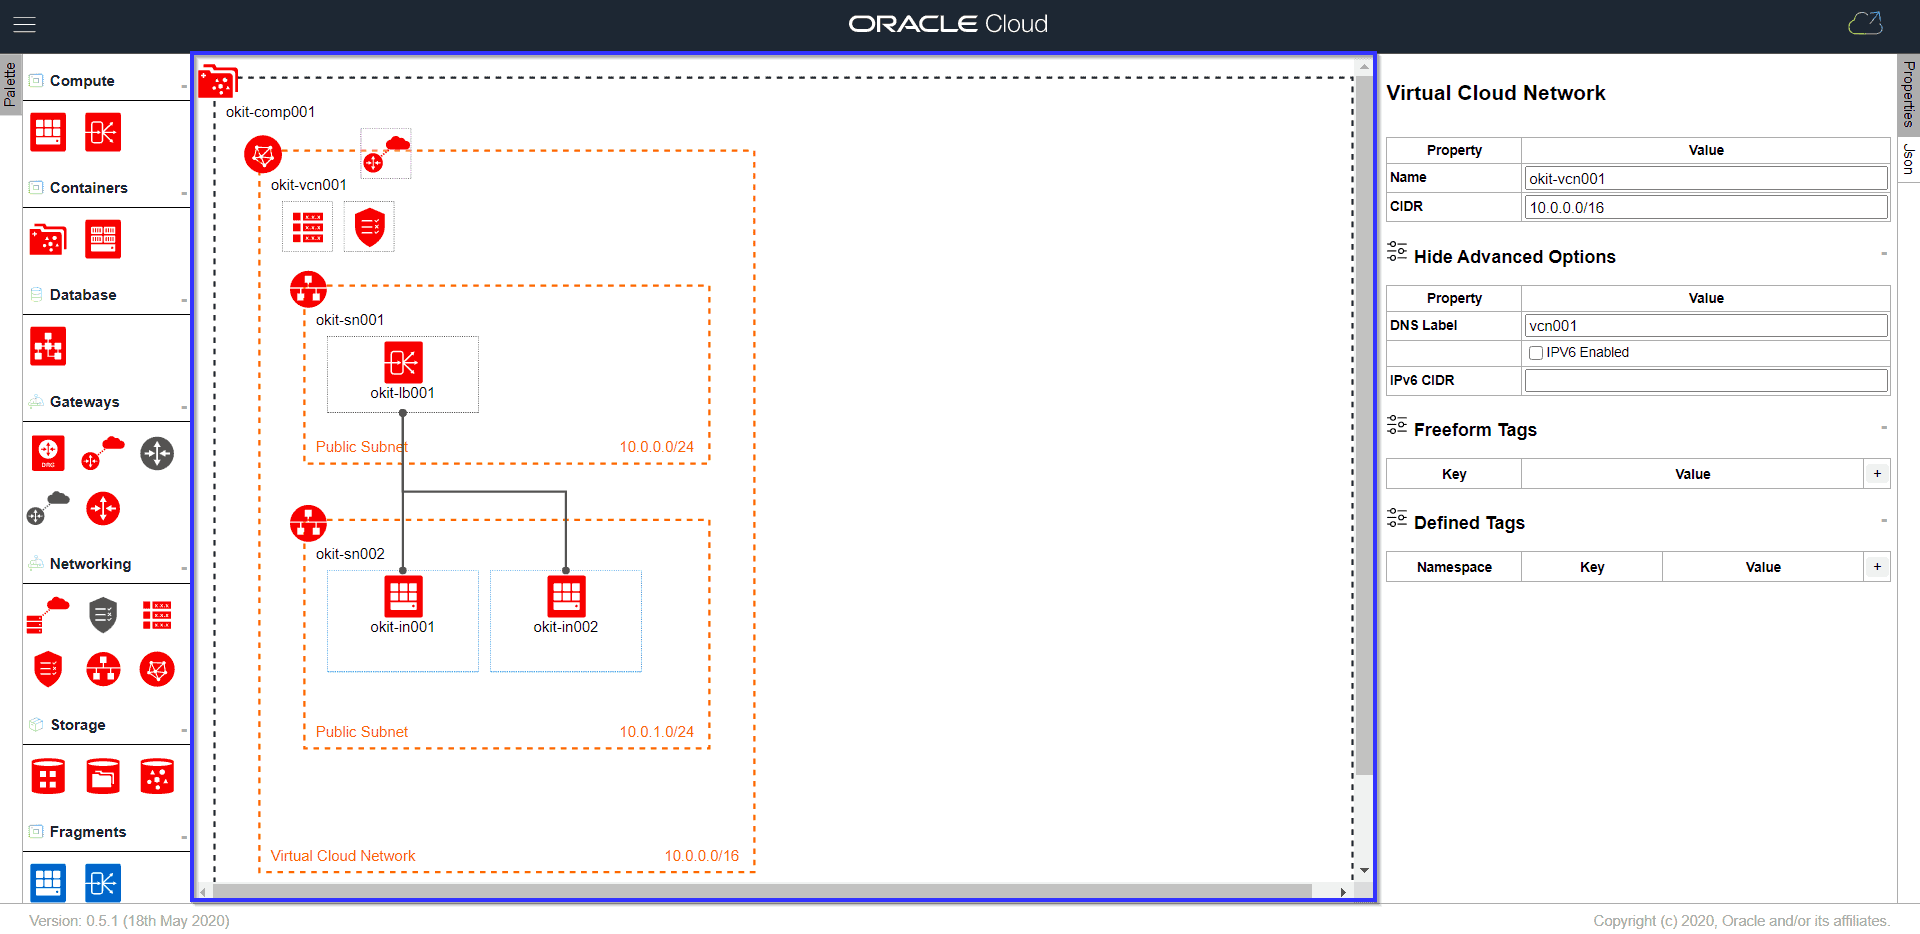
You can now save the diagram and it will be available to resue.
Related/Further Readings
- Oracle cloud infrastructure compartments – User, Groups, Compartment, Policy, Tags, Federation & MFA
- Oracle Cloud Infrastructure (OCI): Region, AD, Tenancy, Compartment, VCN, IAM, Storage Service
- OCI Regions | OCI Availability Domain | Oracle Cloud Region | OCI Realms
- Gateways In OCI
- Storage In Oracle Cloud (OCI)
- Oracle Cloud Infrastructure 2022 Architect Associate Certification
- Oracle Cloud (OCI): How To Recover SSH Keys In Compute Instance
- Overview Of Policy & How It Work In Oracle Cloud (OCI)
Begin Your Cloud Journey
Begin your journey towards becoming a Certified Oracle Cloud Infrastructure Architect and earning a lot more in 2022 by joining our FREE CLASS. You will also know more about the Roles and Responsibilities, Job opportunities for OCI Architects in the market, and what to study Including Hands-On labs you must perform to clear the Oracle Cloud Architect Associate Certification (OCI) certification exam by registering for our FREE Masterclass.
Click on the below image to Register Our FREE Class on Master Oracle Cloud (OCI) and Get a Higher Paying Job!

![Microsoft Agentic AI Business Solutions Architect [AB-100] | K21 Academy](https://test.k21academy.com/wp-content/uploads/2025/11/Microsoft-Agentic-AI-Business-Solutions-Architect-AB-100-Exam-Overview1.png)