


![]()
Organizations may need to fetch and load data to their Power BI from distant locations, and sometimes network issues can result in data loss. This blog will show you the use of Power BI Gateway and how you can install and configure it for your systems with the following topics covered.
- What is Power BI Gateway?
- Types of Power BI Gateway
- Power BI Gateway Download and Installation
- Configure Power BI Gateway
- Conclusion
What is Power BI Gateway?
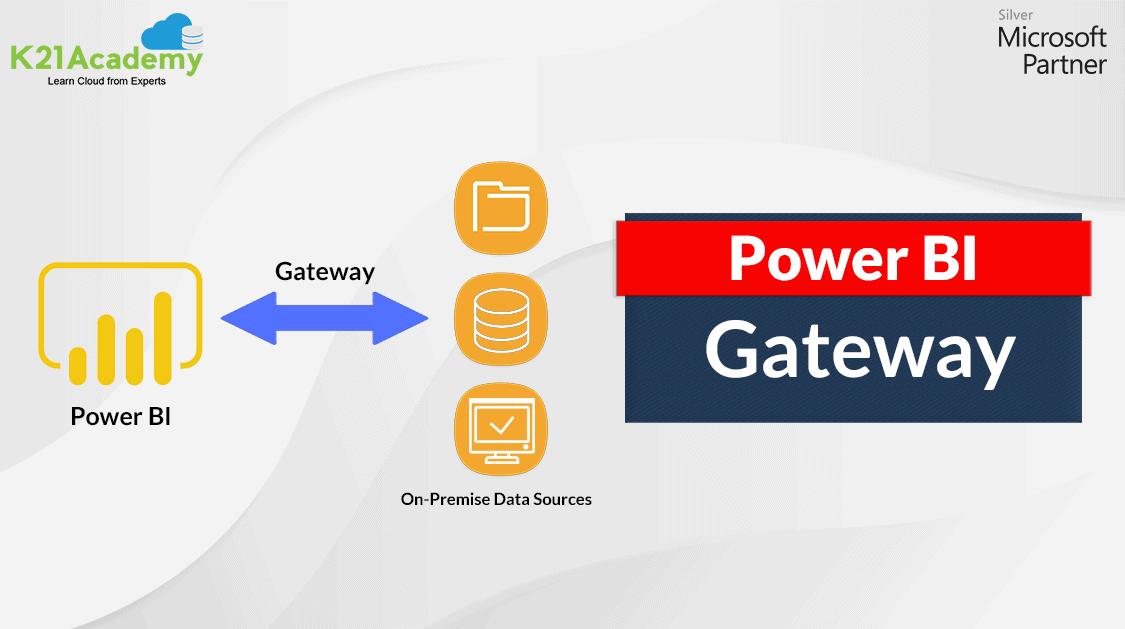
Power BI Gateway is the software required to access data from the on-premises network. The request always goes through a Gateway to access the on-premises data from a cloud. For fast and secure data transfer between on-premises, installing a gateway on servers where data is present is preferred.
The purpose of the gateway is to access the data present in the on-premise server. It allows organizations to keep their data safe on-premises and can access the data securely when needed. It makes data transfer much faster when the server containing data is far from reach. Also, it helps access data from various Microsoft cloud services like Power BI, Power Automate, Power Apps, Azure Analysis Service, and Azure Logic Apps.
Types of Power BI Gateway
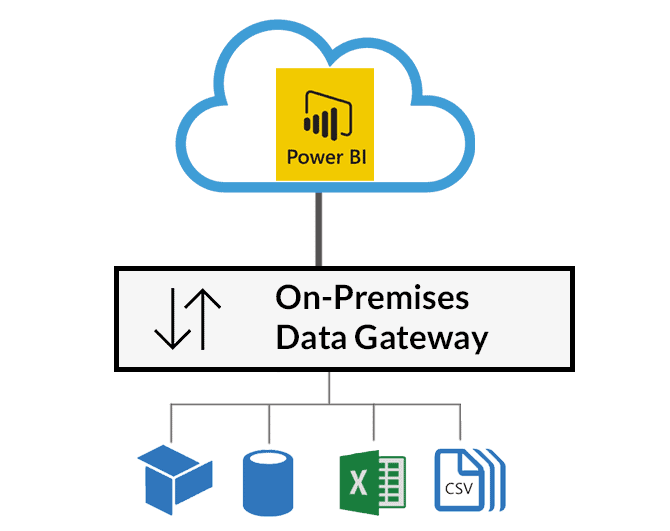
- On-Premises Data Gateway allows multiple users to connect to multiple on-premises data sources. With a single installation, a user can use the data gateway with all on-premises supported services. This data gateway is perfectly suited for the scenario where multiple people access multiple data sources.
- On-Premises Data Gateway (Private) allows users to connect to sources privately and can’t be shared with others. A personal data gateway is used with Power BI only. A private data gateway is perfectly suited for the scenario where you’re the only person who creates reports, and you don’t need to share any data sources with others.
- Virtual Network Gateway allows multiple users to connect with multiple data sources secured by virtual networks. It doesn’t require any installation as it is Microsoft managed service. It is suited for complex scenarios where multiple people can access multiple data sources.
Power BI Gateway Download and Installation
The download and installation process is simple. Visit and log in to your Power BI account and follow the steps listed below.
Note: The Power BI Gateway is downloaded on the machine where data is present.
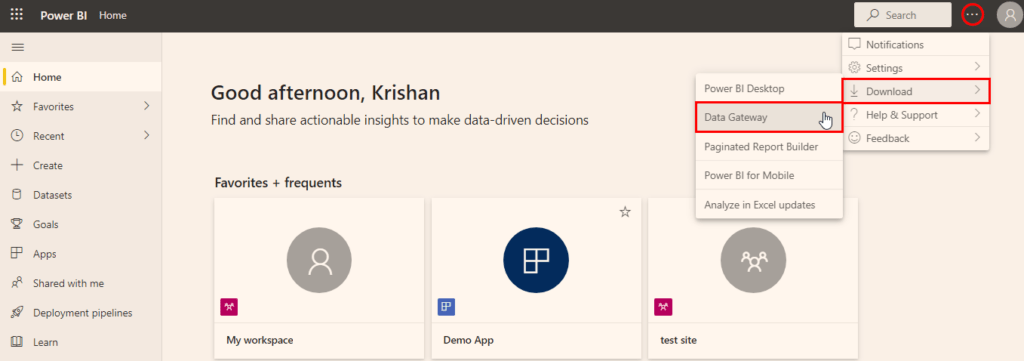
Step 1) After signing in to Power BI, click on the menu as highlighted in the above image. Click on Download and then Data Gateway.

Step 2) Power BI will open a new tab to show you some options for the type of download. Standard Mode will download the complete on-premises gateway, whereas Personal Mode will download the private gateway. I will be using the Standard Mode so click on it. For the Standard Mode, the software to be downloaded will be 300-400 MB in size.
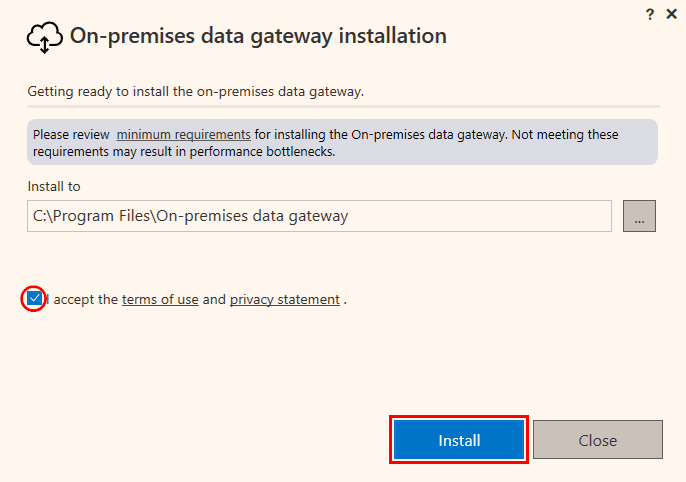
Step 3) After the download is complete, choose your preferred install location, accept the terms and click on the Install button as shown in the above image.
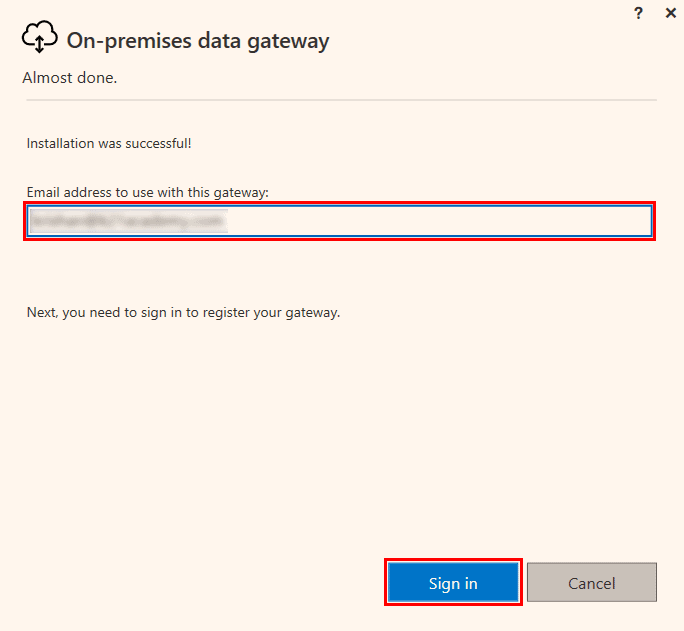
Step 4) Enter the same email address you used to sign for Power BI and click on the Sign-in button. A new window will pop up to confirm the sign-in with your password.
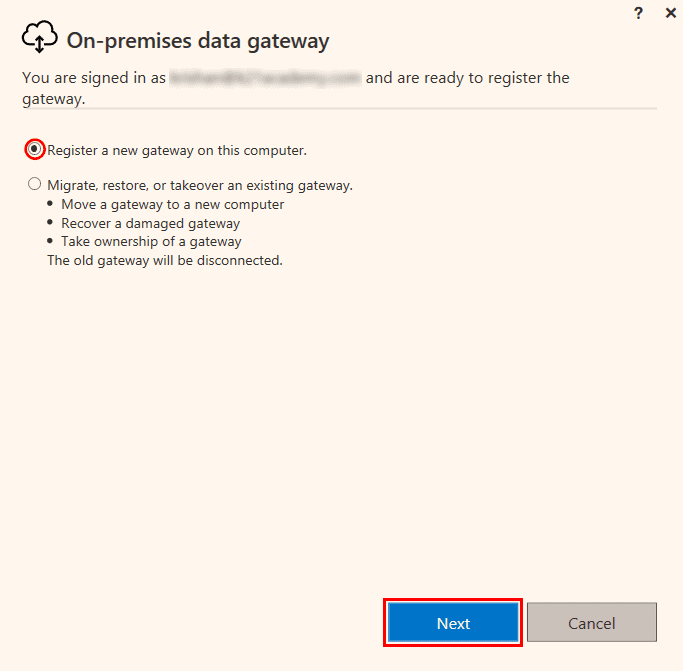
Step 5) Select the ‘Register a new gateway on this computer‘ button if there is no prior gateway installed already on the system. Click on the Next button after the appropriate selection.
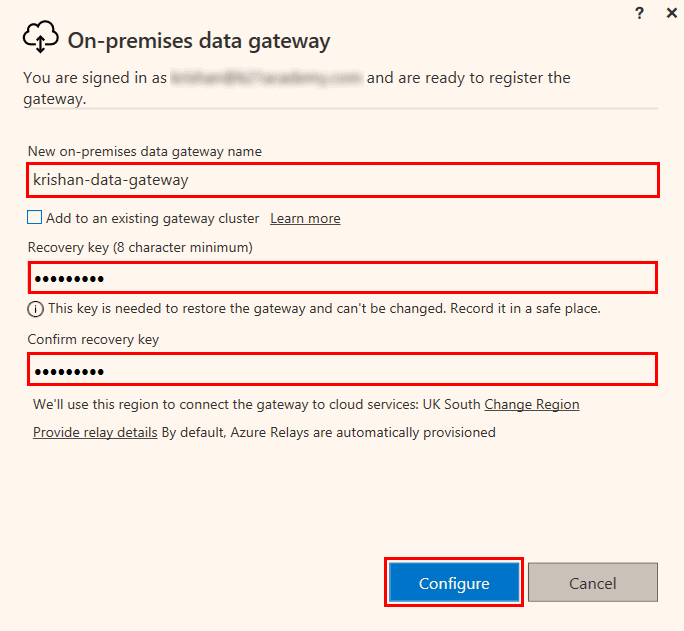
Step 6) In the next window, you need to fill up the details for your gateways, like the gateway name and the recovery key. Remember this recovery key, as it will help you to manage your gateway in the future if you ever get locked out.
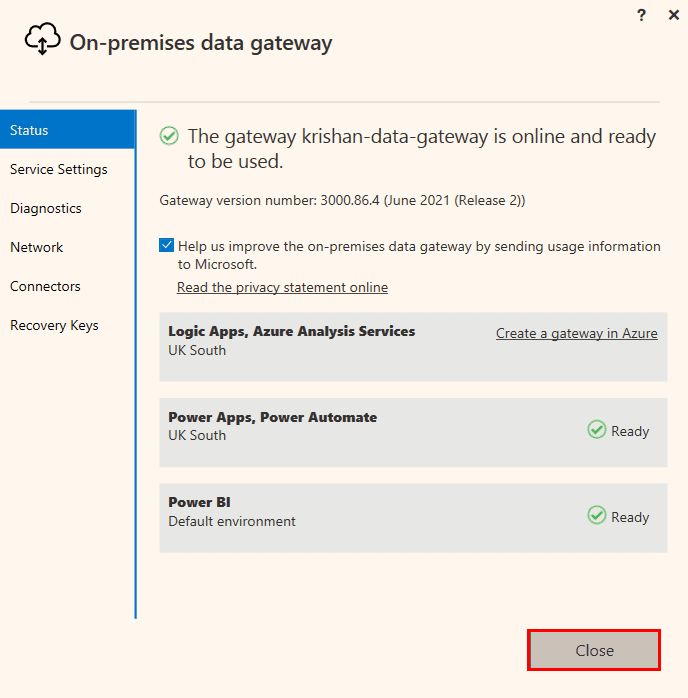
Step 7) The gateway is now created, and all the details of the gateway are shown in front of your screen. The creation and configuration of Gateway on the machine are now complete. Click on the Close button.
After completing all the above steps, the download and installation of a gateway to a system are successful.
Configure Power BI Gateway
After installing the gateway on the machine, Power BI needs to be configured for accessing data. See the below steps for configuring the gateway in Power BI.

Step 1) Log in to your Power BI again and open the menu. Now, visit the settings and click on Manage Gateways.
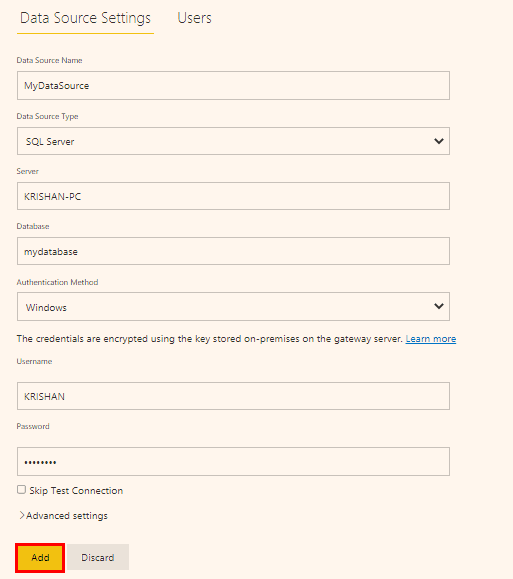
Step 2) The gateway you created is already updated here. Now fill up the data source settings as shown in the above image. You can select any data source like SQL Server, Files, and Folders present on your machine. For SQL Server, enter the server name and database name. Now, select the authentication method like windows and enter your credentials like username and password. After filling in all the required details, click on Add button, and your connection to the gateway will be ready. For a successful connection, the data source details should be correct.
So by completing the above steps, a gateway is configured and connected with Power BI to fetch data from on-premise.
Conclusion
Power BI Gateways are helpful for a secure data transfer from various on-premises data locations. It makes data transfer much faster and also results in better data updates. This blog covered the overview and the need for a Power BI Gateway with a step-by-step tutorial for download, install and configuration on your system.
This blog only covered the overview of Power BI Gateway. If you want to learn more about Power BI and become a certified data analyst, check our Microsoft Certified Power BI Data Analyst Associate Certification course.
References
- Introduction to Microsoft Power BI Platform | Everything You Must Know
- Exam PL-300: Microsoft Power BI Data Analyst | A Replacement Of DA-100
- Microsoft Certified Data Analyst Associate [PL-300] Step By Step Activity Guides (Hands-On Labs)
- Case Study: Display Live Data Streaming Using Power BI Service
- Introduction to Data Modeling in Power BI
- What is Power Query | Microsoft Azure Power BI Tool
- Top 15 Differences Between SSRS vs Power BI
- How to Become a Power BI Developer?
Next Steps to begin with PL-300 Certification:
In our PL-300 Certification Training Program, we’ll cover 10+ Hands-On Labs. If you wish to start your journey towards becoming a Microsoft Certified: Power BI Data Analyst Associate, try our FREE CLASS.

![Microsoft Agentic AI Business Solutions Architect [AB-100] | K21 Academy](https://test.k21academy.com/wp-content/uploads/2025/11/Microsoft-Agentic-AI-Business-Solutions-Architect-AB-100-Exam-Overview1.png)