


![]()
This blog will cover a basic overview of how Git can be used to implement a Branching Strategy in an Azure Environment.
This blog talks about technologies that are part of the Azure DevOps environment. If it’s something in which you have an interest or you want to learn it then you can visit our previous blog to know more about the [AZ-400] Microsoft Azure DevOps certification.
Git Branches
Git branches aren’t much more than a small reference that keeps an exact history of commits, so they are cheap to create.
Committing changes to a branch will not affect other branches, and you can share branches with others without having to merge the changes into the main project.
Create new branches to isolate changes for a feature or a bug fix from your master branch and other work.
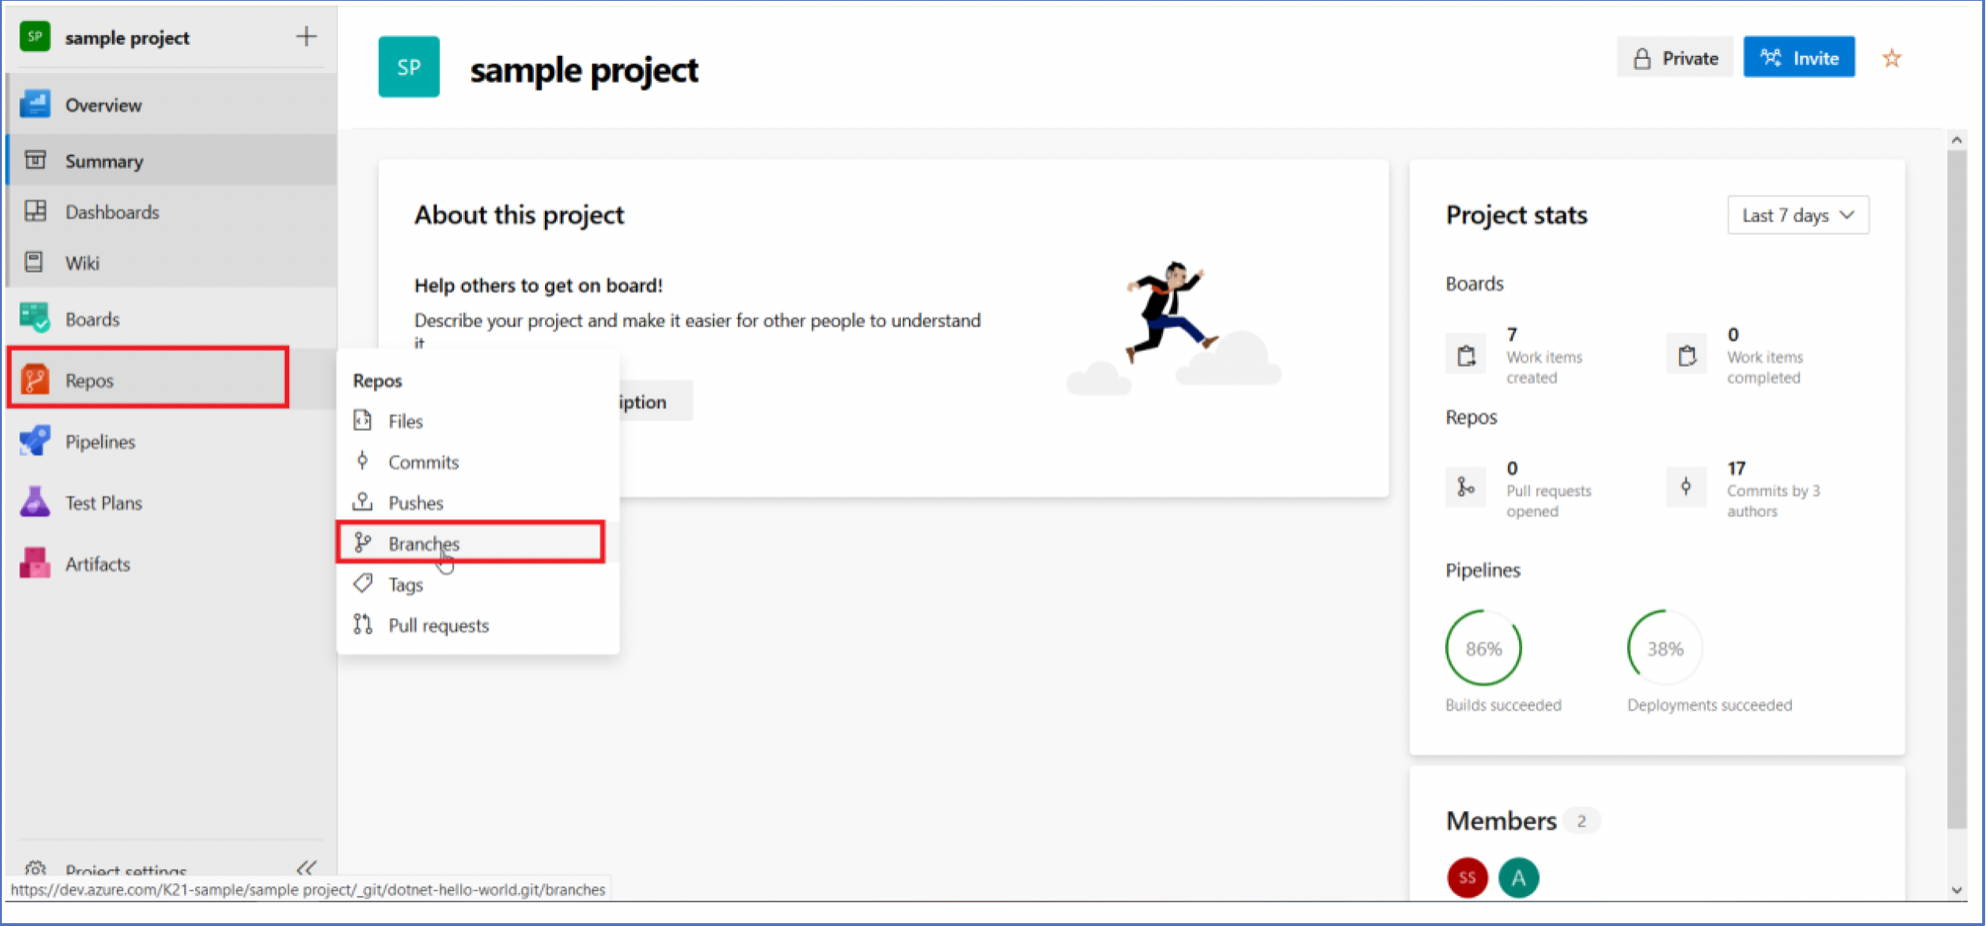

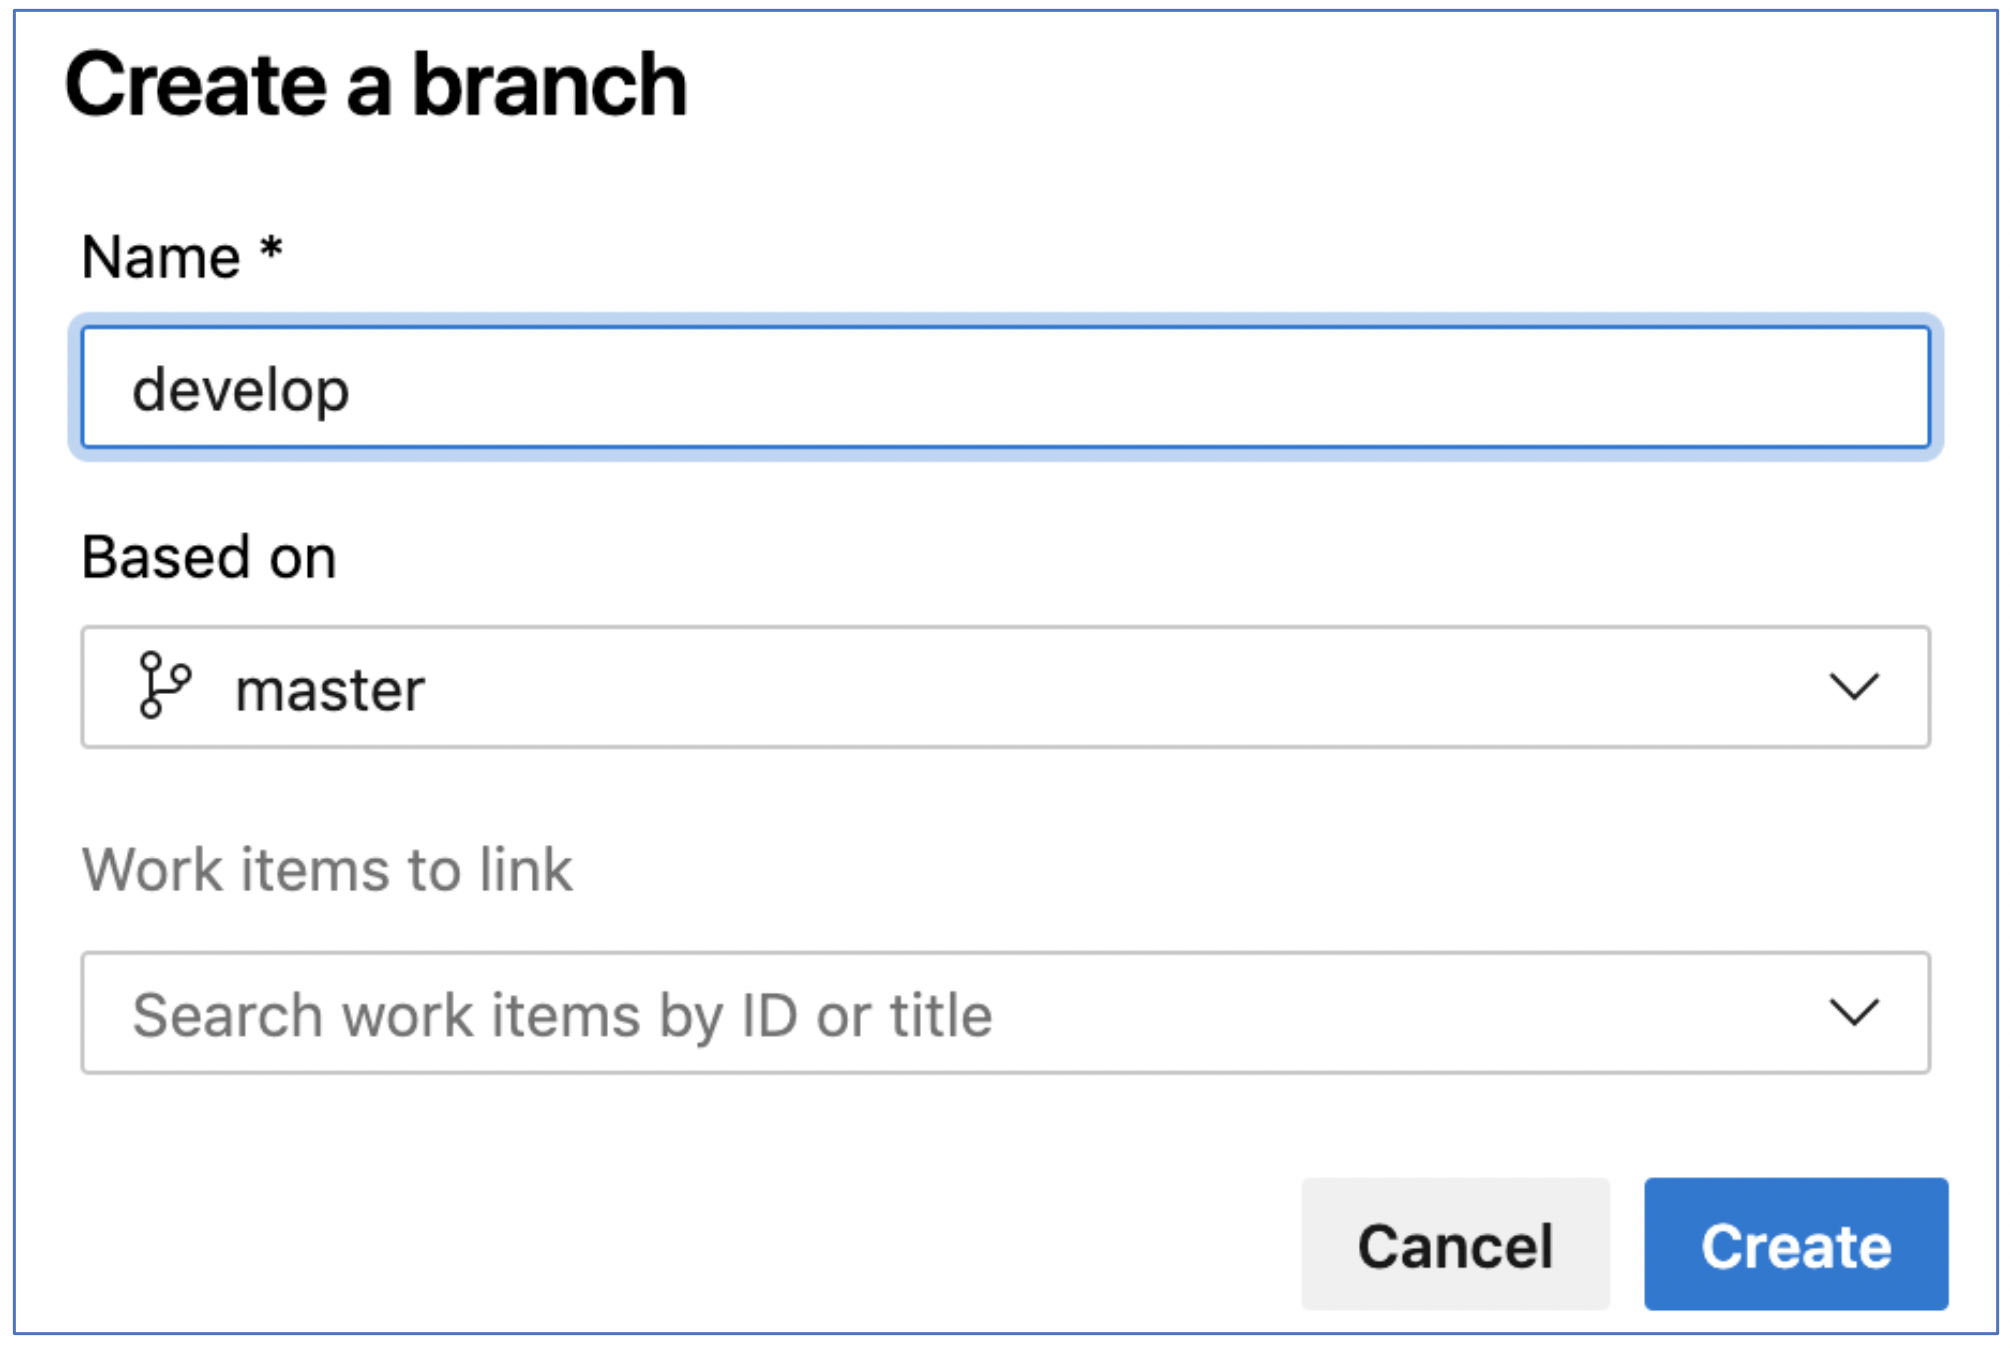
Git Create New Branch


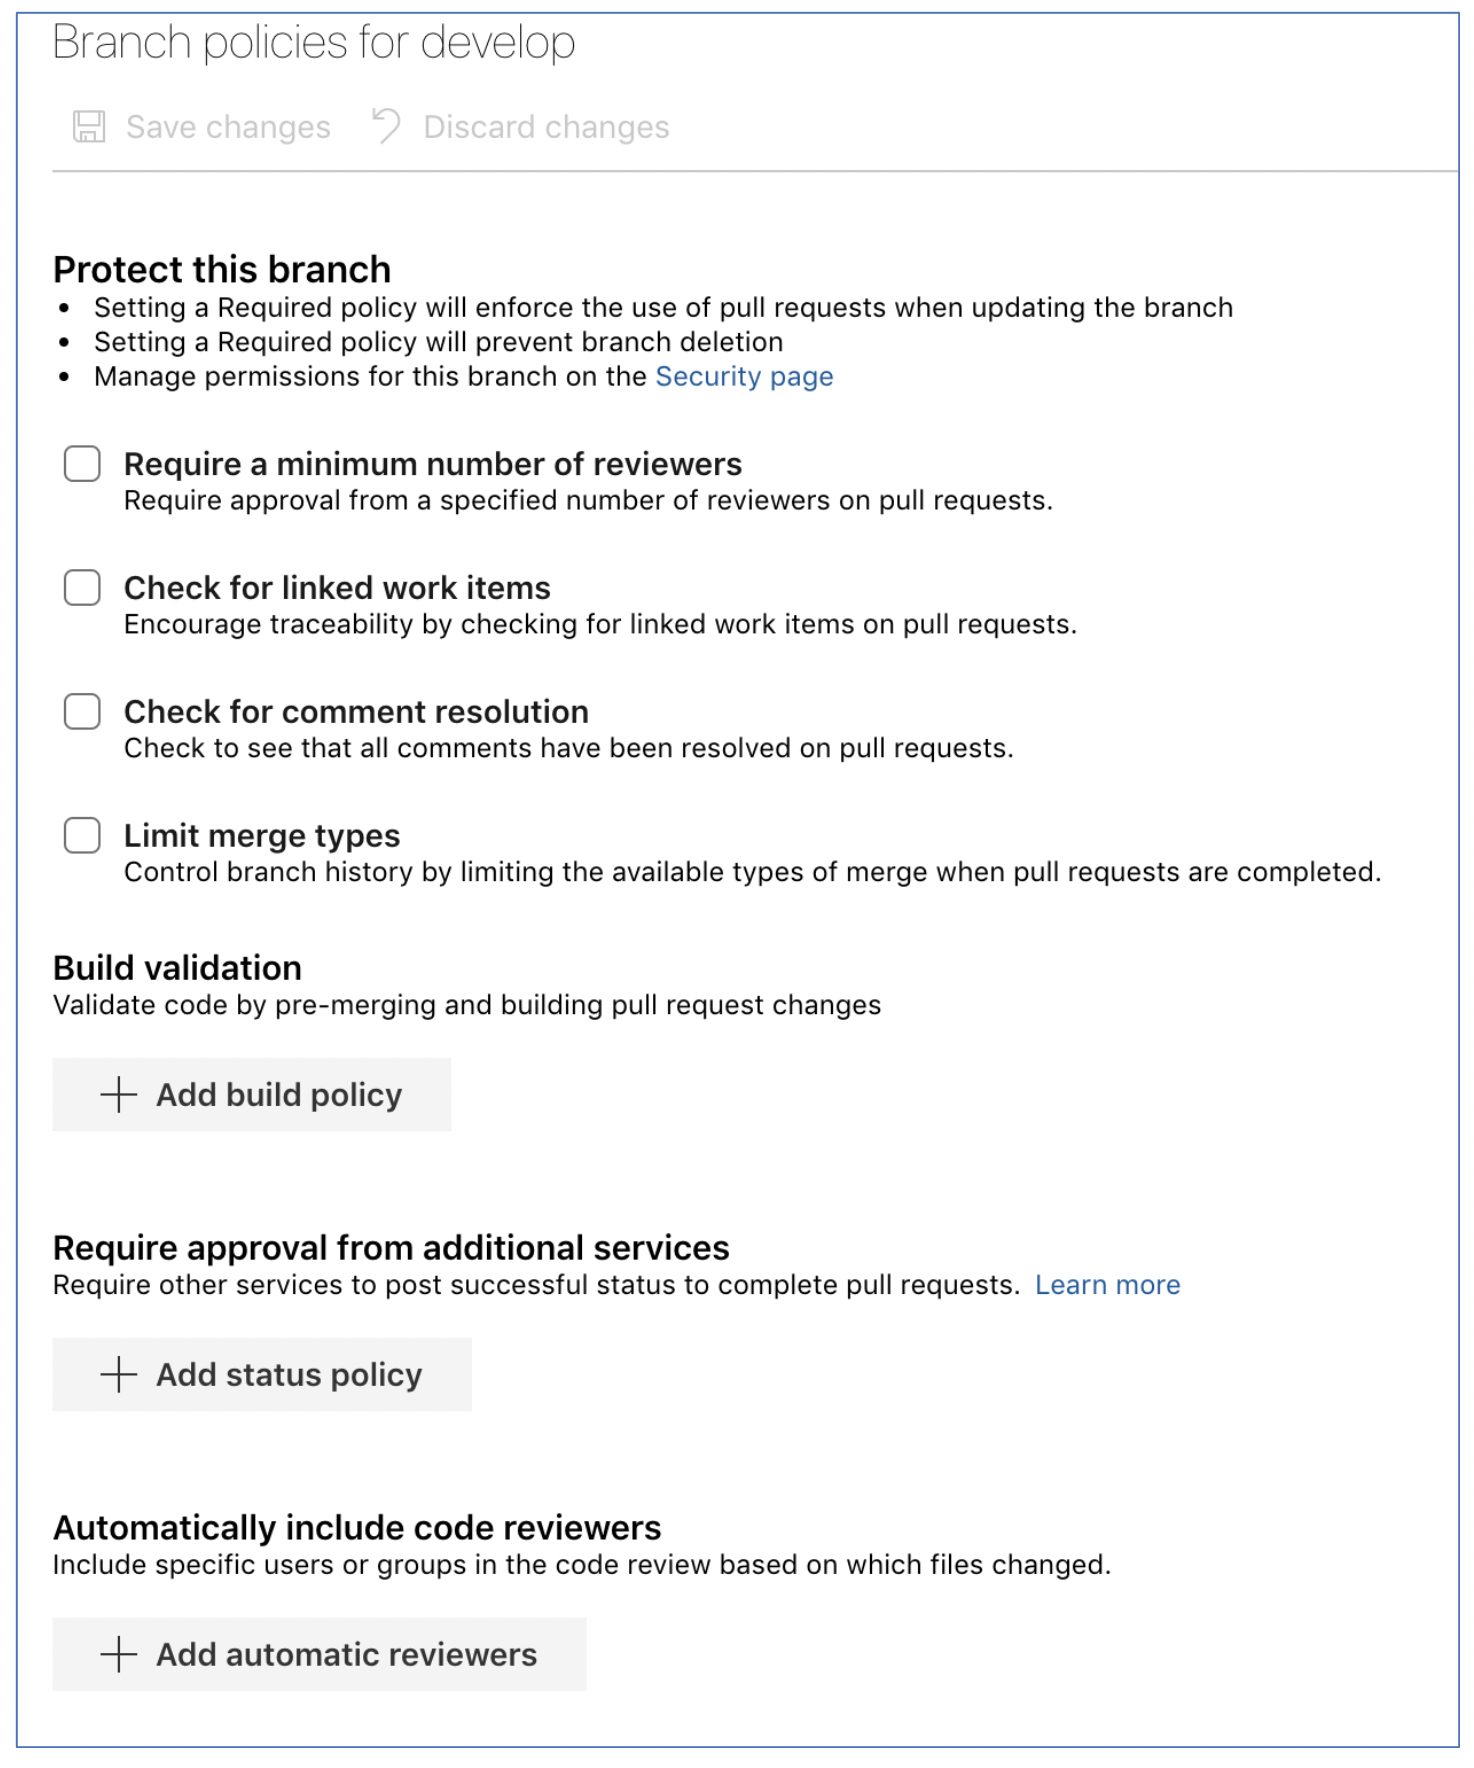
Git Branch Policies
Branch policies are an important part of the Git workflow and enable you to:
- Isolate work in progress from the completed work in your master branch
- Guarantee changes build before they get to master
- Limit who can contribute to specific branches
- Enforce who can create branches and the naming guidelines for the branches
- Automatically include the right reviewers for every code change
- Enforce Git Branching best practices with required code reviewers
Also Read: Our previous blog post on DevSecOps Tools. Click here
Code Reviews
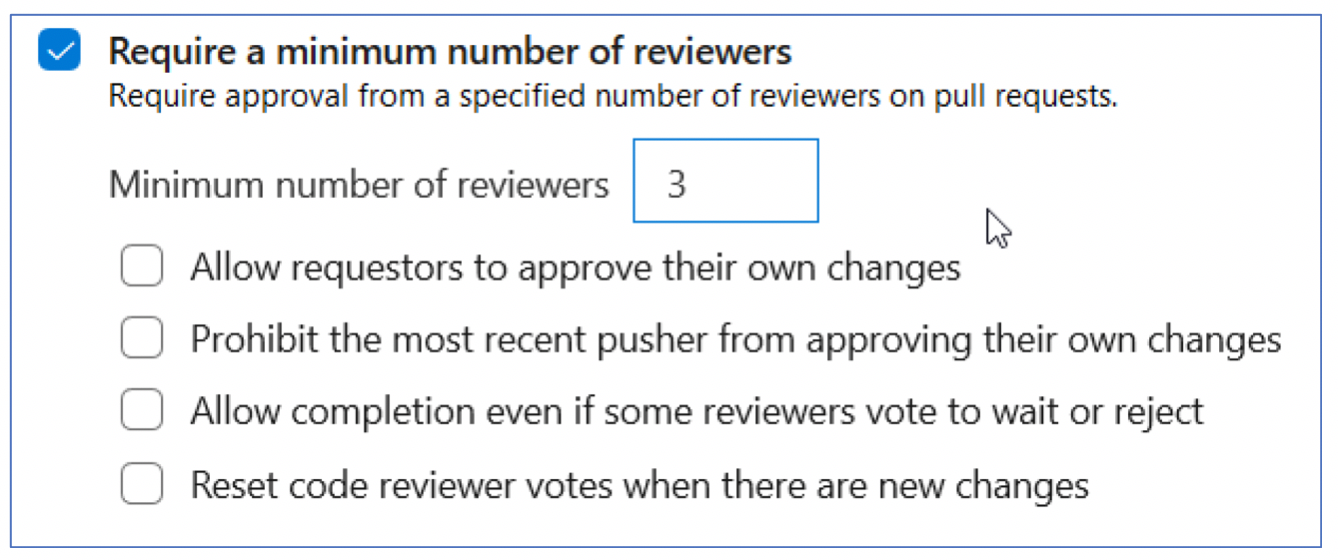
Code reviews are the best practice for most software development projects. To require teams to review their changes before completing a pull request, select Require a minimum number of reviewers.
The basic policy requires that a certain number of reviewers approve the code with no rejections.
If Requestors can approve their own changes isn’t selected, the creator of the pull request can still vote Approve on their pull request, but their vote won’t count toward the minimum number of reviewers.
If any reviewer rejects the changes, the pull request can’t finish unless you select Allow completion even if some reviewers vote to wait or reject.
You can reset code reviewer votes when new changes are pushed to the source branch. Select Reset code reviewer votes when there are new changes.
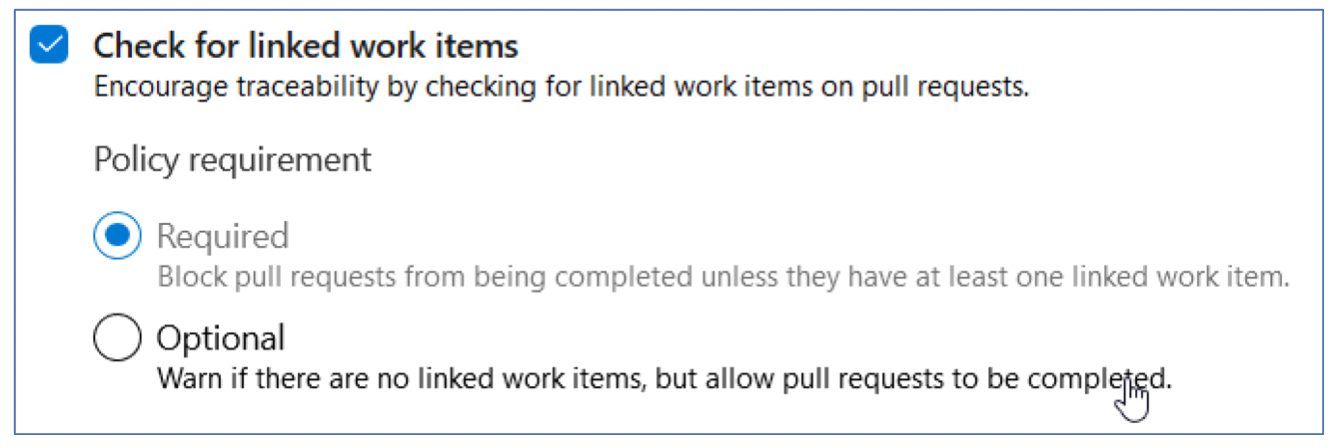
Require associations between pull requests and a work item to ensure that changes to your branch have work item management tracking. Linking work items provide additional context for your changes and ensure that updates go through your work item tracking process.
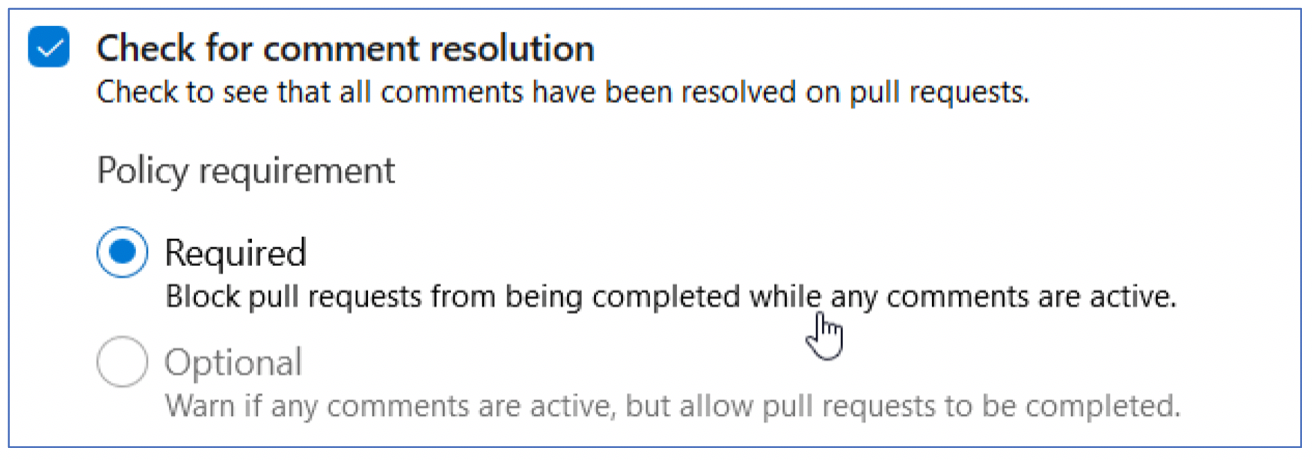
Configure a comment resolution policy for your branch by selecting Check for comment resolution.
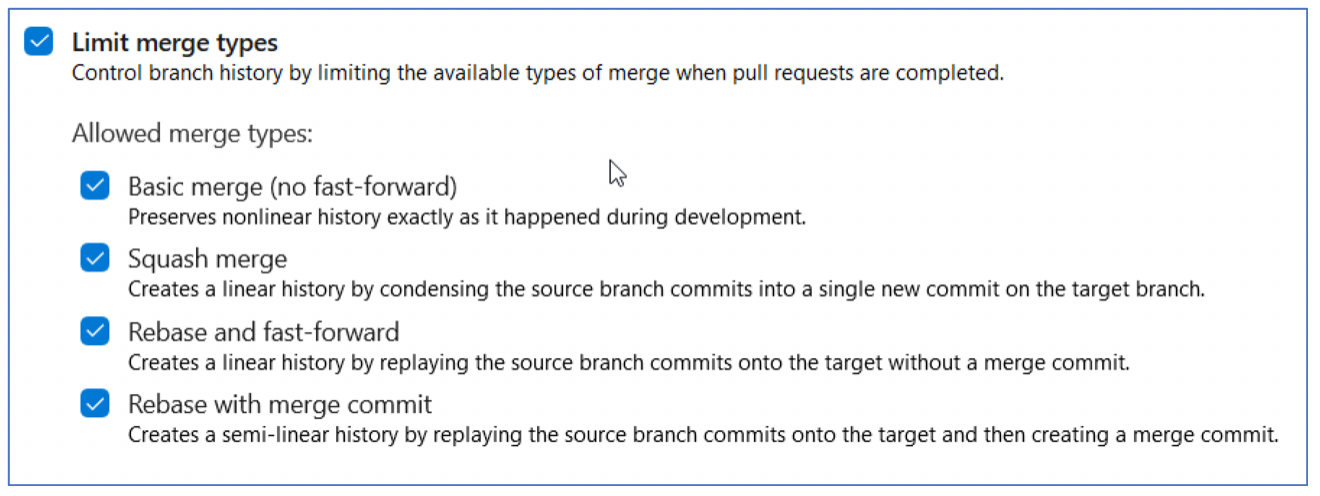
Maintain a consistent branch history by enforcing a merge strategy when a pull request finishes. Select Enforce a merge strategy and pick an option to require that pull requests merge using that strategy.
Set a policy requiring changes in a pull request to build successfully with the protected branch before the pull request can be completed.
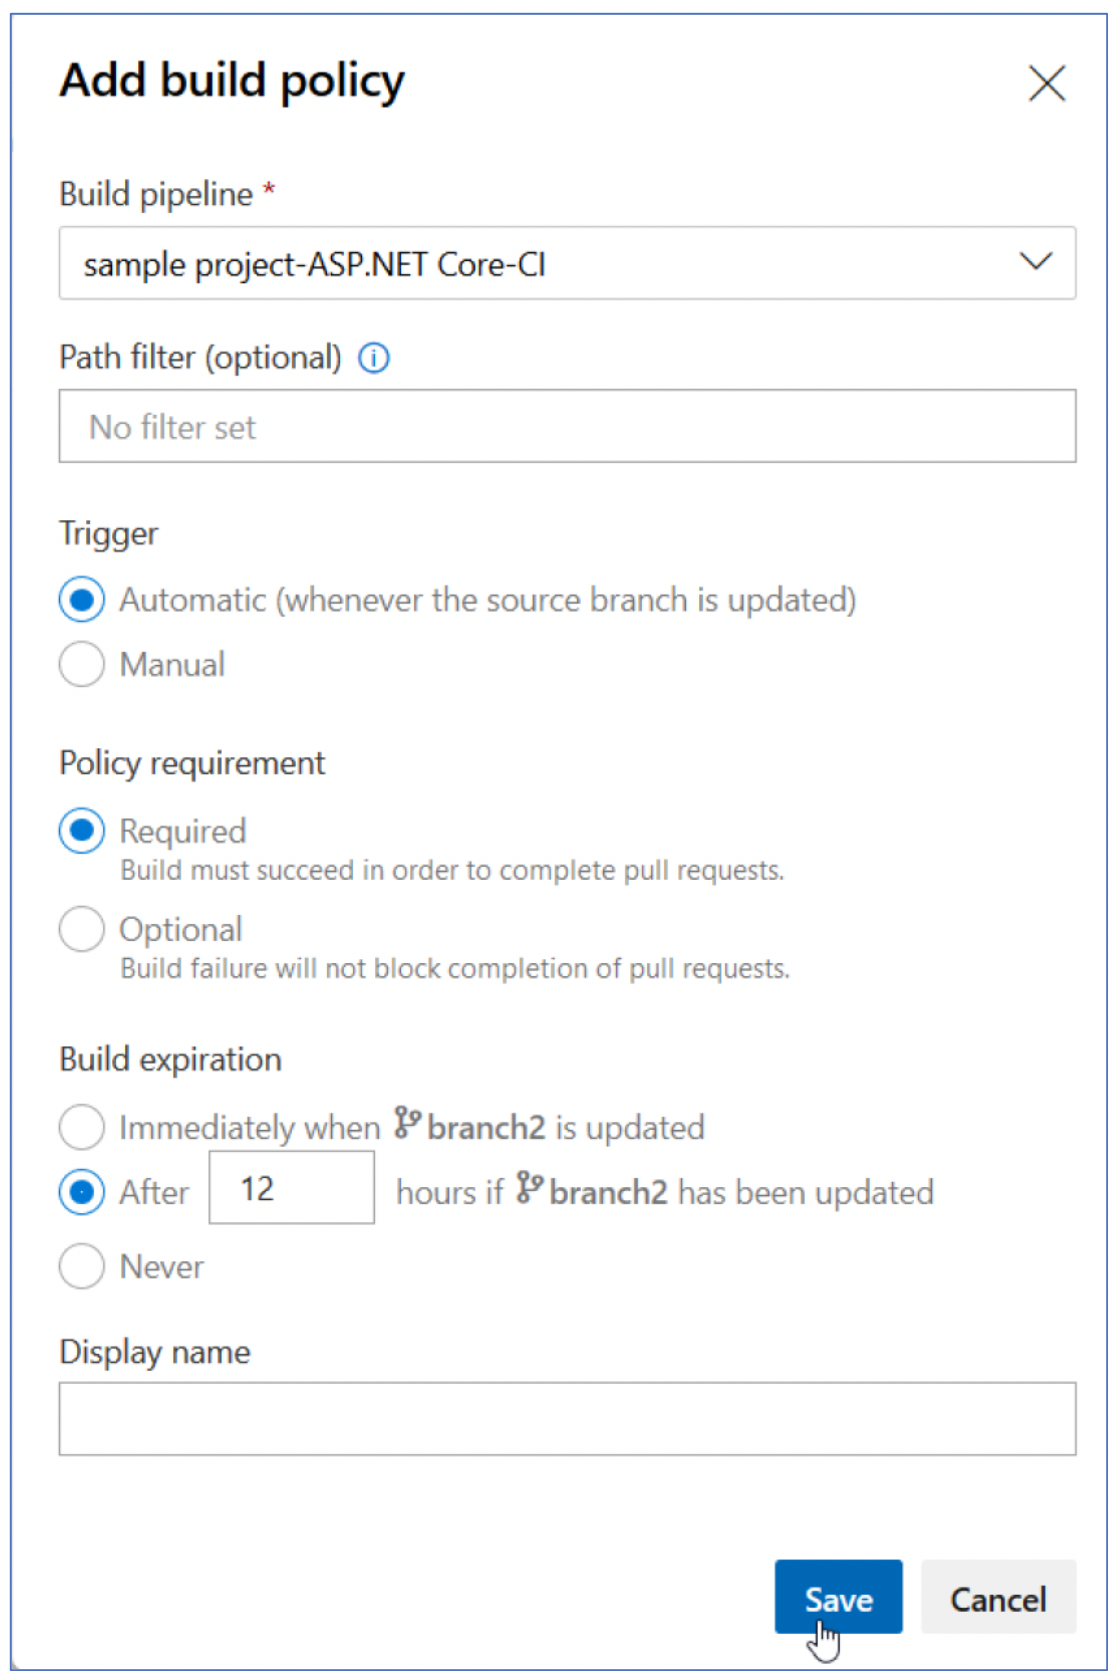
Build Policies
Build policies reduce breaks and keep your test results passing.
Build policies help even if you’re using continuous integration (CI) on your development branches to catch problems early.
External services can use the PR Status API to post detailed status to your PRs.
The branch policy for additional services brings the ability for those third-party services to participate in the PR workflow and establish policy requirements.

Select reviewers for specific directories and files in your repo.
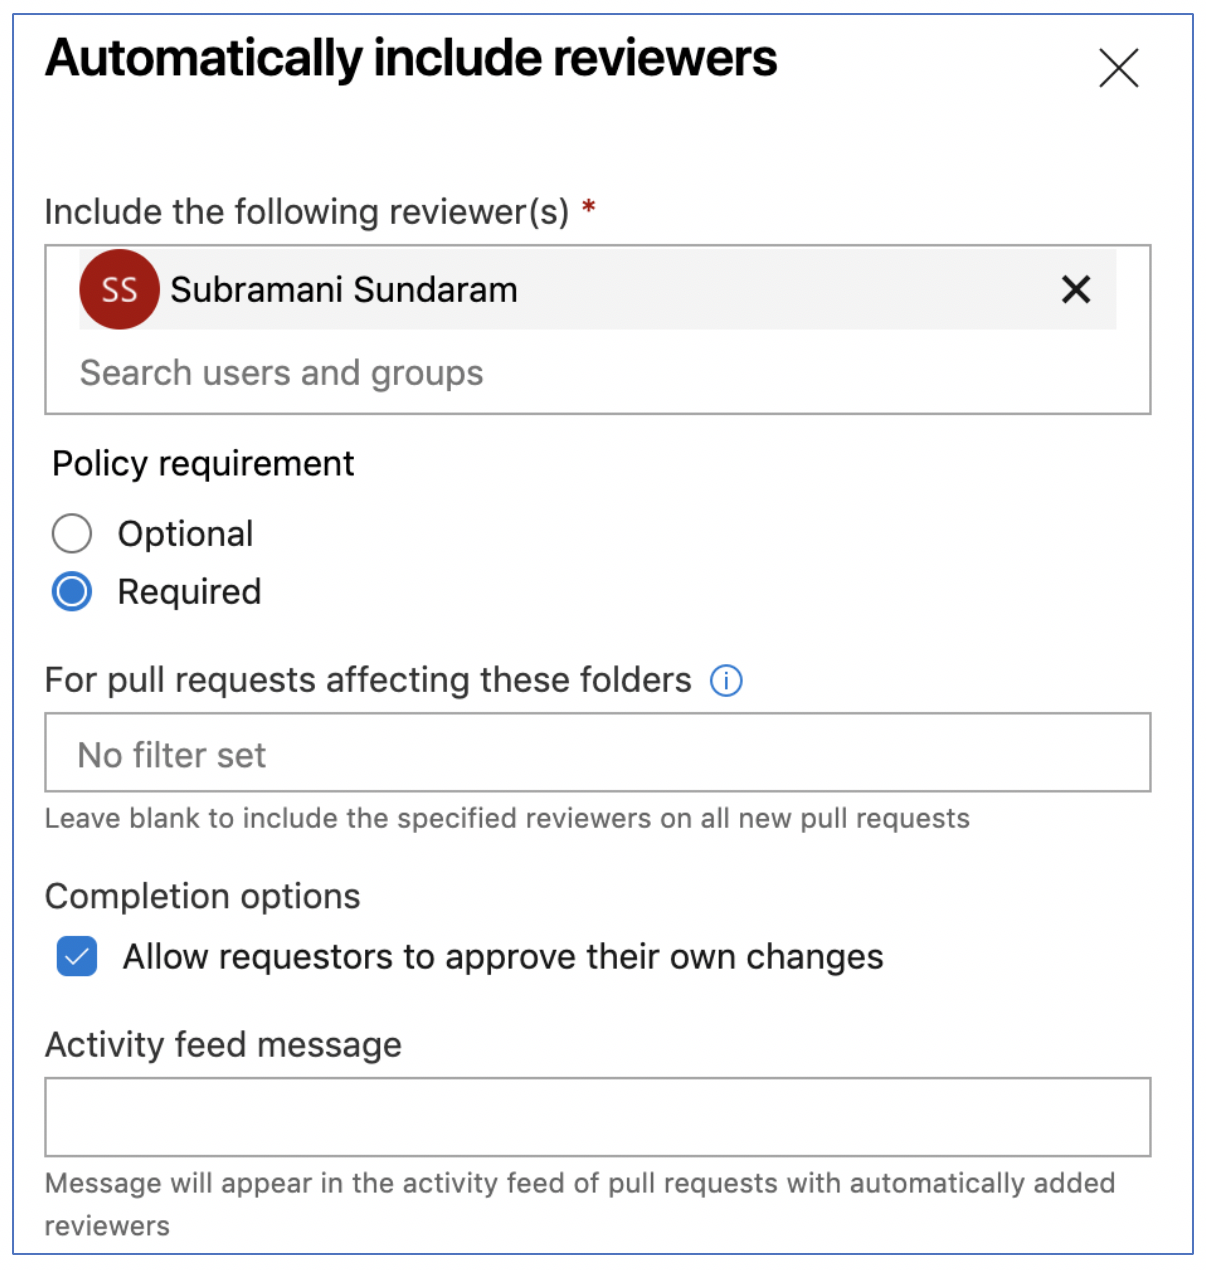
These reviewers are automatically added to pull requests that change files along those paths. You can also specify an Activity feed message.
Bypass Branch Policies
There are several permissions that allow users to bypass branch policy.
In Azure DevOps Services, the Exempt from policy enforcement permission does not exist. Instead, there are two new permissions:
- Bypass policies when completing pull requests
- Bypass policies when pushing
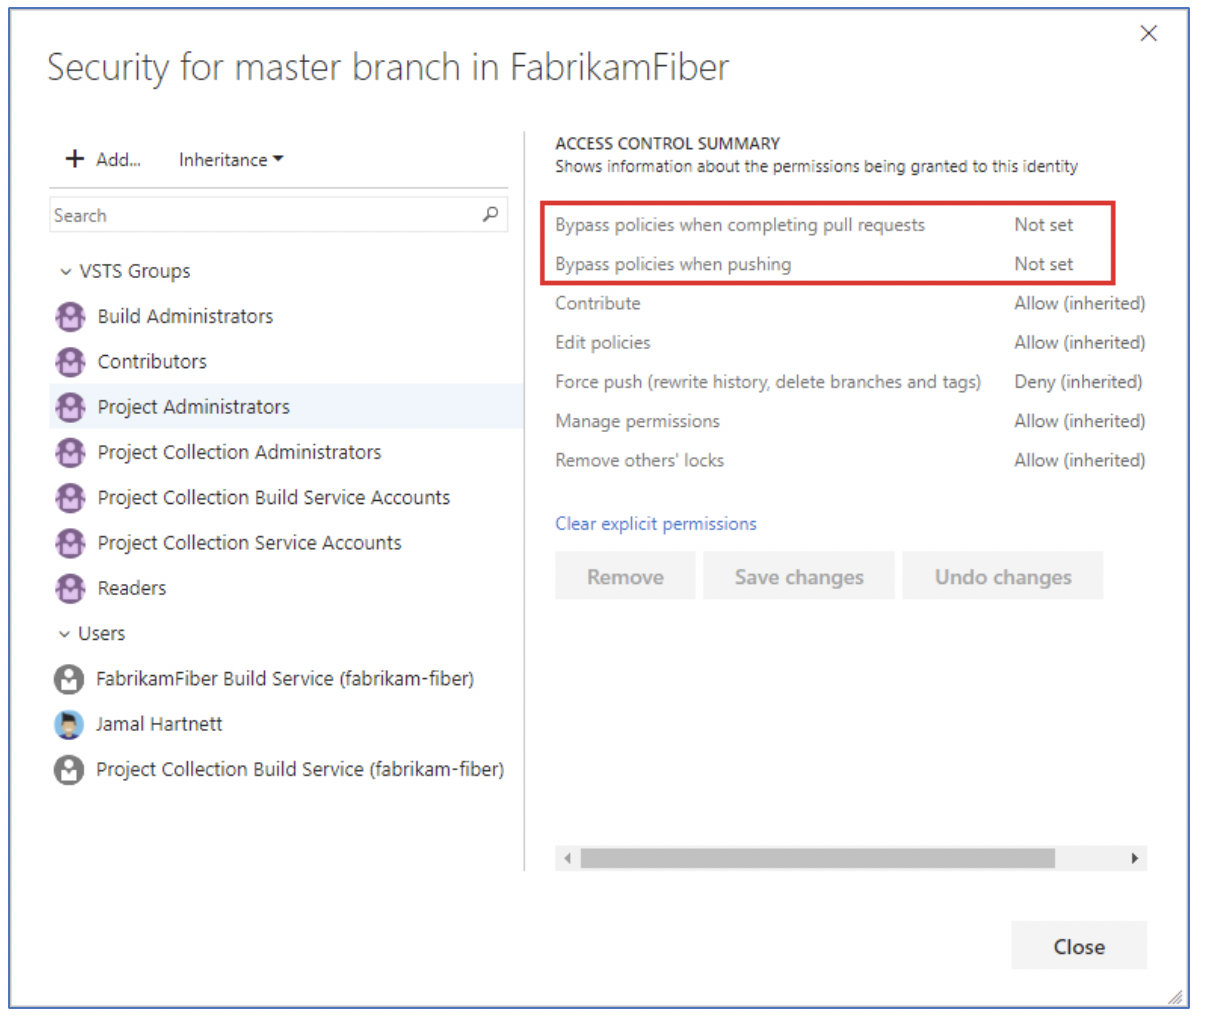
Users that previously had Exempt from policy enforcement enabled now have the two new permissions enabled instead.
In some cases, you need to bypass policy requirements. Bypassing lets you push changes to the branch directly or complete a pull request even if branch policies aren’t satisfied.
Also Check: Our blog post on Azure DevOps Certification. Click here
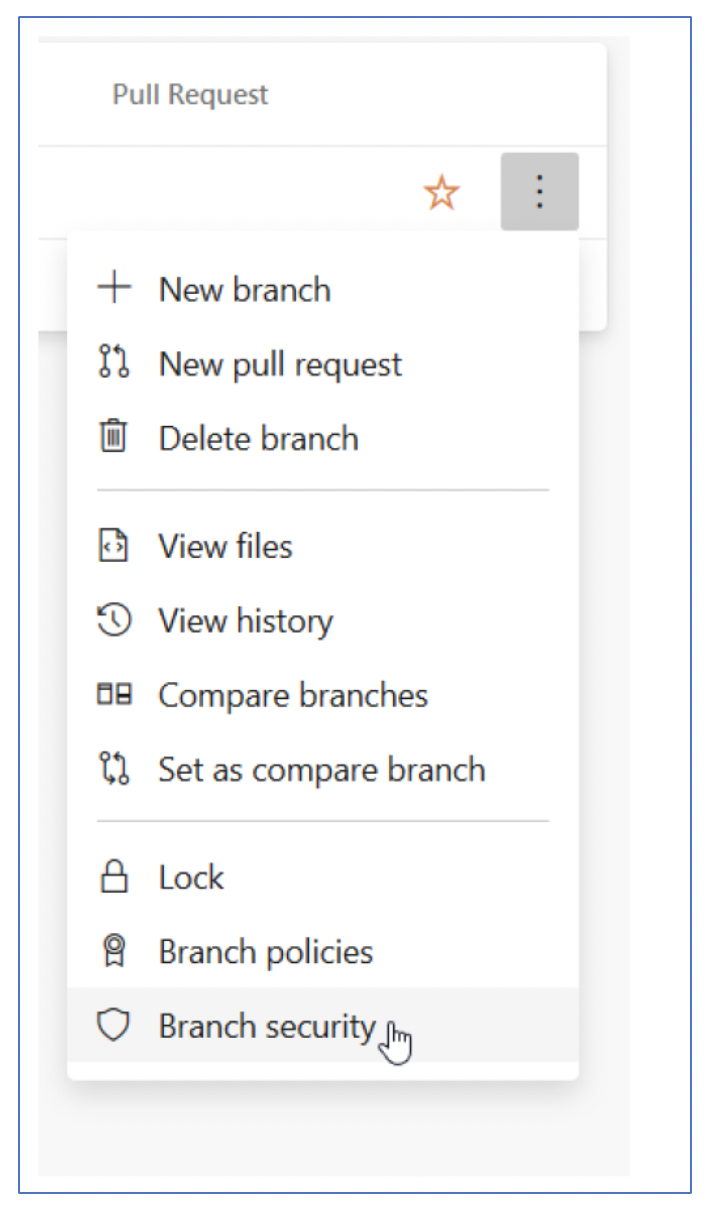
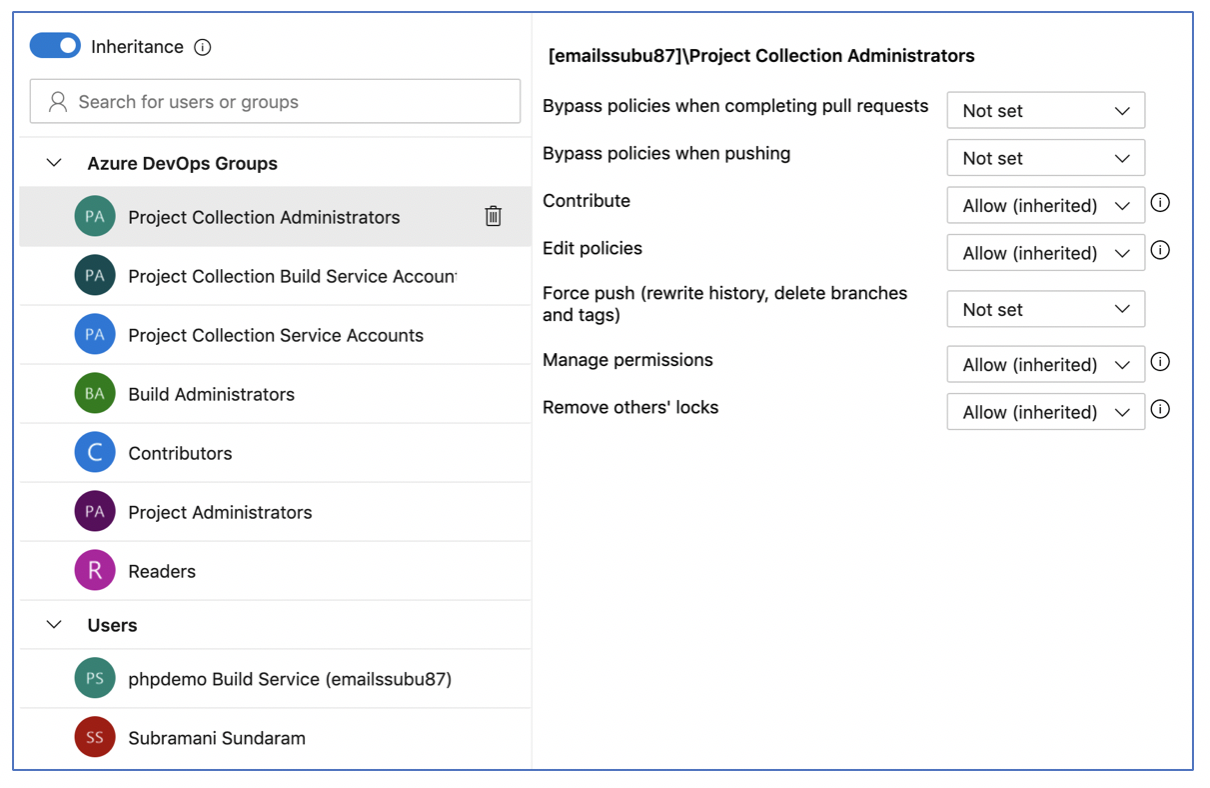
Branch Securities
- Set up permissions to control who can read and update the code in a branch on your GlTrepo.
- You can set permissions for individual users and groups and inherit and override permissions as needed from your repo permissions.
- Remove permissions for a user or group by selecting the user or Azure DevOps group, then selecting Remove.
- The user or group will still exist in your Project and this change will not affect other permissions for the user or group.
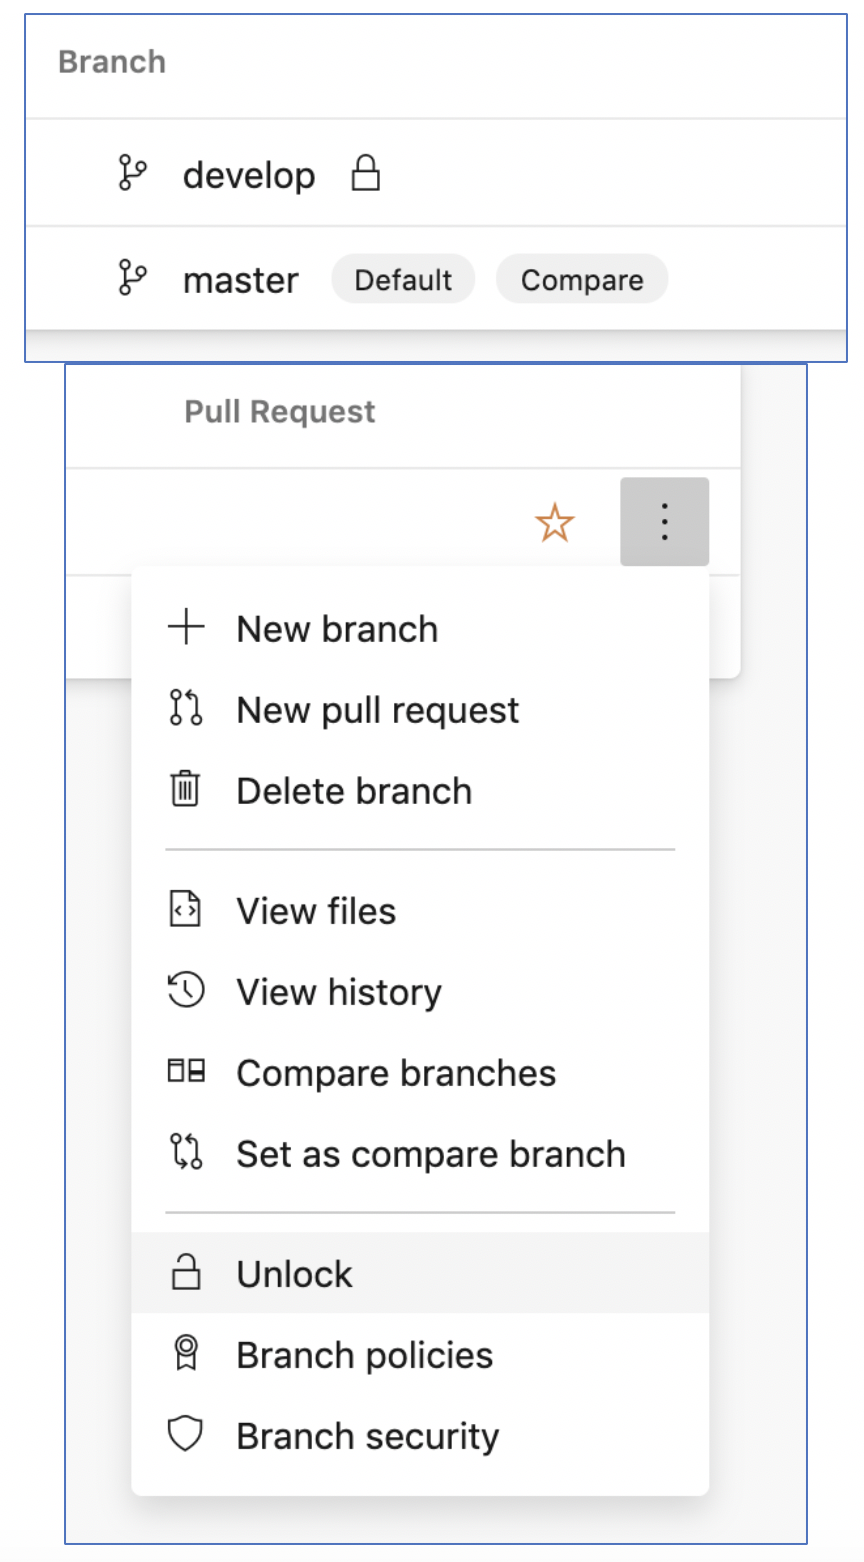
Branch Lock
- Prevent updates to a Git branch by locking the branch. Locking a branch prevents other users from changing the existing commit history.
- Locking also blocks any new commits from being added to the branch by others.

- Locking is ideal for preventing new changes that might conflict with an important merge or to place a branch into a read-only state.
- Locking does not prevent the cloning of a repo or fetching updates made in the branch into your local repo.
Git Recover Deleted Branch
- We can restore a deleted Git branch via the web in Azure Repos or TFS 2019.
- If you need to restore a Git branch in your own repo from Visual Studio or the command line, push your branch from your local repo to Azure Repos to restore it.
- Open your repo on the web and select the Branches view.
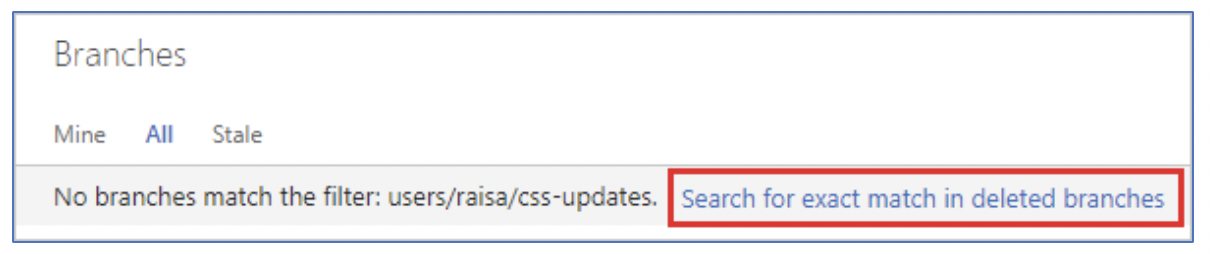
- Search for the exact branch name using the Search all branches box in the upper right.
- Click the link to search for an exact match in deleted branches. If there is an deleted branch that matches your search, you will be able to see which commit it pointed to when it was deleted, who deleted it, and when it was deleted.
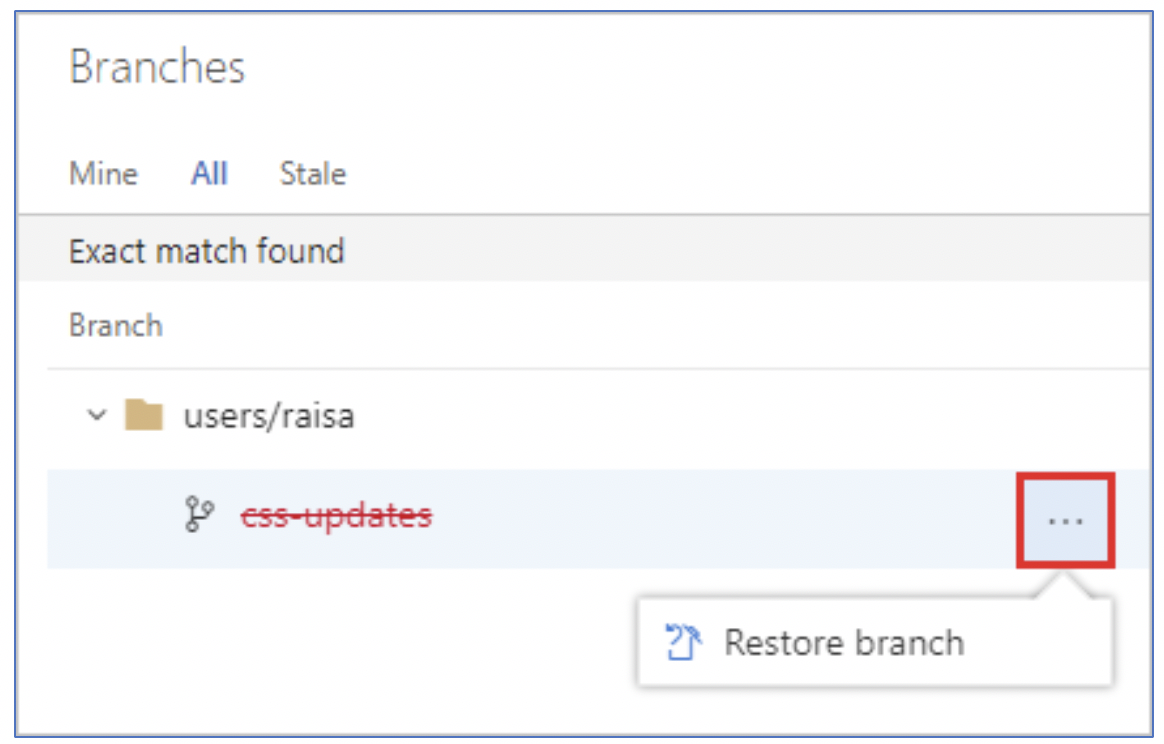
- To restore the branch, select the … icon next to the branch name and then select the Restore branch from the menu. The branch will be recreated at the last commit to which it pointed. Note that branch policies and permissions will not be restored.
Compare Branches
- The ahead and behind numbers listed for each branch are in comparison with the branch currently labeled Compare on the Branches page. Update your compare branch to see how far ahead or behind your branches shown on the page are to another branch in your repo:
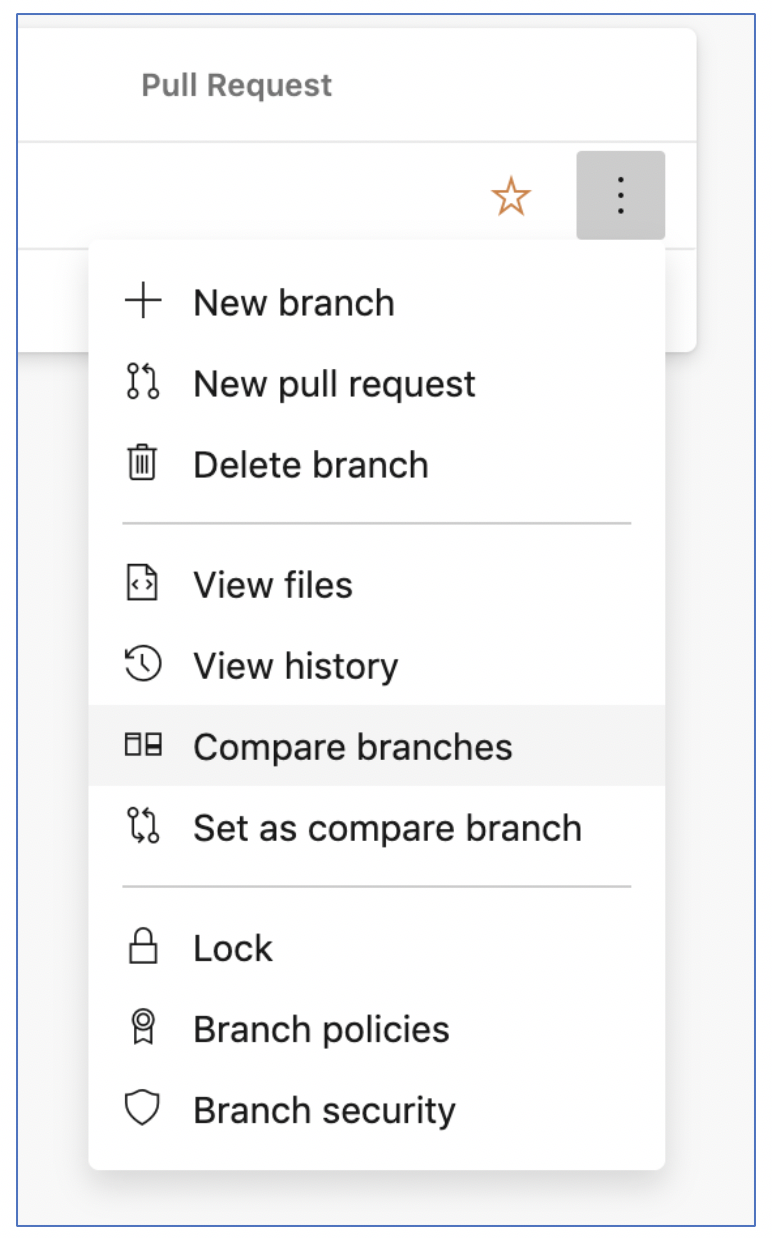
- Select the … next to the branch you want to set as the baseline for comparison.

- Select Set as compare branch.
- The Compare label will move to this branch and the other branches on the page will have the number of commits ahead/behind updated to reflect the new comparison.

Also Read: Azure Pipeline vs Jenkins, know their major differences!
Git Branching Model | A Successful Git Branching Model
Git Branching Model was conceived in 2010, now more than 10 years ago, and not very long after Git itself came into being. In those 10 years, git-flow (the branching model laid out in this article) has become hugely popular in many a software team to the point where people have started treating it like a standard of sorts
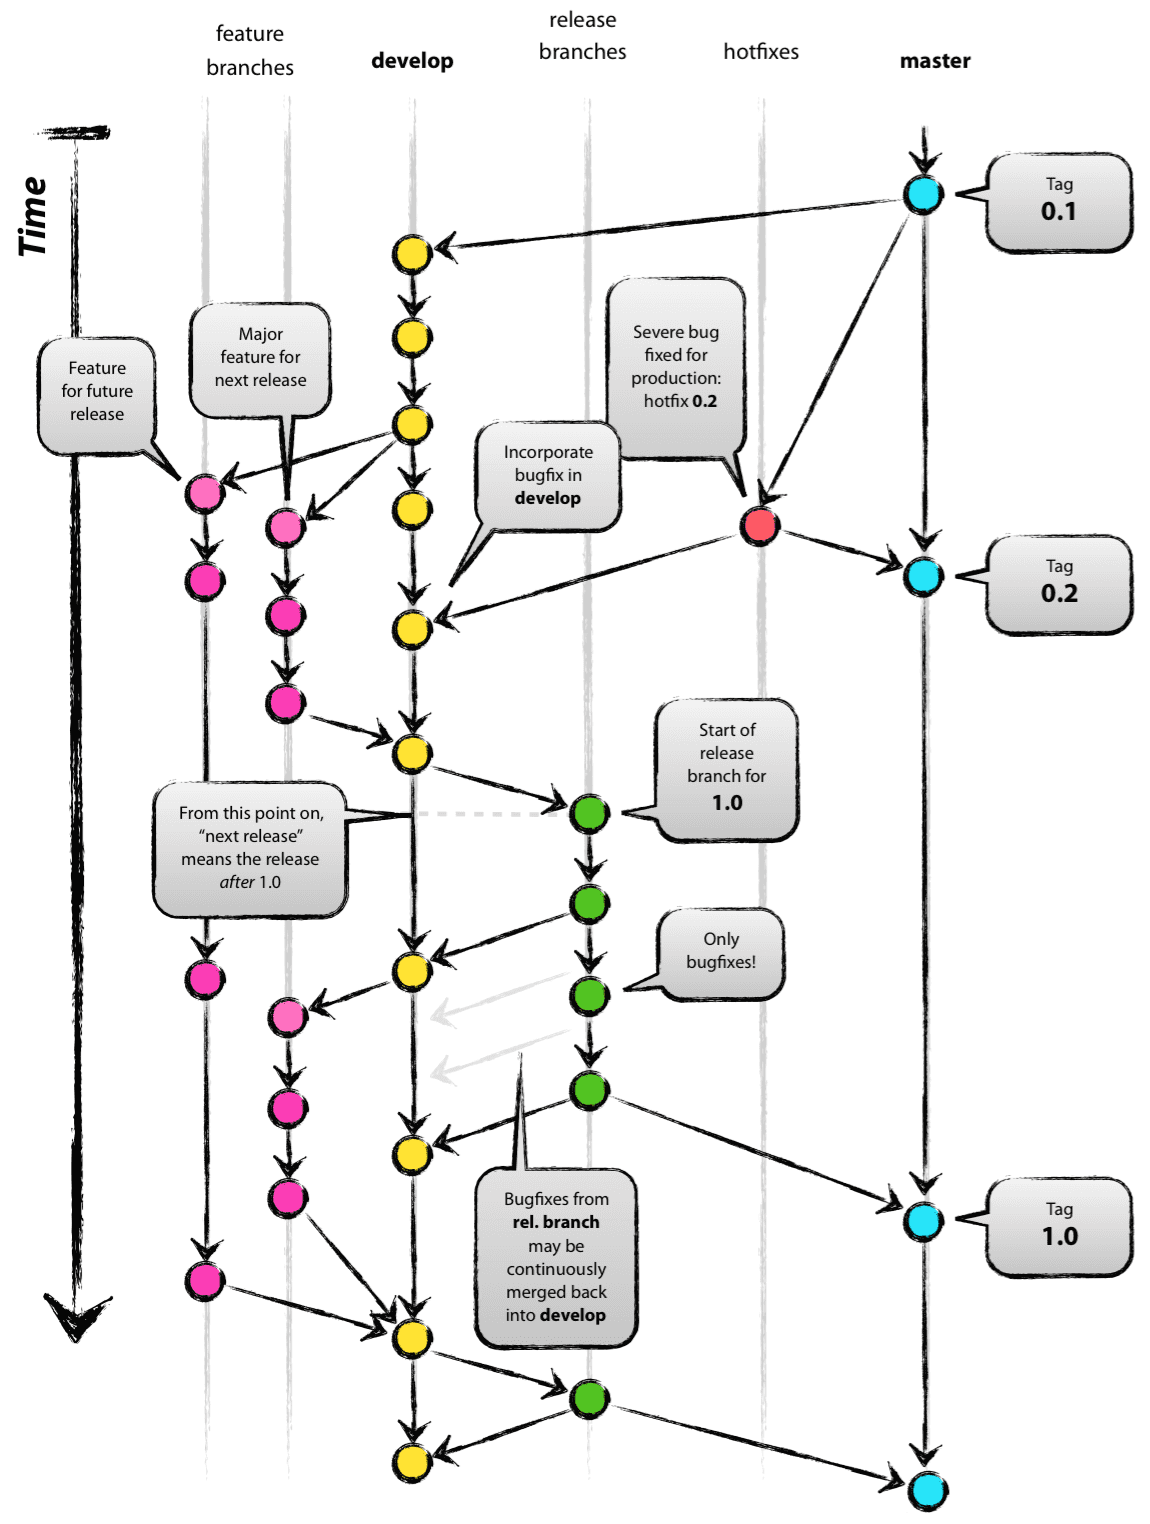
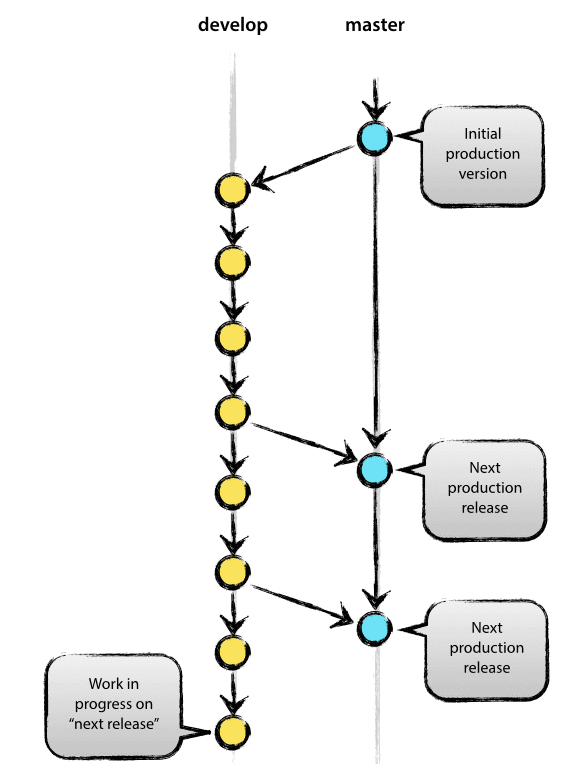
Git Main Branches
The central repo holds two main branches with an infinite lifetime:
masterdevelop
The master branch at origin should be familiar to every Git user. Parallel to the master branch, another branch exists called develop.
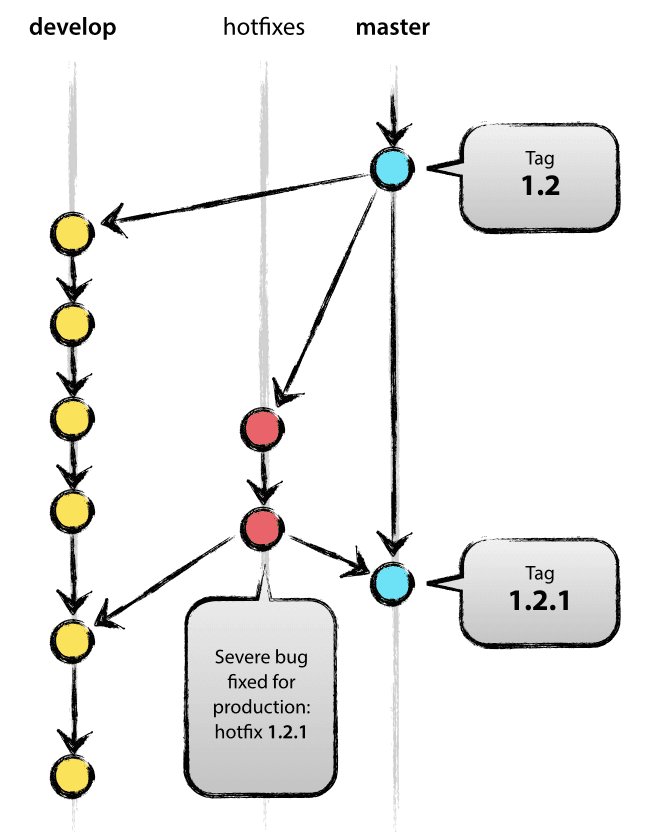
Git Supporting Branches
After, the main branches master and develop, our development model uses a variety of supporting branches for parallel development between team members, and tracking of features, product releases and to assist in quickly fixing live production problems. Unlike the main branches, these branches always have a limited lifetime(short-lived), since they will be removed after the work is completed.
The different types of branches we may use are:
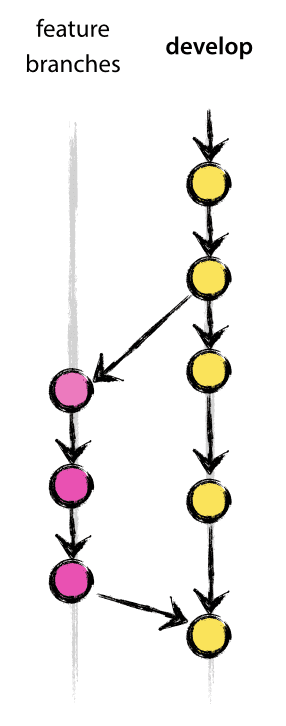
- Feature branches
- Release branches
- Hotfix branches
Related/References
- [AZ-400] Azure DevOps Certification Path
- [AZ-400] Roles And Responsibilities As An Azure DevOps Engineer
- [AZ-400] Microsoft Azure DevOps Certification Exam: Everything You Need To Know
- [AZ-400] Microsoft Azure DevOps Training: Step By Step Activity Guides/Hands-On Lab Exercise
- [AZ-400] Azure DevOps Services for Beginners
- [AZ-400] Designing and Implementing Microsoft DevOps Solutions [Official Page]
- Azure DevOps Service Hooks | Subscription Of Service Hooks | Release Approvals
- SonarCloud Azure DevOps | Integrating SonarCloud In Azure
- Azure DevOps Environments | How To Setup DevOps Environment | Approval Checks | Azure DevOps Pipeline
Next Task For You
Begin your journey toward Mastering Azure Cloud and landing high-paying jobs. Just click on the register now button on the below image to register for a Free Class on Mastering Azure Cloud: How to Build In-Demand Skills and Land High-Paying Jobs. This class will help you understand better, so you can choose the right career path and get a higher paying job.

![Microsoft Agentic AI Business Solutions Architect [AB-100] | K21 Academy](https://test.k21academy.com/wp-content/uploads/2025/11/Microsoft-Agentic-AI-Business-Solutions-Architect-AB-100-Exam-Overview1.png)