

![]()
The Application market is blooming rapidly ever since its advent, and to maintain user loyalty and engagement, it is necessary to keep the user informed. The user must know about the latest updates and events that may have happened in the application. So the Azure Notification Hub has been a boon to this market and provides many facilities to ease the developer’s life.
I will cover the following topics in this blog:
- What is Azure Notification Hub
- Push Notification
- Need for Azure Notification Hub
- Guide to Create Azure Notification Hub
- Conclusion
What is Azure Notification Hub
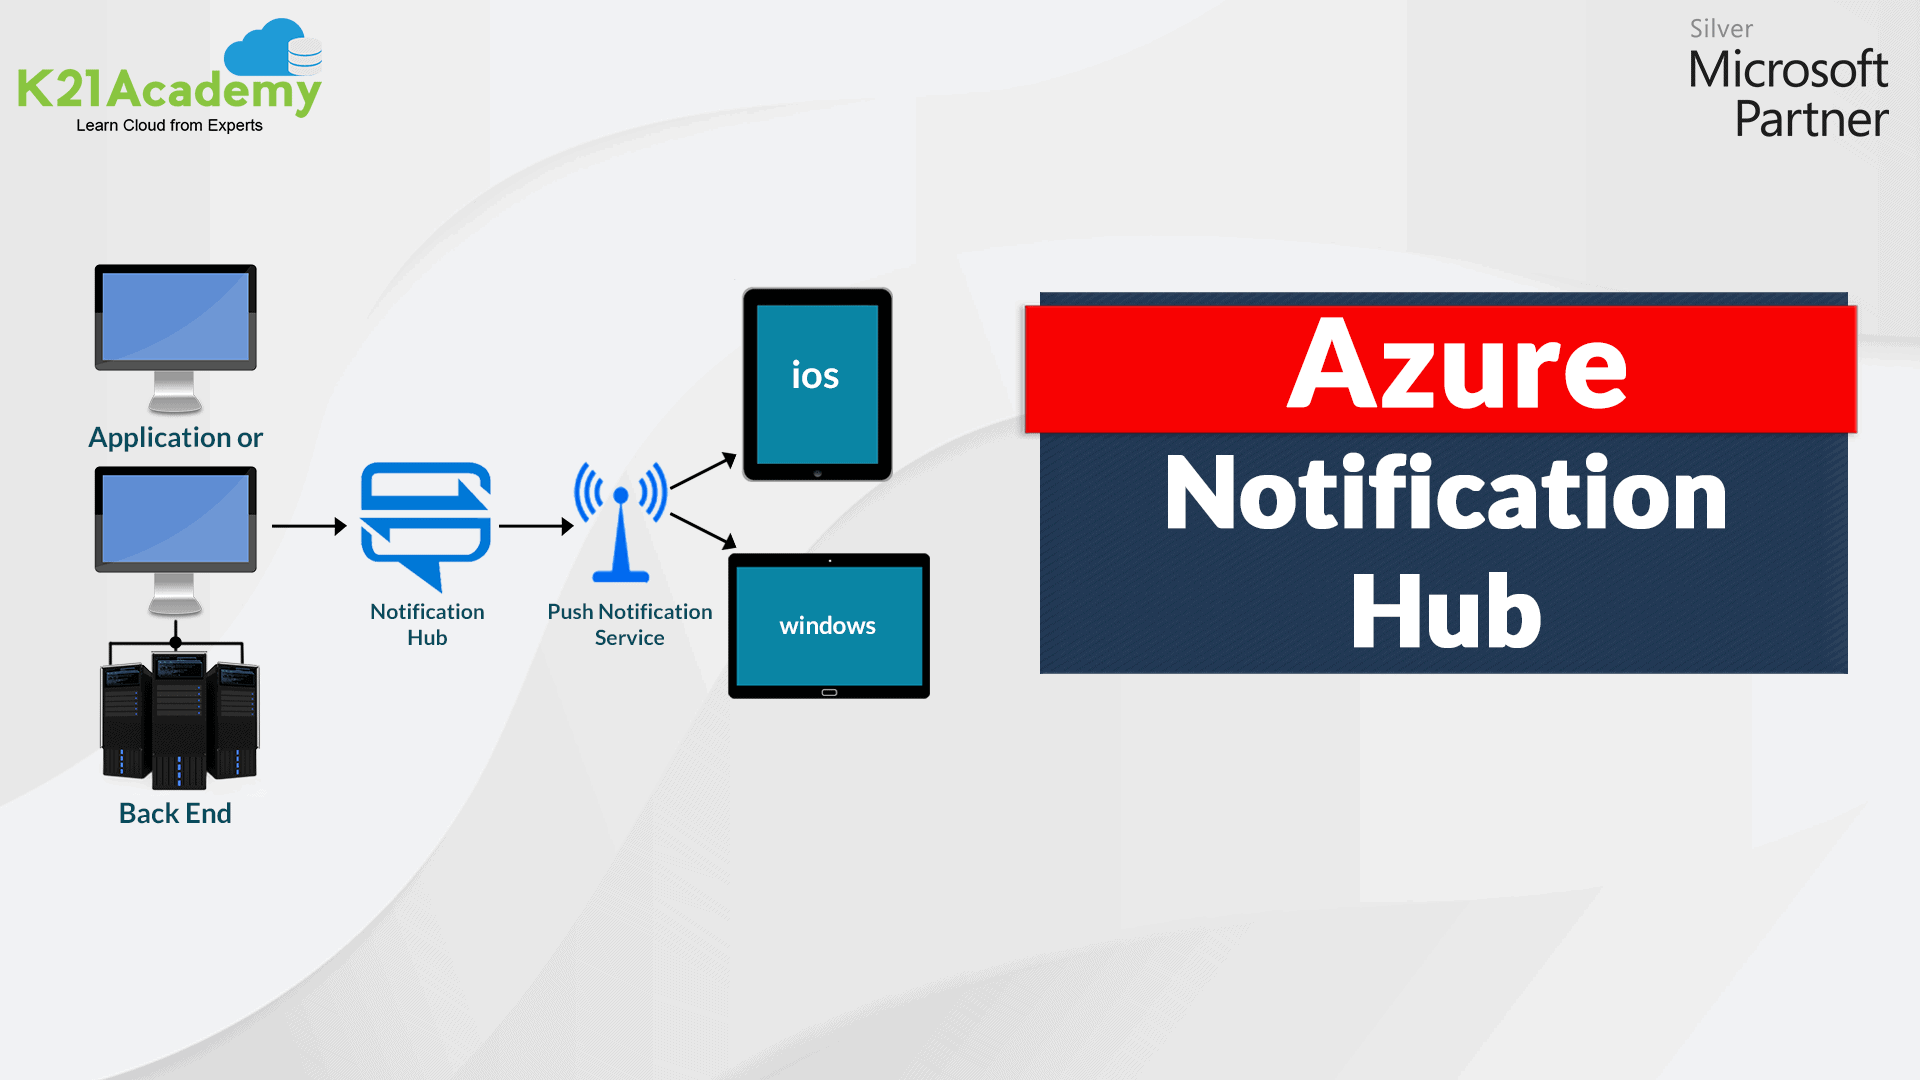
Azure Notification Hub is the notification service provided by Microsoft Azure. These notifications can be sent to various platforms like Windows, Android, iOS, WindowsPhone, etc. It is an infrastructure that sends a push notification to any platform. Through Notification Hub, one can monitor, schedule, and telemetry the push notification. Tags and Templates are two main components to understand the Notification Hub.

Tags – It is thought of as an ‘interest group‘ that helps deliver the notification to that target group. It is a string value that is defined according to the requirement. For example, an entertainment application could define tags as movies, videos, songs and so forth. For authentication application, the user id will be described as a tag.
Templates – It is an instruction segment that helps in enabling the notification format for the application. It provides the following benefits: customised notification, easy localisation, independence of client-version communication and platform-depended backend.
Push Notification
An application and user communicate via push notification. These push notification appear on the device either as a dialogue box or a pop-up to notify the users.
Now, let me brief how these Push Notifications work.
PNS (Platform Notification System), a platform infrastructure, helps deliver the push notification. The overall work of PNS revolves around the handle. The handle could be registration ID, URL of channel or any device token.
Through the Registration process, devices are registered with the notification hub. The registration process helps in linking PNS handles with tags and templates. Tags help direct the notification to the appropriate handle, and Templates help define the key/value pair for the notification registered on the hub.
PNS lifecycle
The process takes place in 4 steps:
- An application connects with PNS, requests the handle for the targeted platform, and conducts the registration process with Notification Hub.
- Then, these handles get stored in the App backend on the client app.
- The App backend, through the handles, connects with PNS to target the client app.
- Finally, notifications are forwarded to the device based on the handles specified.
Also Check: Our blog post on Azure Compute. Click here
Need for Azure Notification Hub
Consider a scenario where you made an application say a mobile app or a web app, and after few days you make some changes to it. So, how you will notify people about the changes? One way you can do this is personally tell everyone, but what if in the case of more than a million people. Hence, in this case, Azure Notification Hub comes into play.
So, the different scenarios where the notification hub can aid its support are:
It can help send notifications to millions of people at one go. It also allows sending notification related to application events, for example, events like sports, gaming, finance. Furthermore, it let you send coupons (based on location) to specific users. In addition to that, it helps in engaging the customer by sending informational content. Likewise, it also makes sure to send codes for authentication purpose.
Besides that, Notification Hub resolves the complexities faced while sending the push notification from the app backend. The various advantages of Notification Hub include:
- Compatability – It helps send a notification to multiple platforms like Android, Windows, and iOS. Moreover, it can efficiently work with the backend created in any language.
- Security – Notification Hub ensures security by following the federation authentication process or SAS (Shared Access Secret).
- Delivery Pattern – It provides a varied range of delivery pattern. One can choose according to one’s need. To name a few: Silent, Direct, Scheduled, Personalized, and Localized push.
Note: To know more about the delivery pattern, ☚ click here.
- Telemetry – It is present in the Azure Portal by default. Telemetry records the pushes, starting from its request to sending notification to the user.
- Scalability – Notification can be sent to millions of people without restructuring infrastructure.
Create Azure Notification Hub in Azure Portal
Prerequisite: Ensure that you have a Microsoft Azure account with a valid subscription plan. If you don’t, you can create a free account, with a one-month FREE TRIAL subscription.
Note: Learn how to create an Azure Free Trial Account.
Step 1) Log in to Azure Portal 🚀
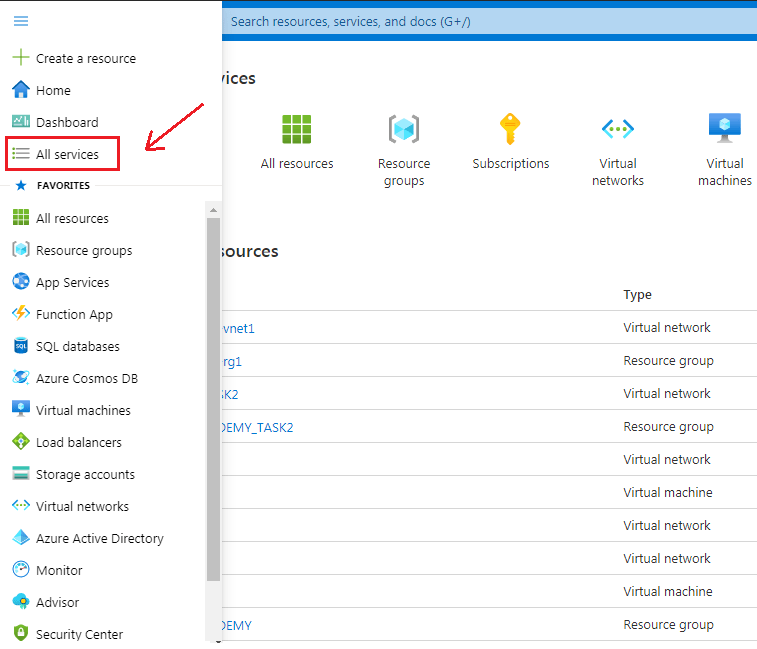
Step 2) Click on the Hamburger icon on the top left corner. Select ‘All services‘.
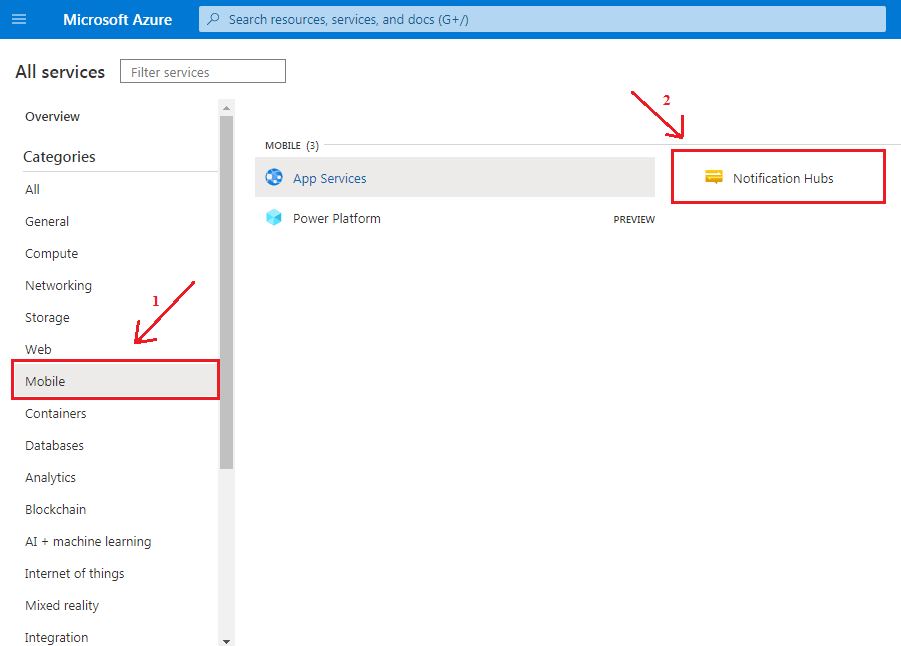
Step 3) Under the All services categories, (1 )- Select the ‘Mobile’ option, then (2 ) – Click on ‘Notification Hubs’.
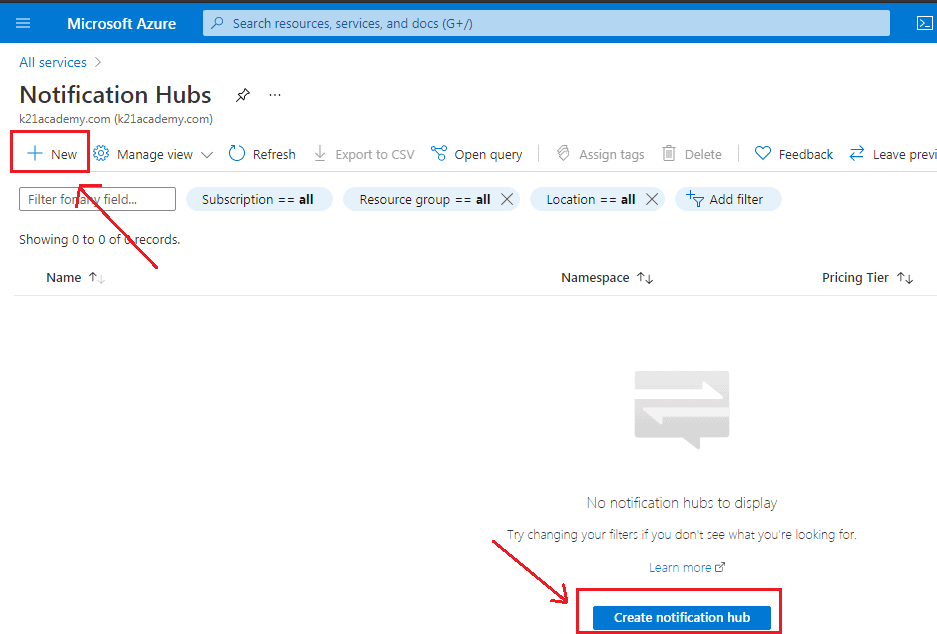
Step 4) The Notification Hubs page section provides you with the option to create a new hub by clicking on ‘+New’; alternatively, you can also opt for the option ‘Create notification hub’.
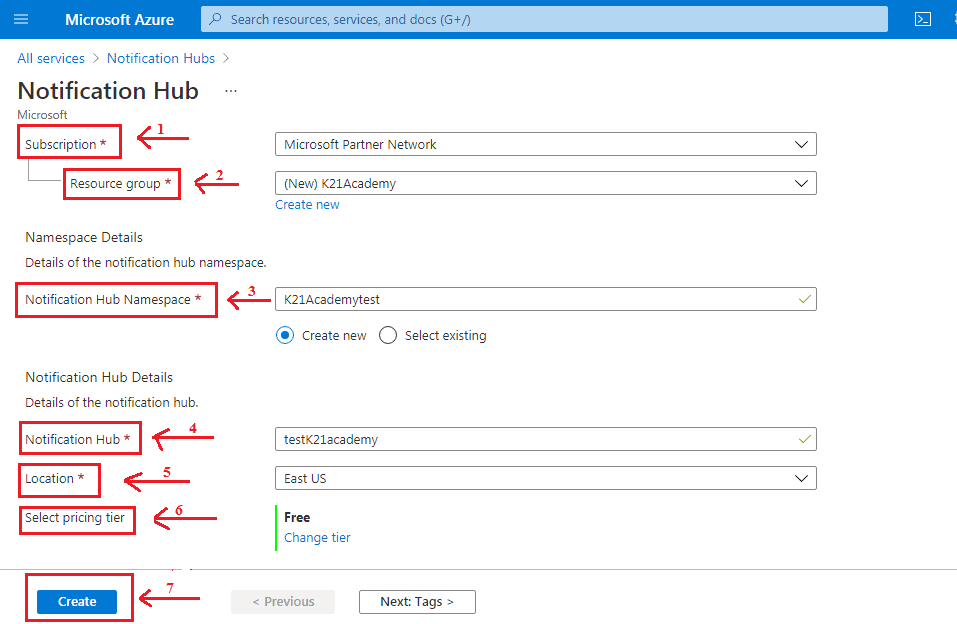
Step 5) Then, the following wizard asks to fill in the following details
- Subscription – Select the subscription plan.
- Resource Group – Click on the ‘Create new‘ option if you want to create a new resource group.
- Notification Hub Namespace – It is the cluster of the notification hub in a particular region. Specify the name of the namespace.
- Notification Hub – Specify the name for the Azure Notification Hub.
- Location – Select the region.
- Select Pricing Tier – It provides us with various option pricing tier. We have selected ‘Free Tier’ for the demo purpose.
Click on the ‘Create’ button to get to the deployment screen.
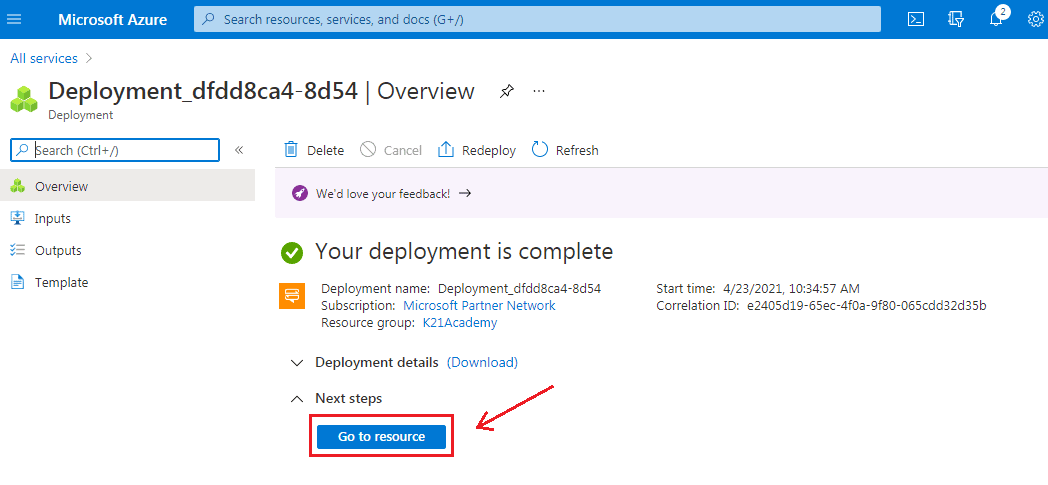
Step 6) Once you click on the create button, the deployment process is initiated. After completing the deployment process, click on ‘Go to Resource’.
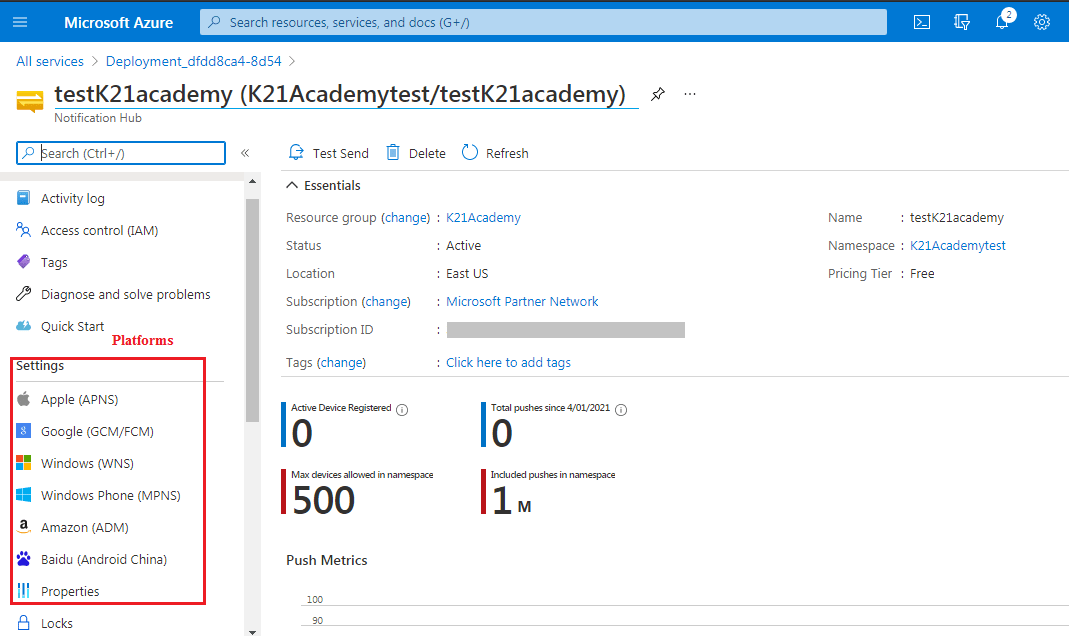
Step 7) The following screen will appear describing Notification Hub’s details. The various platforms compatible with the Notification Hub are shown in the image below.
Step 8) Again, when we go to Notification Hubs under the Mobile section in All services, we will see the created Notification Hub. Refer to the image below for a better understanding.
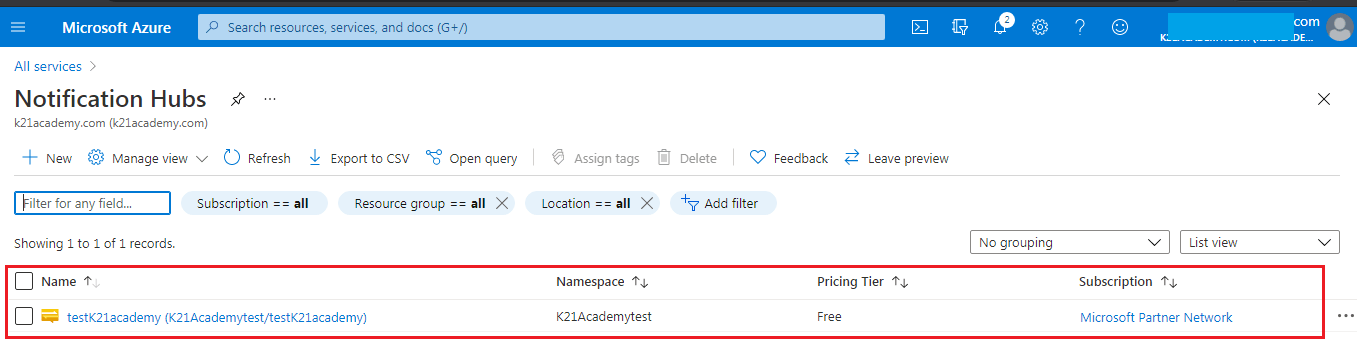
Voila !!! We successfully created a Notification Hub.
Conclusion
Azure Notification Hub makes it very easy to send push notification across multi-platforms. Due to its various advantages like scalability, cross-platform, security, and rich telemetry have been widely recognised. One of the most significant features of Notification Hub is a different type of push notification delivery pattern that makes the task very easy and convenient. I hope this blog has been helpful in increasing your knowledge about Notification Hub. Keep Reading. 📖
Related/References
- Exam AZ-300 – Microsoft Azure Architect Technologies Certification Exam
- Microsoft Azure Solution Architect AZ-303/AZ-304: Everything You Need To Know
- Tips To Prepare Exam AZ-304: Microsoft Azure Architect Design
- Microsoft Azure Solutions Architect | AZ-303 vs AZ-304
- AZ-304 Microsoft Azure Architect Design: Step By Step Activity Guides (Hands-On Labs)
- Exam AZ-305: Azure Solutions Architect Expert Certification
Next Task For You
Begin your journey towards becoming a Microsoft Azure Solutions Architect Expert. Just click on the register now button below to register for a Free Class on Microsoft Azure Solutions Architect Expert Certification [AZ-305], which will help you to understand better, so you can choose the right path and clear the certification exam.

![Microsoft Agentic AI Business Solutions Architect [AB-100] | K21 Academy](https://test.k21academy.com/wp-content/uploads/2025/11/Microsoft-Agentic-AI-Business-Solutions-Architect-AB-100-Exam-Overview1.png)


