

![]()
In this blog, I will cover steps on how to create EC2 Instance on Amazon Web Services AWS from scratch.
To follow the steps you need to have an AWS Account. You can create a Free tier account by following the steps in the blog Creating AWS Free Tier Account
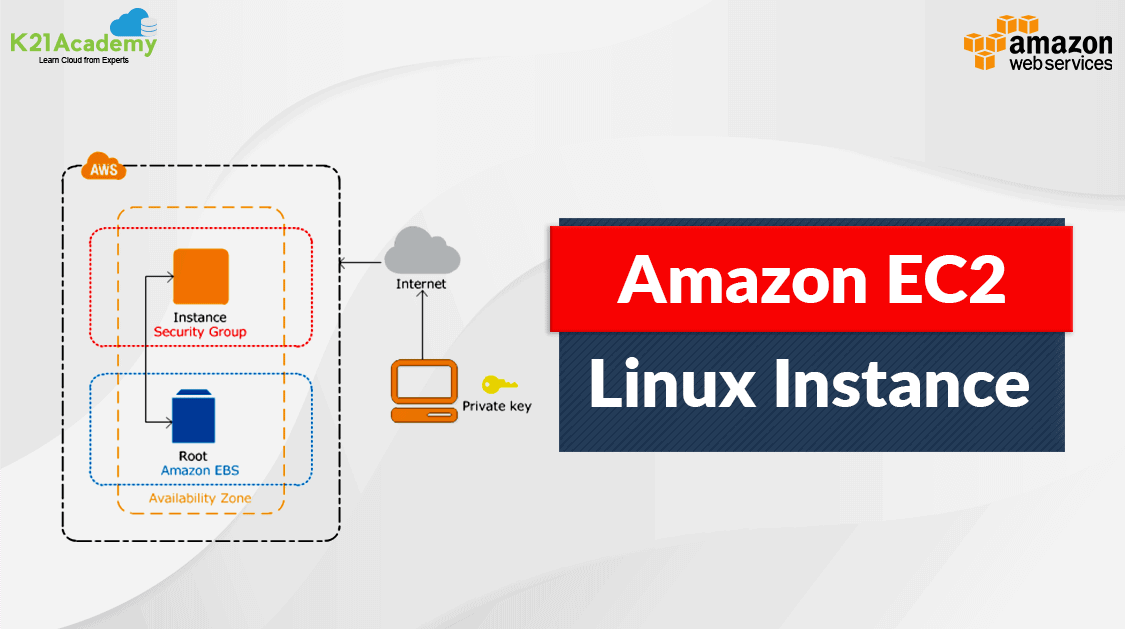
Elastic Compute Cloud EC2 Instance
EC2 stands for Elastic Compute Cloud. It is a computing service provided by AWS. There are 6 main types of Instances to fit different use cases. Each Instance is unique and provides a unique combination of CPU, memory, storage, and networking capacity.
This allows for the flexibility to choose the desired combination of resources for your applications.
Features of AWS EC2 Instance:
- EC2 allows the ability to choose from a series of Operating systems for instance.
- The instance creation process is very quick and does not need to monitor while it is being created.
- Multiple Storage Volumes can be added or removed in the instance without needing to stop the instance.
- Volumes can be scaled up and down on the go with plenty of storage types to choose from.
- You are only charged for the resources you use.
How To Create An EC2 Instance
EC2 Instances are created in a few minutes, unlike on-premise where it would have taken more than 30 minutes.
If you are new to AWS and having difficulty in finding services, No need to worry we have a blog that will guide you on AWS Management Console.
1. Open the AWS console and click on All Services > Compute> EC2.

Also Read : Our Previous Blog on AWS Identity And Access Management.
2. Click on the Launch Instance button to create a new EC2 Instance.

3. Choose an Amazon Machine Image AMI for your EC2 Instance. AMI is Like Selecting an Operating System for you Instance.

4. Now, Choose Instance type and Click on the Review and Launch button on the bottom.
Note: Amazon EC2 provides a wide variety of Instance types optimized to fit different use cases having varying combinations of CPU memory and storage. If you are a beginner, then t2 micro instance type must be preferred because it is free.
5. Now your EC2 Instance is almost ready. Click on Launch button at the bottom.
6. To log in, we need a password and EC2 instances used SSH key pair to secure access. Create a new key pair, provide a key pair name and Download Key Pair.

7. Now click on the Launch Instance button to start the creation process.

8. Now your instance is getting created click on View Instance to close the message and view the instance.
9. It may take a few minutes for your EC2 Instance to get created. If the state changes to running that means the instance is available for use.

Accessing EC2 Instance
We have successfully created an EC2 instance now we need to access the instance to use it.
There are three methods to Access the EC2 Instance
The quickest way to access EC2 Instance is through the browser-based SSH connection.
1. Right-click on the EC2 Instance

2. Select EC2 Instance Connect (browser-based SSH connection) radio button. Click on the Connect button.

3. A new window will open and this window will function as a CLI SSH connection.

Summary
This how an EC2 instance on AWS is created and access through browser-based SSH Connection.
Similarly, you can create an Instance with a different AMI and a type that suits your workload.
Make sure to stop or terminate the EC2 Instance after use or you will waste your free tier usage.
To avoid any extra charges make sure you are within the allowed free limit, to know more on the limit check our blog Amazon Web Service (AWS) Free Tier Account Services
Related Links/References:
- Amazon Web Service (AWS) Free Tier Account Services
- Overview of Amazon Web Services & Concepts
- How to create free tier account in AWS
- AWS Certified Solutions Architect Associate SAA-CO2
- Amazon Elastic File System User guide
- AWS Management Console Walkthrough
Next Task For You
Begin your journey towards becoming a Certified AWS Solution Architect Associate by joining our FREE Informative Class on Amazon AWS Solution Architect Certification For Beginners & Q/A by clicking on the below image.

![Microsoft Agentic AI Business Solutions Architect [AB-100] | K21 Academy](https://test.k21academy.com/wp-content/uploads/2025/11/Microsoft-Agentic-AI-Business-Solutions-Architect-AB-100-Exam-Overview1.png)