

![]()
Azure Migrate is a service provided by Microsoft, which can help your enterprise determine how on-premises workloads will perform on the azure cloud service and test its suitability. Not just that, you will also get an estimate of the cost which your enterprise has to bear for running on-premises machines on Azure.
In this blog post, we’ll discuss how to set up your Azure migrate server step-by-step. So buckle up, and let’s get started!
There are a number of reasons why you should migrate. Using cloud services means getting rid of a certain part of your own infrastructure, thus converting CAPEX (Capital Expense) to OPEX (Operation Expense), reducing the cost of its administration and maintenance, and this not only increases flexibility but also helps you cope up with peak loads in rush hours.
Is Azure Migrate Free?
Azure Migrate and Azure Migrate tools are available at no additional charge. However, you may incur charges for third party Independent Software Vendor (ISV) tools.
Which Type of Workloads Can be Migrated?
There is a wide range of workloads that can be migrated with Azure Migrate including the following:
- Virtual desktops
- Web applications
- Data
- Servers
- Databases
Range of tools
Azure Migrate tools include Azure Migrate: Discovery and assessment and Azure Migrate: Server Migration.It also integrates with other Azure services and tools, and with independent software vendor (ISV) offerings. More.
- Azure Migrate: Discovery and assessment: Discover and assess on-premises VMware VMs, Hyper-V VMs, and physical servers in preparation for migration to Azure.
- Azure Migrate: Server Migration: Used to Migrate VMware VMs, Hyper-V VMs, physical servers, other virtualized servers, and public cloud VMs to Azure.
- Web app migration assistant: Used to assess on-premises web apps and migrate them to Azure.
- Azure Data Box: Use Azure Data Box products to move large amounts of offline data to Azure.
- Azure Database Migration Service: Used to migrate on-premises databases to Azure VMs running SQL Server, Azure SQL Database, or SQL Managed Instances.
- Independent software vendor (ISV) offerings:
ISV Features Carbonite It allows you to migrate physical, virtual, and cloud workloads
from any environment to Microsoft Azure.Cloudamize Used to Assess servers. Corent Technology Used to Assess and migrate servers. Device42 Used to Assess servers. Lakeside Assess VDI.
Support of New Features
- Migration of on-premises servers and VMs running on other clouds: To migrate on-premises servers you’ll need an installable package.
- Support of CMDB import: Using this feature, you can import 20,000 records simultaneously in a single shot
- Agentless dependency mapping: Azure Migrate offers agentless dependency mapping which means having inventory apps and roles without agents. You can also migrate your own agentless .NET web application.
Advantages of Azure Migrate
- Comprehensive discovery, assessment, and migration capabilities powered by Azure and partner tools
- Centralized migration repository delivering end-to-end tracking and insights
- Microsoft employs more than 3,500 security experts completely dedicated to your data security and privacy. The data migrated with Azure migrate is encrypted both in-flight and at rest during the process
- The new limit is 35,000 VMs for discovery and assessment which more than likely will cover the needs of most environments
- Cost-efficient migration with Azure cost optimization features and tools
Limitations of Azure Migrate
- The number of VMs supported by a single vCenter is 35,000 which in turn means that the assessment limit is 35,000 VMs.
- Only agentless VM migration for vSphere and Hyper-V. Agentless application migration is limited to .NET applications.
- It is not available in all the regions till now. Therefore, choose wisely.
Also Check: Our blog post on Azure Virtual Desktop.
Steps to configure Azure Migrate Server
1. We’ll start with a resource group creation as all our tasks will be done inside it. Just provide the resource group name, select your subscription, and then select a region. Then hit Review+Create.
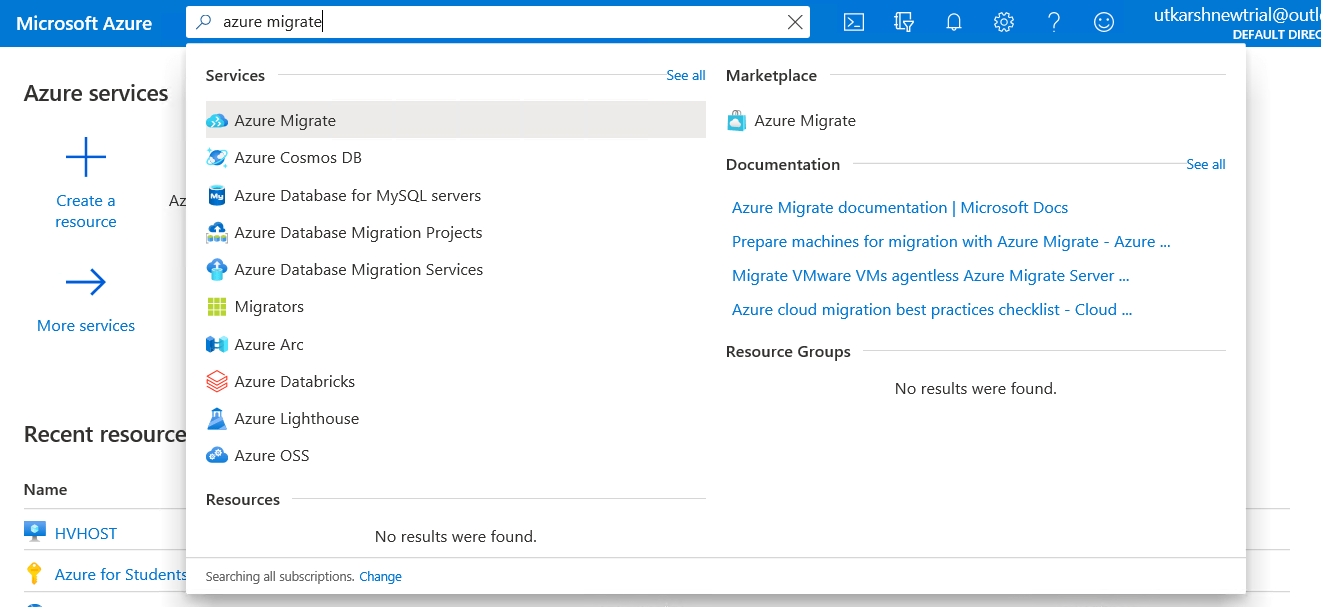
2. After the resource group has been created, search for “Azure Migrate” in the search bar and select it.
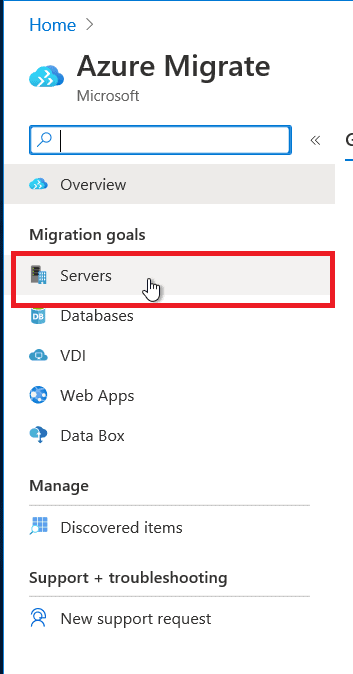
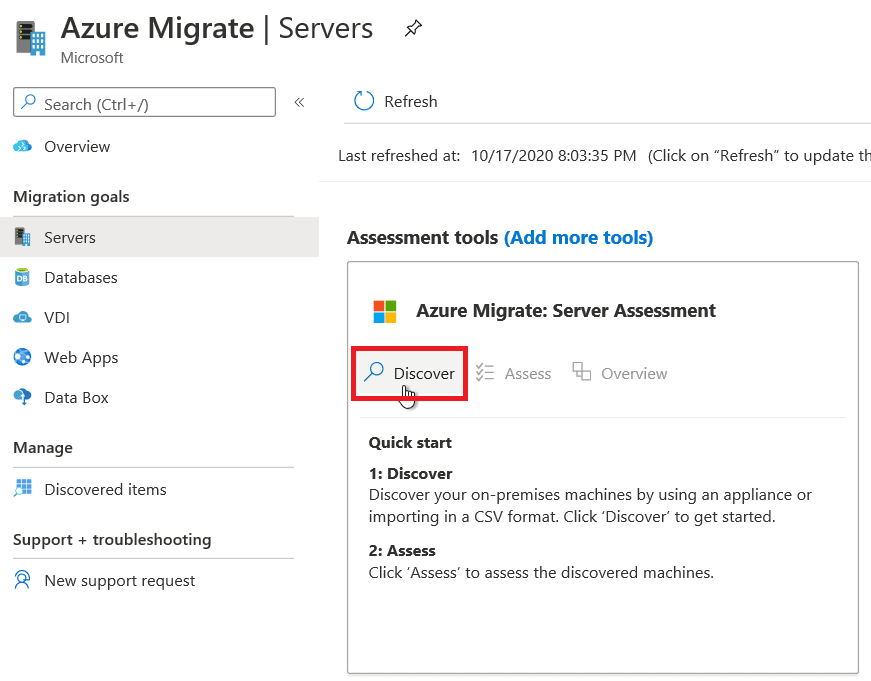
 3. Now select the Servers tab under Migration goals as we want to do server assessment and migration.
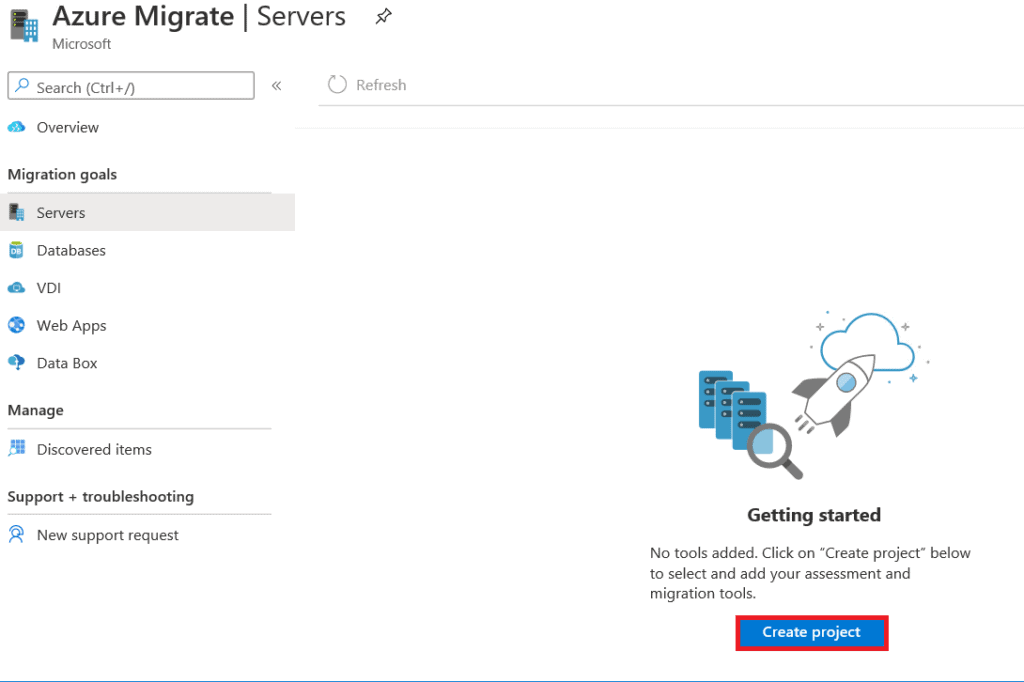
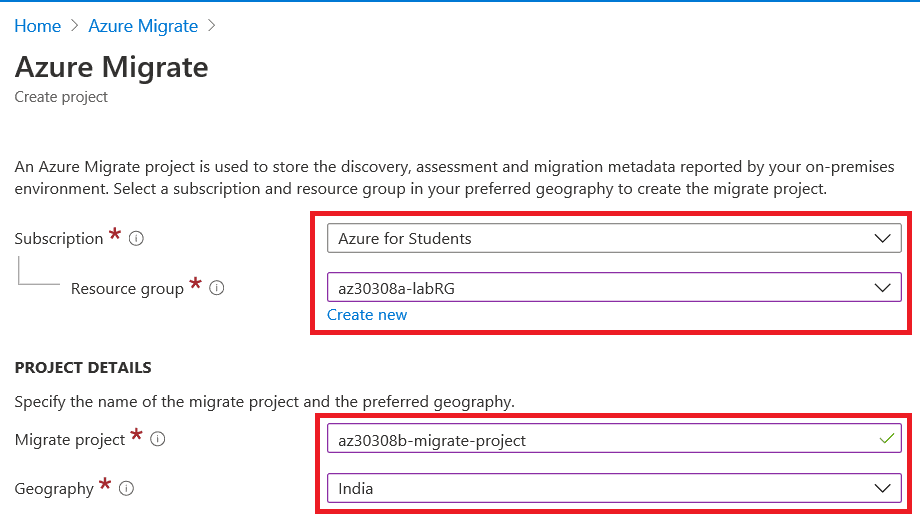
 4. If you haven’t created a project before, then here you’ll be asked to create one. Select the subscription and resource group which you used previously. Then provide your migrate project name and geography. Click on Create.
5. After clicking on Create project, fill out project details.
 6. In the Servers tab, under “Azure Migrate: Server Assessment” you’ll see the Discover button. Click on it.
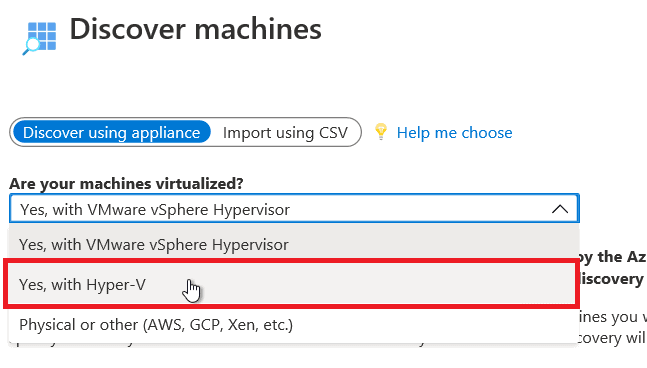
 7. Under the “Are your machines virtualized?” option, you’ll have three choices. Choose the one that fits your environment.
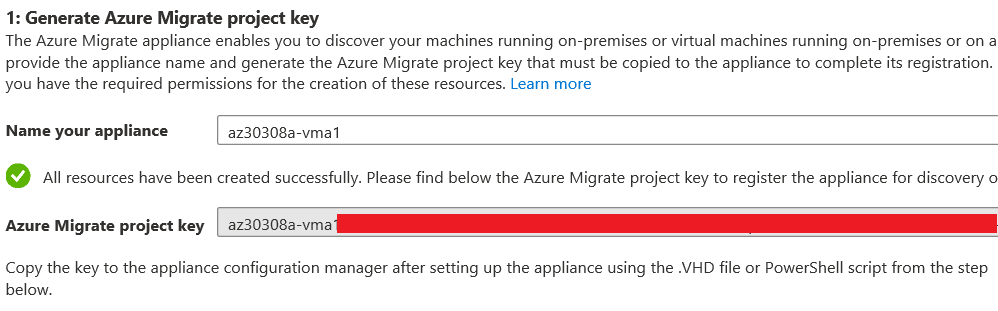
 8. Next step, provide a name for your appliance and then click on the Generate key button.
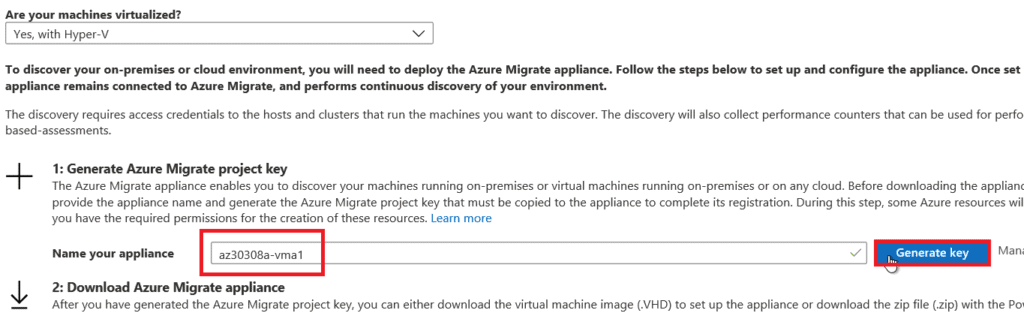
9. Wait for the process to finish, and then you’ll be provided with an Azure migrate project key. Copy the key somewhere as you will need it later.
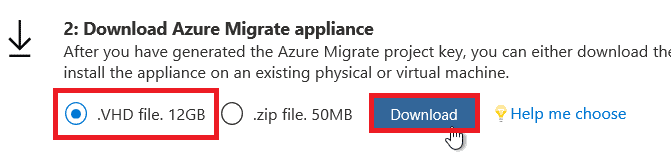
 10. Now, select the “.VHD file” option and click Download. This may take some time as the file size will be 12GB.
 11. Now that you have download the Azure Migrate appliance, it’s time to import it. For this, you’ll need a Hyper-V. If you don’t have one, then you can create one in Azure itself.
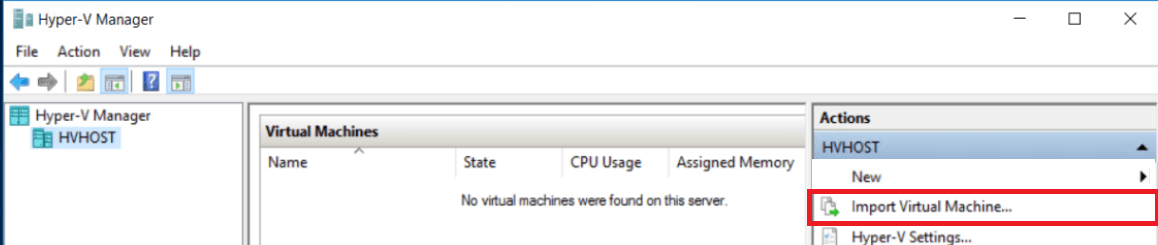
12. Open the Hyper-V Manager and right-click on the Hyper-V machine name, and select Import Virtual Machine.
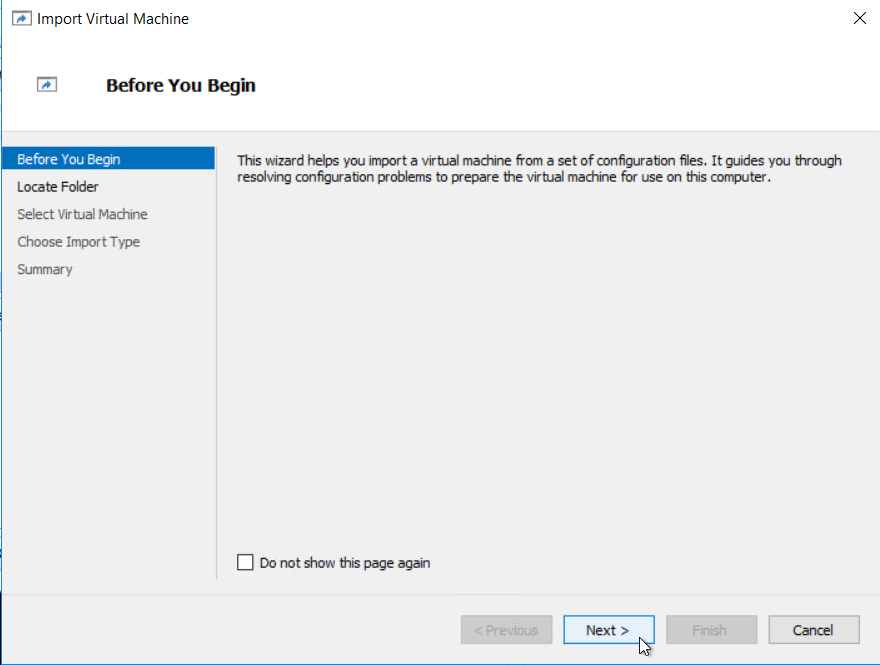
 13. In the Before You Begin tab, click Next.
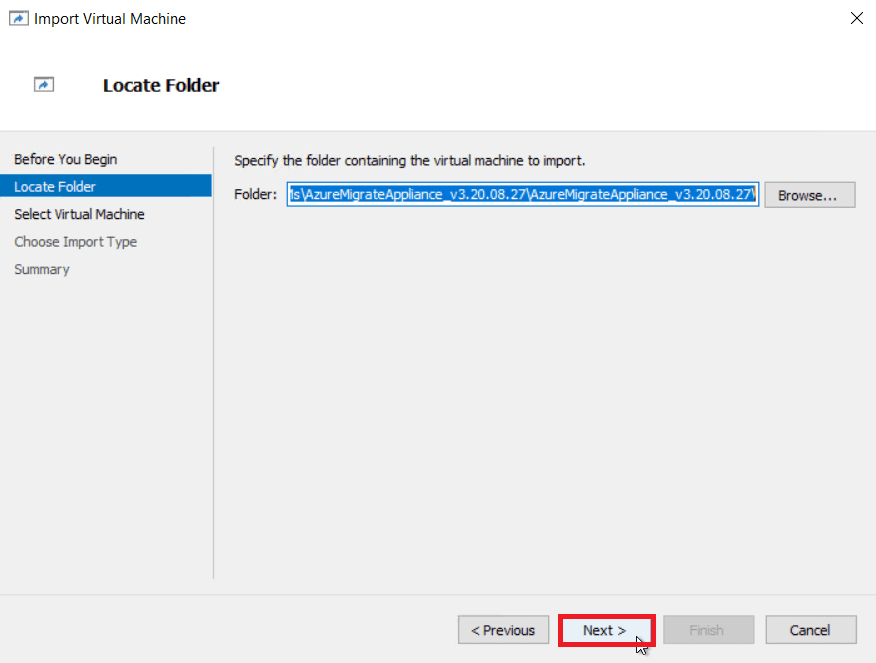
14. After this, you’ll see the Locate Folder tab. Here, browse and select the Azure Migrate appliance which you downloaded before, Then click Next.
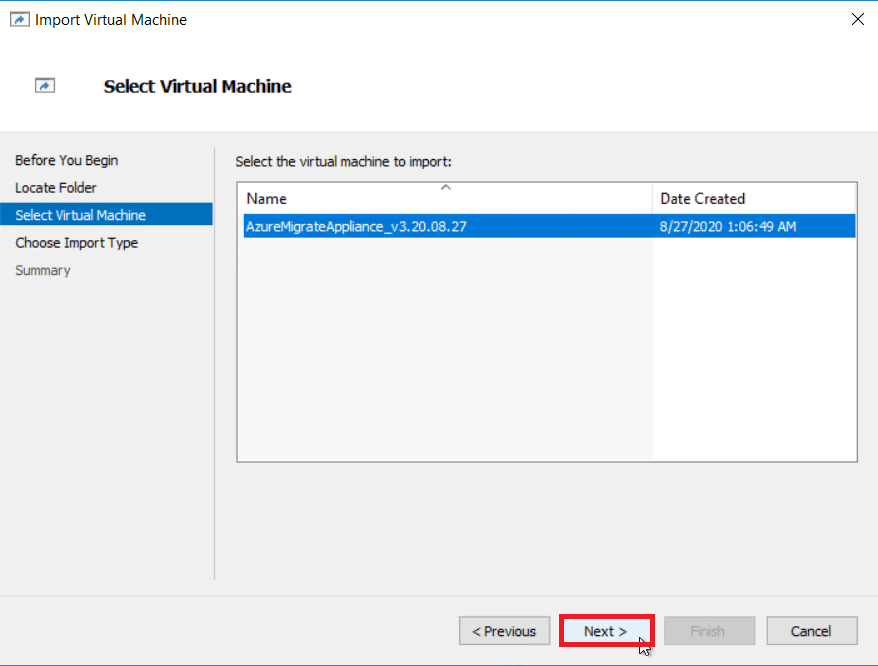
15. In Select Virtual Machine, select the Azure Migrate appliance and hit Next.
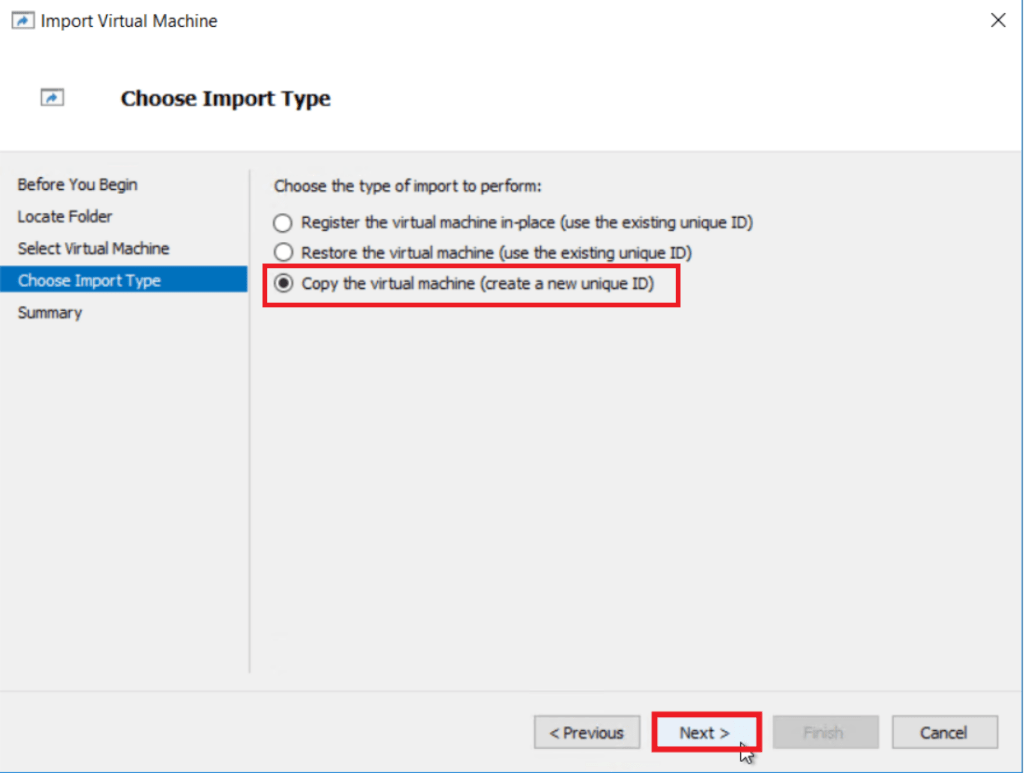
 16. In Choose Import Type, select the one which you prefer and press Next.
 17. Click Next again in the Choose Destination window.
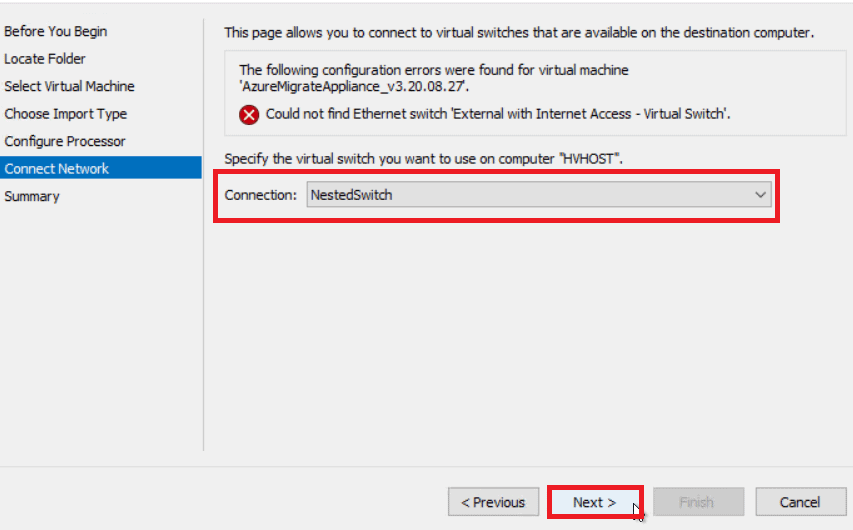
18. Browse to the Storage Folder in the Storage Folder tab and click Next. Then select your connection and click Next.
 19. Click Finish on the Summary tab.
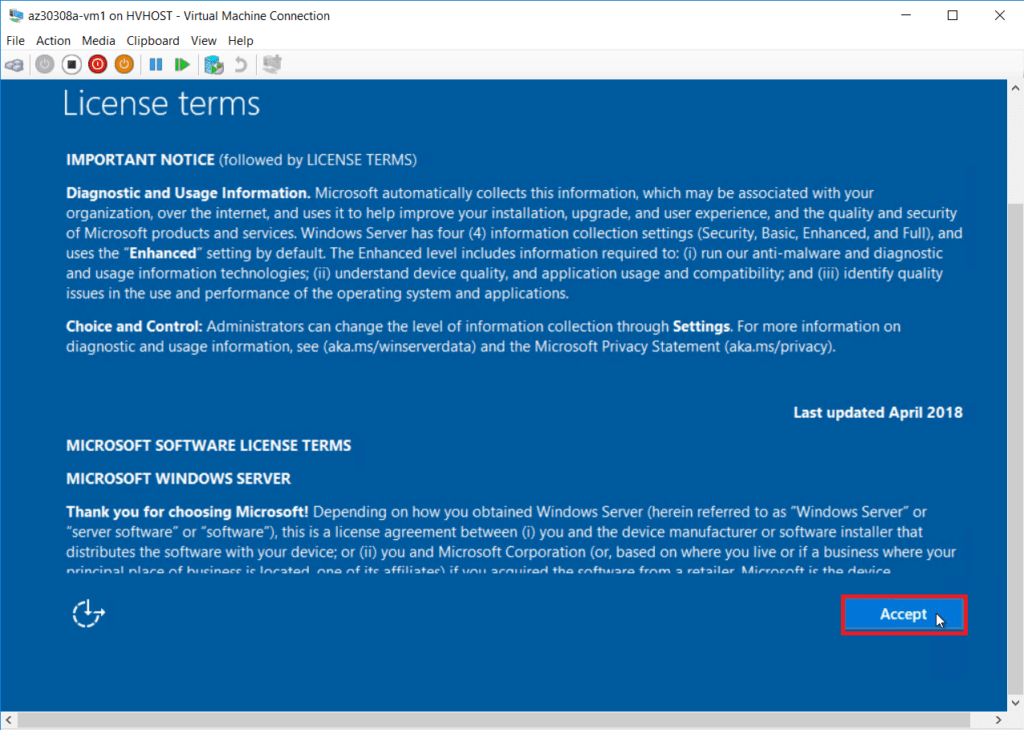
20. Please wait for it to finish. Once you power on the new Azure Migrate appliance, the first screen will show the license terms, and click “Accept” to the next screen.
21. Enter a password and hit Finish.
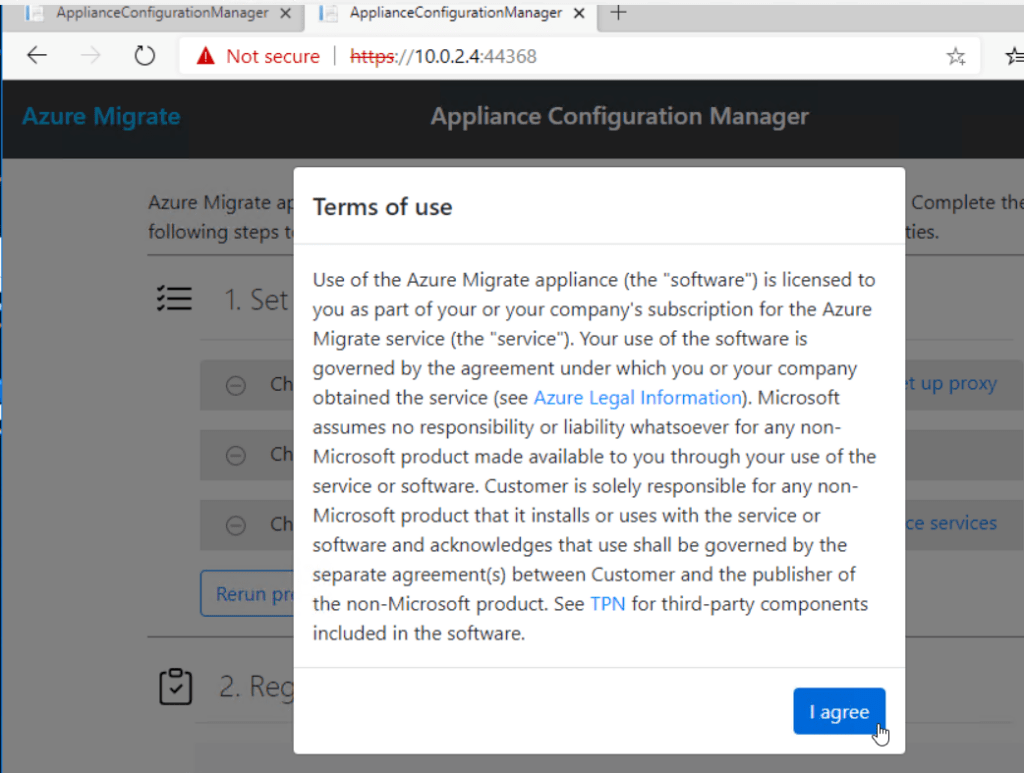
 22. Click on Microsoft Edge, and it will open the Appliance Configuration Manager. You can access the application by https://appliance name or IP address: 44368.
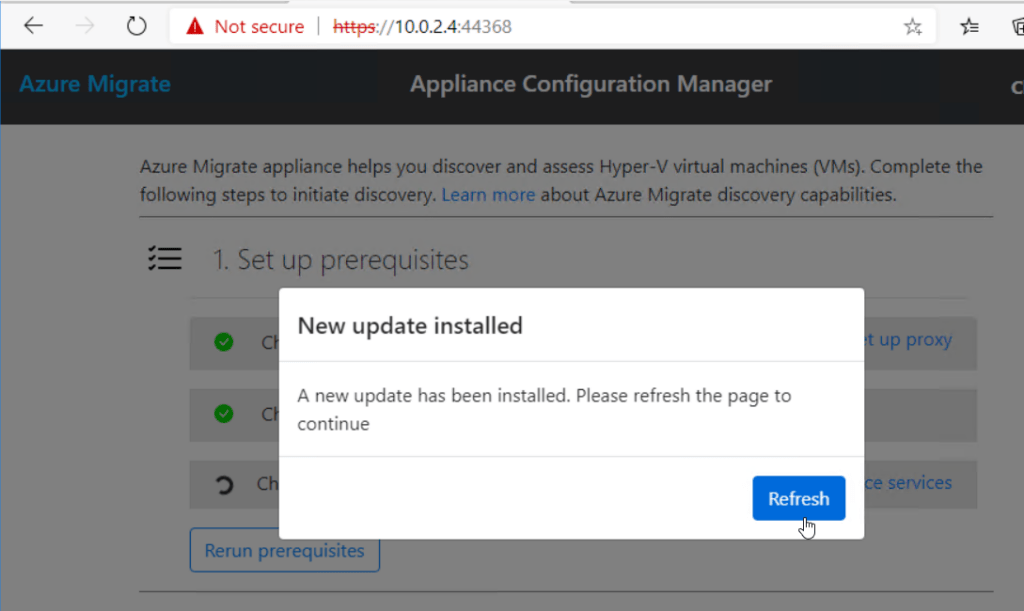
 23. Click Run prerequisites.
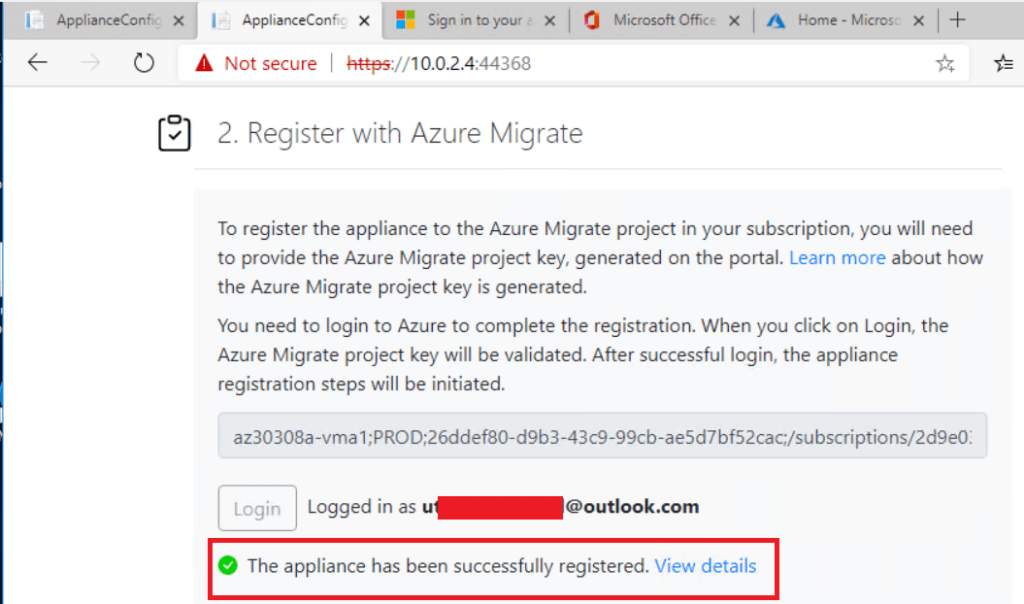
24. Then paste the Azure Migrate project key, which you saved before, here. Click Login and wait for it to register successfully.
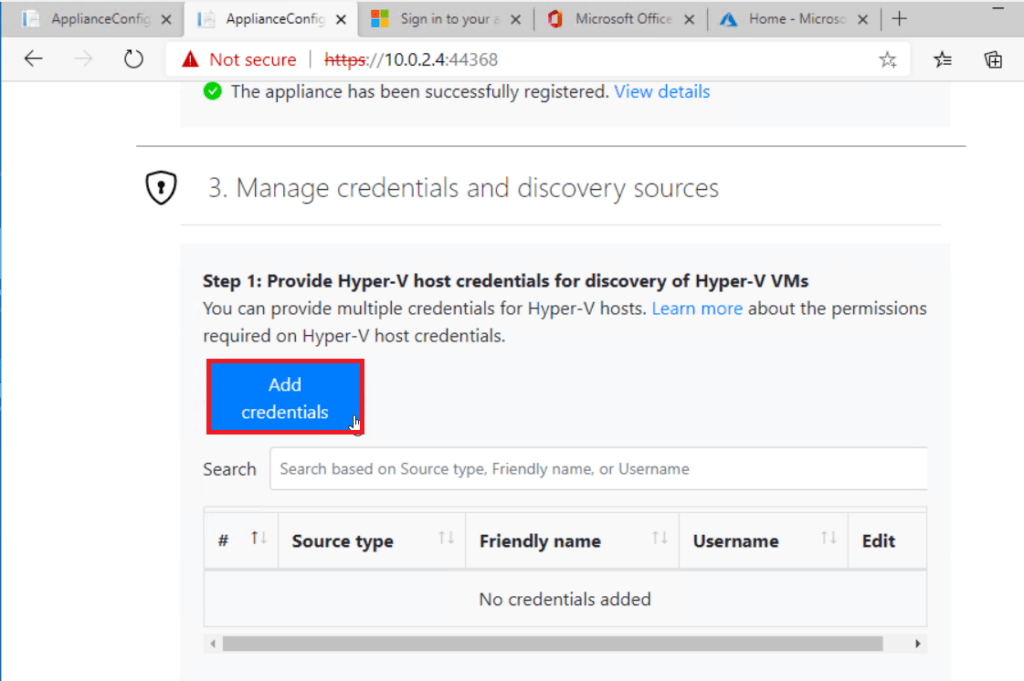
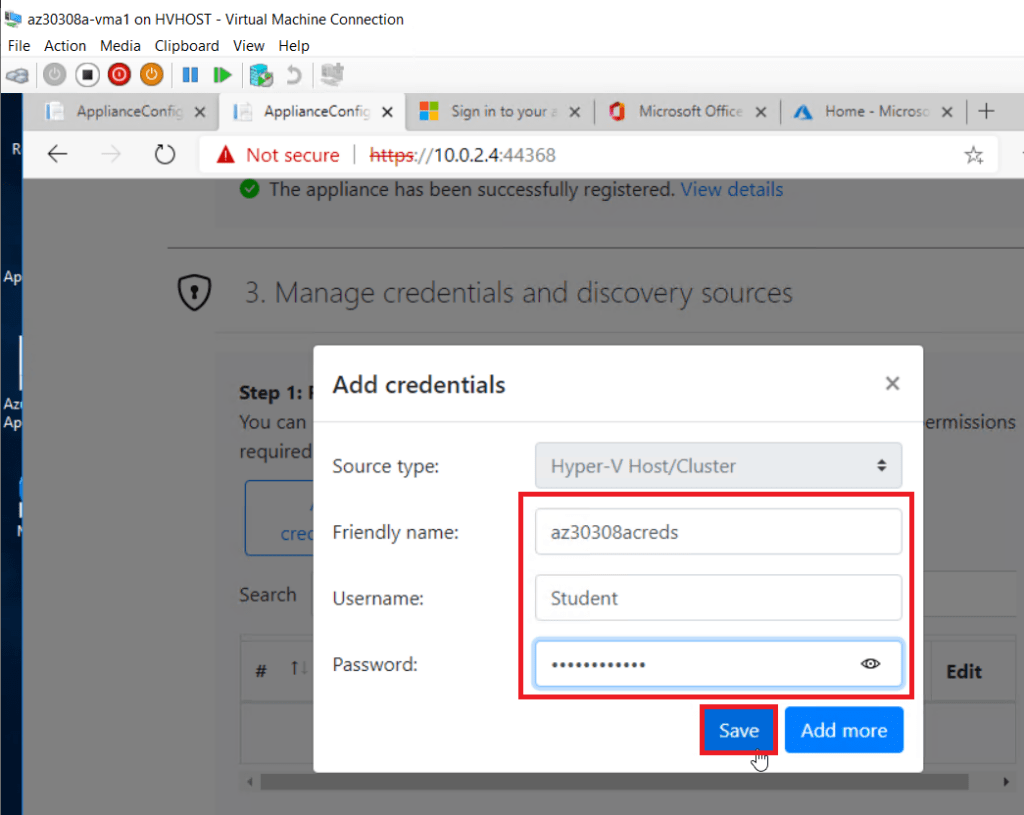
25. Click Add credentials and provide Hyper-V host credentials.
26. After Pasting Hyper-V host credentials click on save.
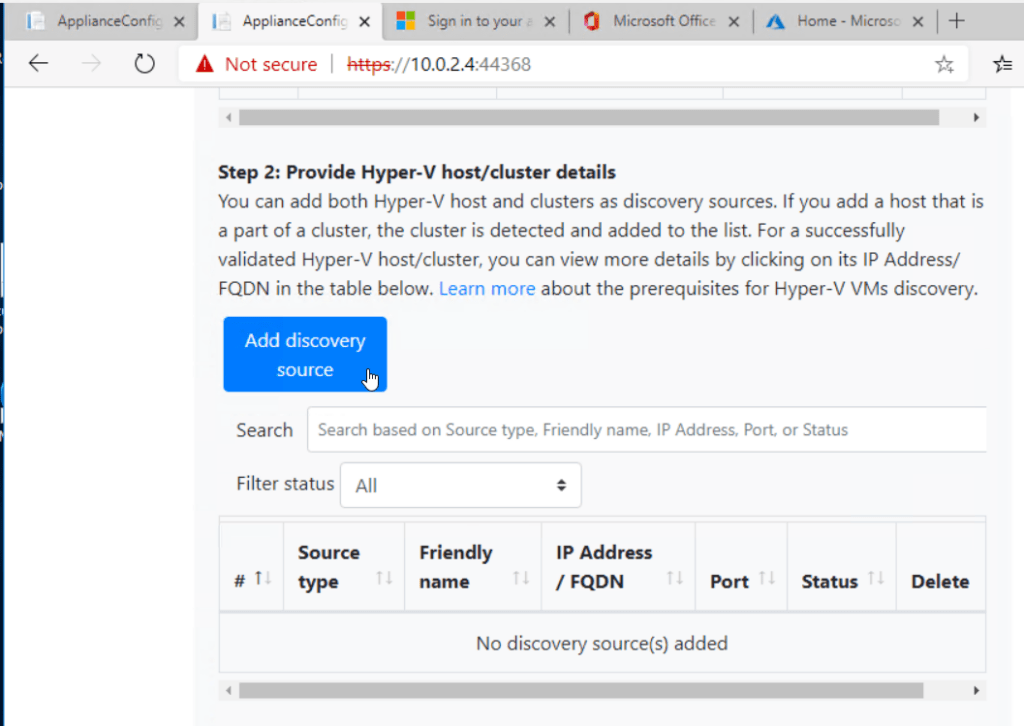
27. Then click on Add discover source and configure it.
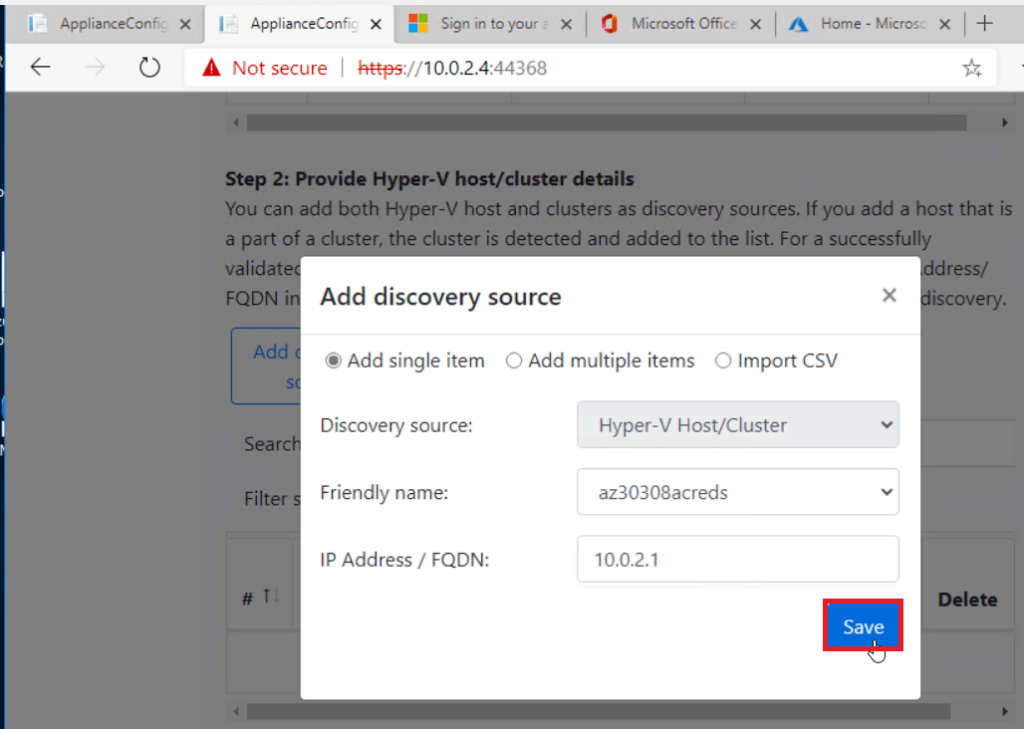
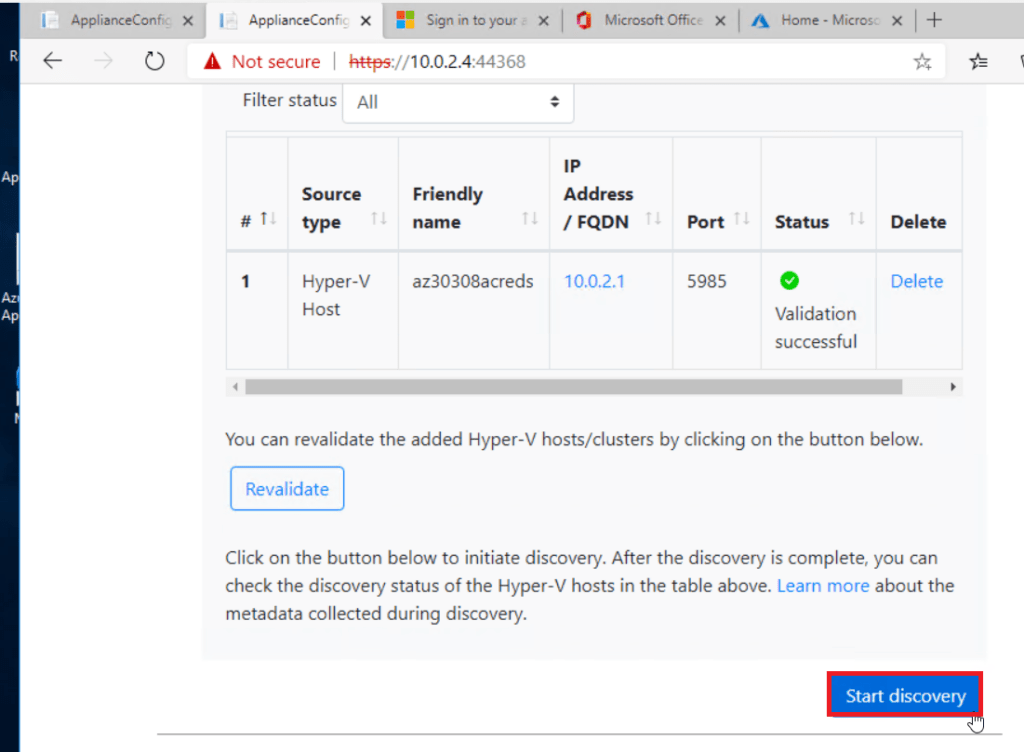
28. Add Discovery source info.
29. Finally, hit the Validate button and wait for Validation Successful status. Finally, click Start Discovery
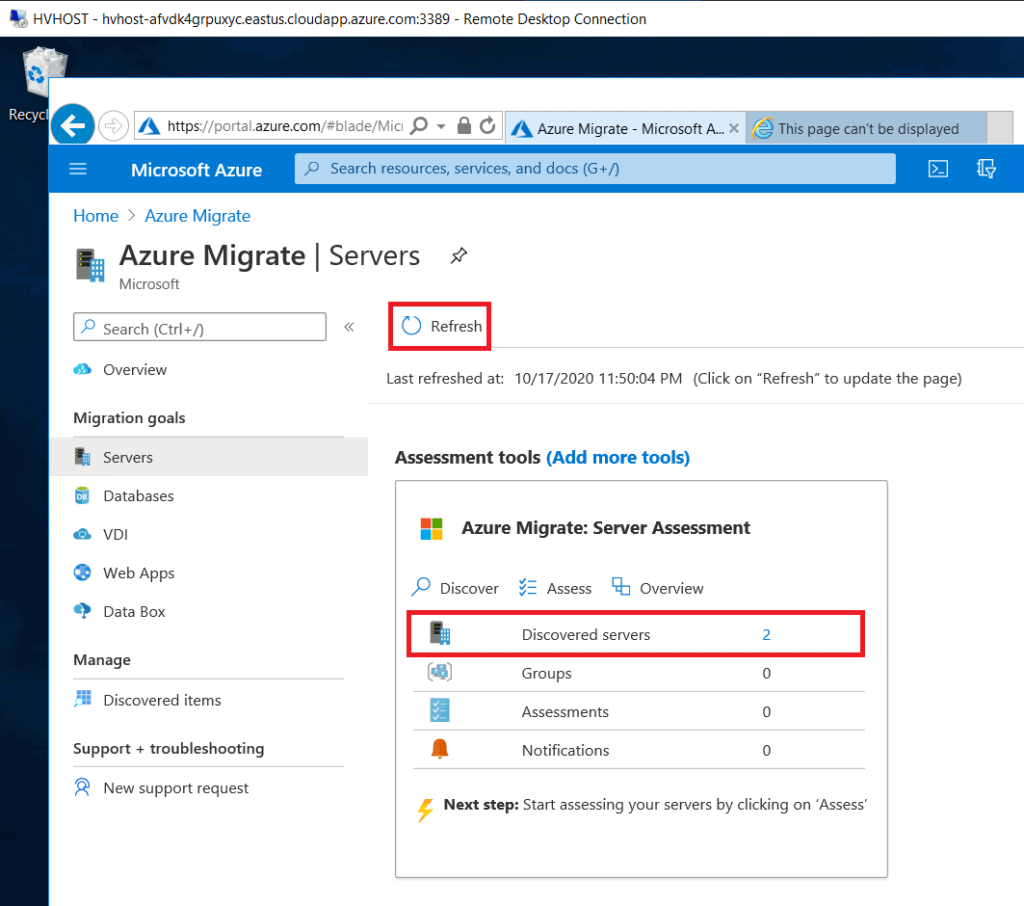
 30. Wait for a few mins and go back to the Azure portal, and refresh. In the Servers blade, you’ll see all the discovered virtual machines.
Congrats! Your Azure Migrate Server setup is complete!
Frequently Asked Questions
Q1. How is the data transmitted from the on-prem environment to Azure? Is it encrypted before transmission?
Ans. The Azure Migrate appliance in the agentless replication case compresses data and encrypts it before uploading. Data is transmitted over a secure communication channel over HTTPS and uses TLS 1.2 or later. Additionally, Azure Storage automatically encrypts your data when it is persisted to the cloud (encryption-at-rest).
Q2. How do I know if my VM was successfully migrated?
Ans. Once you have migrated your VM/server successfully, you can view and manage the VM from the Virtual Machines page. Connect to the migrated VM to validate. Alternatively, you can review the ‘Job status’ for the operation to check if the migration was successfully completed. If you see any errors, resolve them, and retry the migration operation.
References/Related
- Azure Migrate And Cloud Migration Strategy
- AZ 305: Microsoft Azure Solutions Architect Expert: Step By Step Activity Guides (Hands-On Labs)
- Core Cloud Service: Azure Compute Options
- Exam AZ-305: Azure Solutions Architect Expert Certification
Next Task For You
Begin your journey toward Mastering Azure Cloud and landing high-paying jobs. Just click on the register now button on the below image to register for a Free Class on Mastering Azure Cloud: How to Build In-Demand Skills and Land High-Paying Jobs. This class will help you understand better, so you can choose the right career path and get a higher paying job.

![Microsoft Agentic AI Business Solutions Architect [AB-100] | K21 Academy](https://test.k21academy.com/wp-content/uploads/2025/11/Microsoft-Agentic-AI-Business-Solutions-Architect-AB-100-Exam-Overview1.png)


