


![]()
Terraform is an infrastructure as code (IAC) tool that enables us to define and manage infrastructure resources in a declarative way, making it easier to automate the provisioning, deployment, and management of our cloud resources. With Terraform, we can easily and consistently create and manage our Azure infrastructure resources, such as resource groups, VMs, and among others.
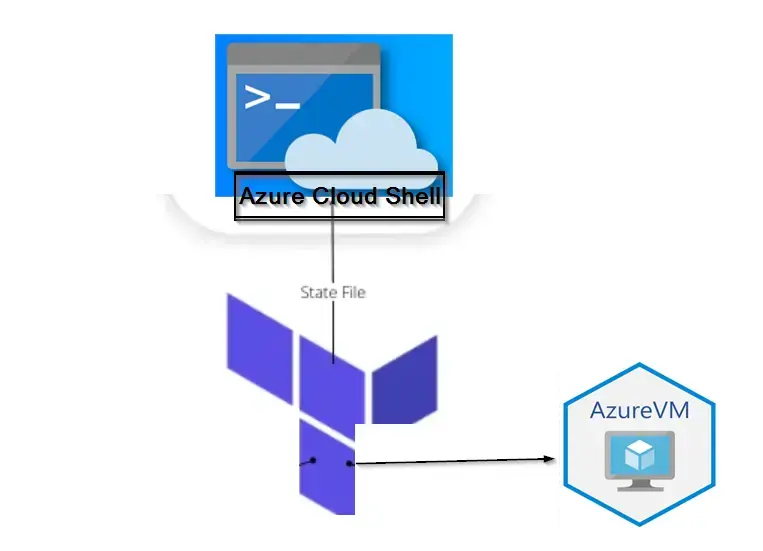
Virtual Machine (VM) provisioning on Azure can be a seamless process when leveraging Terraform, an Infrastructure as Code (IaC) tool. This article guides you through the quick and efficient steps to create a VM on Azure using Terraform.
STEP 1: ACCESS AZURE CLOUD SHELL
Sign in to Azure Portal:
Open a web browser and navigate to the Azure Portal. Sign in with your Azure account.
Access Cloud Shell:
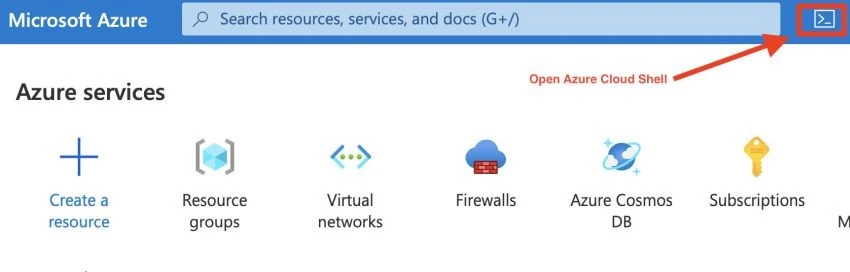
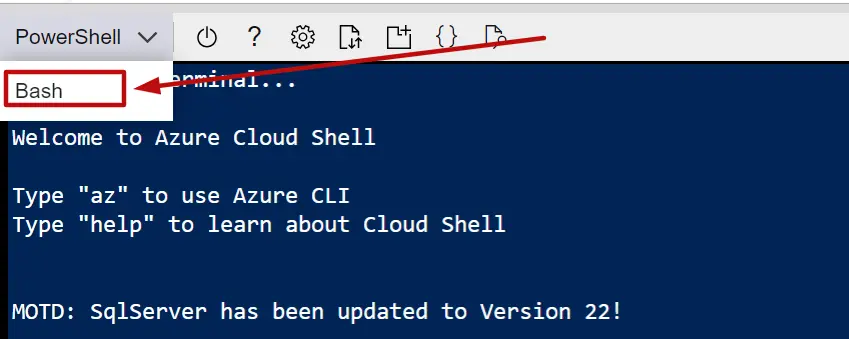
Once you’re in the portal, click on the “Cloud Shell” icon in the top-right corner (it looks like a greater-than symbol >).
Cloud Shell Icon & Choose Shell Type:
If prompted, select either Bash or PowerShell as your preferred shell. For this guide, we’ll use Bash.
STEP 2: CREATE A TERRAFORM CONFIGURATION FILE
Create a new Terraform configuration file:
In the Cloud Shell, run the following command to create a new file named main.tf:
touch main.tf
 Open the file for editing:
Run the following command to open the file in the built-in editor:
vi main.tf

Add Terraform Configuration:
Add the following basic Terraform configuration to main.tf.
Note 1: You can find the complete configuration file from this GitHub URL to avoid indentation:
https://github.com/k21academyuk/terraform/blob/main/Create%20a%20Vm%20on%20Azure%20Cloud%20Shell
provider "azurerm" {
  features {}
}

resource "azurerm_resource_group" "example" {
  name     = "K21-ResourceGroup"
  location = "East US"
}

resource "azurerm_virtual_network" "example" {
  name                = "K21-VNET"
  address_space       = ["10.0.0.0/16"]
  location            = azurerm_resource_group.example.location
  resource_group_name = azurerm_resource_group.example.name
}

resource "azurerm_subnet" "example" {
  name                 = "K21-Subnet"
  resource_group_name  = azurerm_resource_group.example.name
  virtual_network_name = azurerm_virtual_network.example.name
  address_prefixes    = ["10.0.1.0/24"]
}

resource "azurerm_network_interface" "example" {
  name                = "K21-NIC"
  location            = azurerm_resource_group.example.location
  resource_group_name = azurerm_resource_group.example.name

  ip_configuration {
    name                          = "internal"
    subnet_id                     = azurerm_subnet.example.id
    private_ip_address_allocation = "Dynamic"
  }
}

resource "azurerm_virtual_machine" "example" {
  name                  = "K21-VM"
  location              = azurerm_resource_group.example.location
  resource_group_name   = azurerm_resource_group.example.name
  network_interface_ids = [azurerm_network_interface.example.id]
  vm_size               = "Standard_DS1_v2"

  storage_image_reference {
    publisher = "Canonical"
    offer     = "UbuntuServer"
    sku       = "16.04-LTS"
    version   = "latest"
  }

  storage_os_disk {
    name              = "exampleOSDisk"
    caching           = "ReadWrite"
    create_option     = "FromImage"
    managed_disk_type = "Standard_LRS"
  }

  os_profile {
    computer_name  = "hostname"
    admin_username = "adminuser"
    admin_password = "Password1234!"
  }

  os_profile_linux_config {
    disable_password_authentication = false
  }
}
Save the file and close the editor.
STEP 3: INITIALIZE AND APPLY TERRAFORM CONFIGURATION
Understanding the Purpose of the terraform init Command
The terraform init command is a crucial first step when working with Terraform. It sets up the necessary environment to ensure that your configuration files can interact with the cloud resources you intend to manage. Here’s what it accomplishes:
- Initializes the Working Directory: This command prepares your project directory by setting up necessary state files and folders, which are crucial for tracking the current state of your infrastructure.
- Downloads Provider Plugins: Terraform uses provider plugins to interact with various cloud and on-premise platforms like AWS, Azure, and Google Cloud. The
terraform initcommand downloads these plugins, ensuring your environment can communicate with the platforms specified in your configuration. - Validates the Configuration: While it’s not a strict validation of your entire setup,
terraform initchecks the initial structure of your configuration to ensure there are no glaring issues before proceeding with further actions. - Sets Up Backend Configuration: If you’re using a remote backend to store your Terraform state (as opposed to local storage), this command configures the backend. Correct state management is fundamental for a seamless Terraform operation.
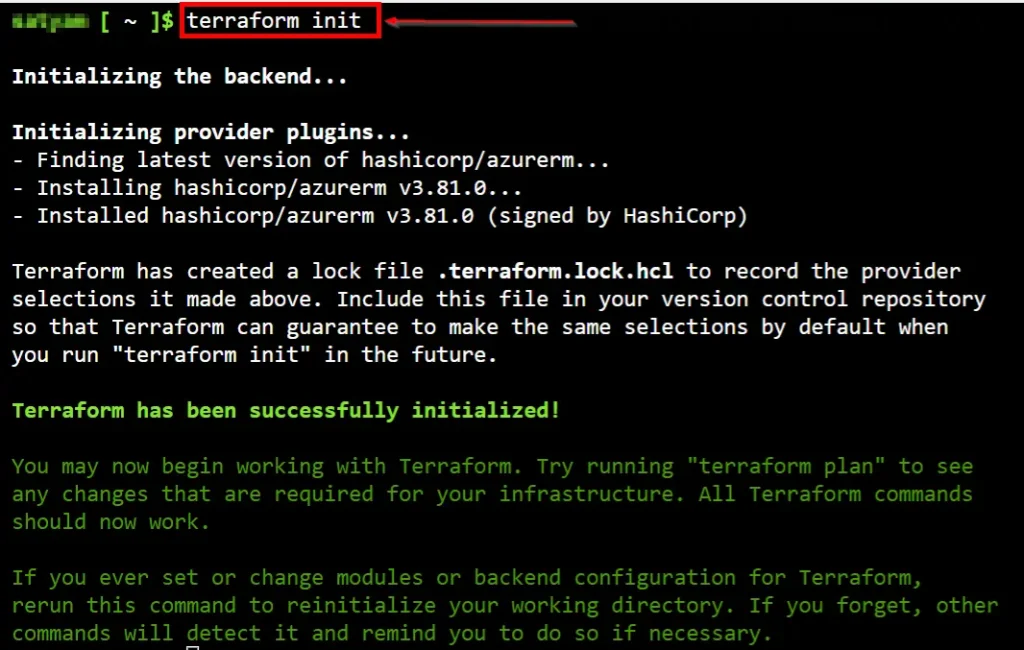
By running terraform init, you lay a solid foundation for subsequent Terraform commands, like apply and plan, ensuring that your infrastructure initiation and modifications proceed smoothly.
terraform init
Review Changes:
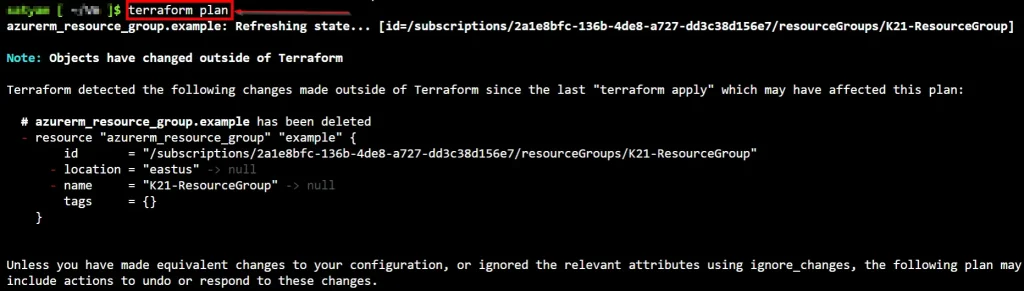
Run the following command to see what changes Terraform will make:
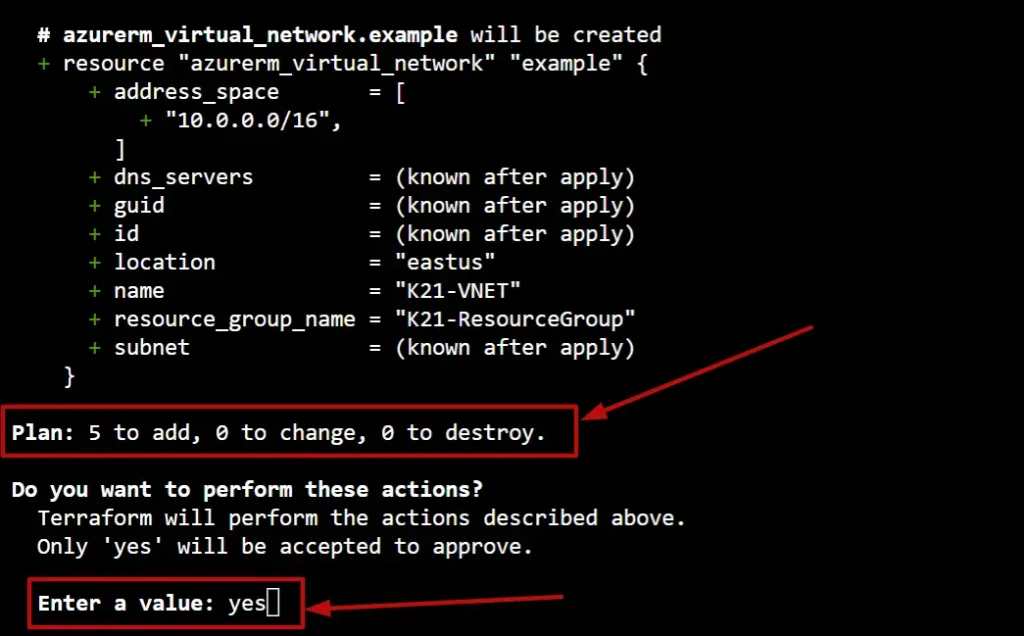
terraform plan
Apply Changes:
If the plan looks good, apply the changes:
terraform apply
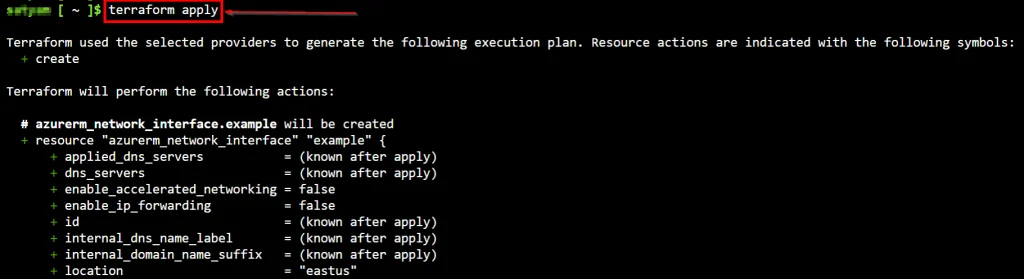
Type “yes” when prompted to confirm the changes.
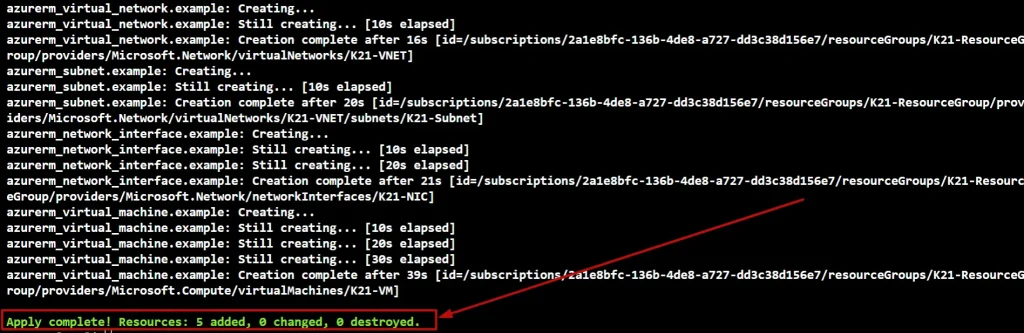
ACCESS THE VIRTUAL MACHINE
Once the Terraform apply is complete, you can access your VM using SSH (replace <your-vm-name> with the actual VM name):
ssh azureuser@<your-vm-name>.<location>.cloudapp.azure.com
Replace <location> with the location you specified in the Terraform configuration.
Or
Go to the Azure Cloud management console in the Virtual Machine Dashboard. You can see the running VM here.
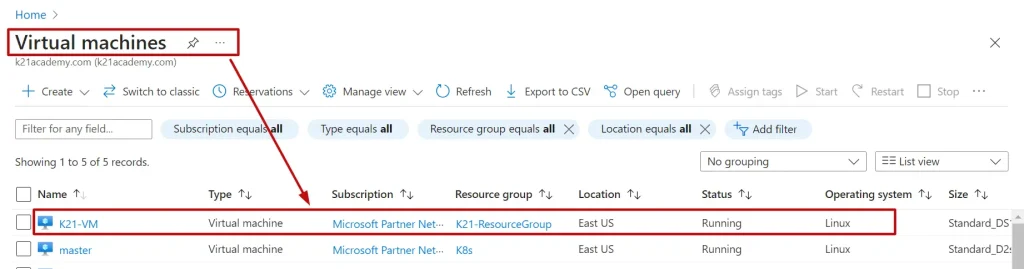
That’s it! You’ve successfully created a Virtual Machine on Azure using Terraform in Cloud Shell.
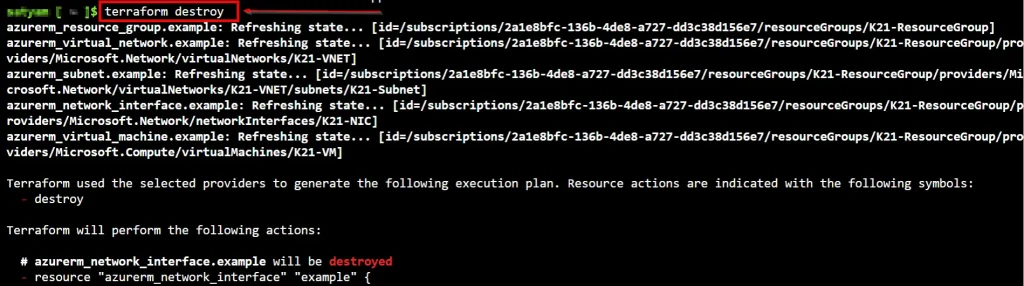
CLEANUP RESOURCES
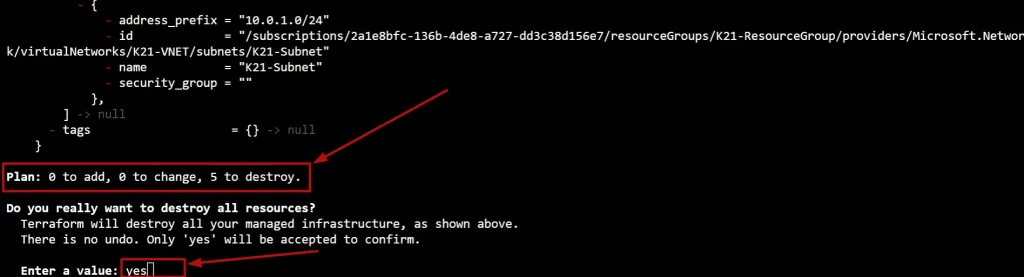
Now run the terraform destroy command, and type yes when asked for confirmation to destroy resources.
terraform destroy
OR
terraform destroy --auto-approve
 Verify the VM has been terminated
- Go to the Azure Management Console and navigate to the Virtual Machines Dashboard
- Verify that the VM you created using Terraform has been terminated and is no longer running.
By following these steps, you can safely delete the VM you created using Terraform and clean up any remaining resources that are no longer needed.
Conclusion
In conclusion, creating a VM on Azure using Terraform offers a streamlined approach to infrastructure provisioning. The synergy between Terraform’s IaC capabilities and Azure’s robust cloud environment provides a powerful solution for managing VMs. Embrace the best practices, troubleshoot effectively, and stay updated on industry trends to optimize your Terraform-Azure deployments.
Frequently Asked Questions (FAQs)
Can I use Terraform with other cloud providers besides Azure?
Yes, Terraform is cloud-agnostic and supports multiple cloud providers, including AWS, Google Cloud, and more.
How does Terraform contribute to Azure DevOps practices?
Terraform integrates seamlessly with Azure DevOps, allowing for continuous integration and deployment pipelines.
What are the advantages of using Terraform for VM provisioning?
Terraform provides a declarative syntax, version control, and automation, ensuring consistent and reliable VM provisioning.
Is Terraform suitable for complex, multi-tiered Azure architectures?
Yes, Terraform excels in handling complex infrastructures, allowing for the definition of intricate architectures as code.
Are there any limitations or drawbacks when using Terraform on Azure?
While powerful, Terraform may have a learning curve, and occasional updates in Azure services may require adjustments in configurations.
Related/References
- Terraform Installation Overview
- HashiCorp Infrastructure Automation Certification: Terraform Associate
- Resource Manager In Oracle Cloud Infrastructure
- HashiCorp Certified Terraform Associate
- How to Provision AWS Infrastructure with Terraform?
- Terraform Cheat Sheet
- Why Choose Terraform Over Chef, Ansible, Puppet or CloudFormation?
Join FREE Class
🚀 Master Terraform & DevOps to get High-Paying Jobs! 🔥 Join our EXCLUSIVE Free class! 🚀
Get your hands dirty with lots of projects and labs based on Terraform and DevOps in our Program.Click on the below image to Register for Our FREE Class Now!

![Microsoft Agentic AI Business Solutions Architect [AB-100] | K21 Academy](https://test.k21academy.com/wp-content/uploads/2025/11/Microsoft-Agentic-AI-Business-Solutions-Architect-AB-100-Exam-Overview1.png)